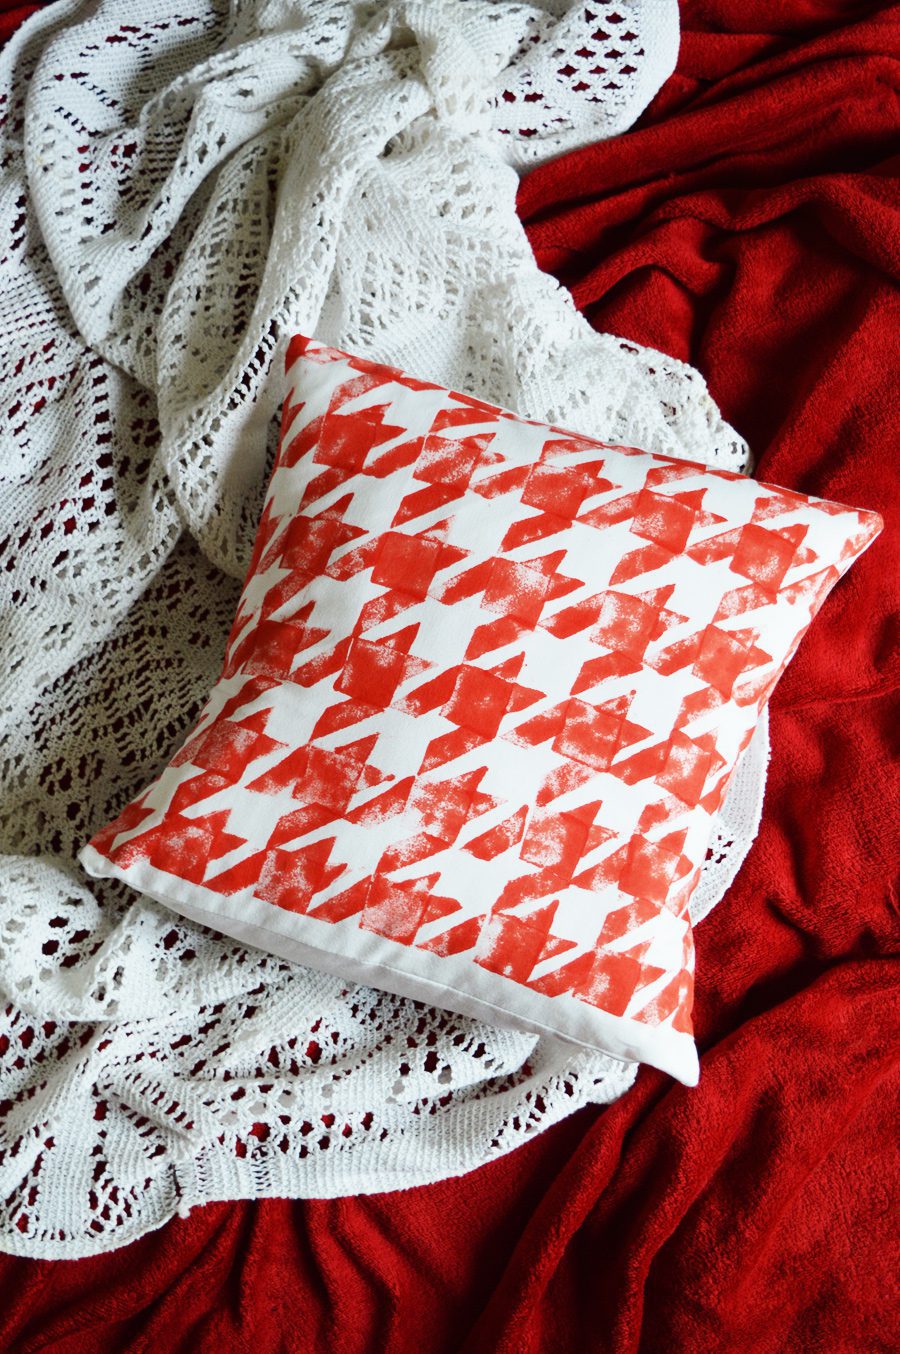
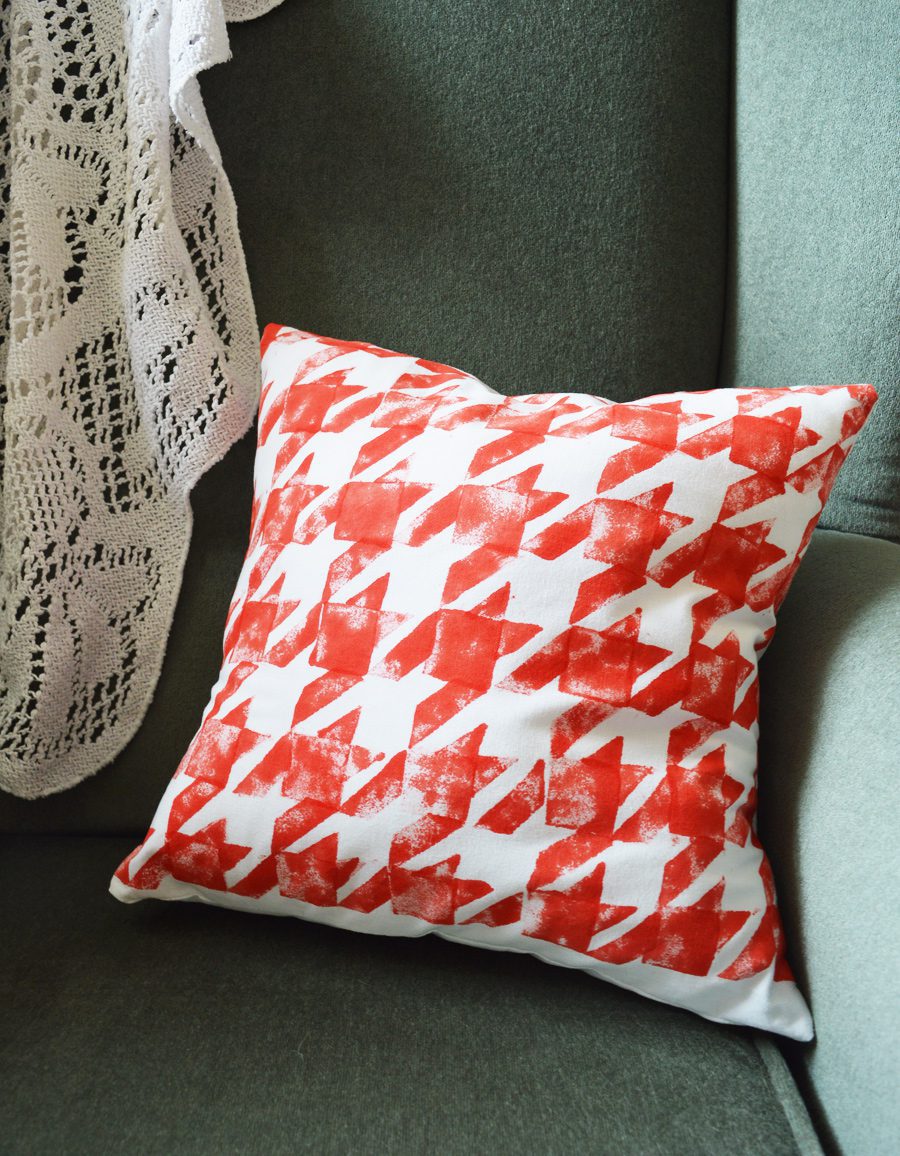
DIY Houndstooth Patterned Cushion Cover
Disclosure: This post is in collaboration with Keepmoat
I’m obsessed with houndstooth. As a pattern it’s smart and sophisticated. In a word, timeless.
I love the way it looks with a bit of handmade flair!
Learn to stamp the houndstooth pattern and use the printed fabric to sew a simple cushion cover. After the tut I’m sharing some of my tips for making DIY decor without losing your sanity. (It’s easy to go overboard!)
What you’ll need
Be prepared to get a little messy! I covered my workspace with newspaper and paper towels. The fabric paint will soak through the layer of fabric you’re stamping!
- Foam (or linoleum) to create stamps
- Sharp scissors
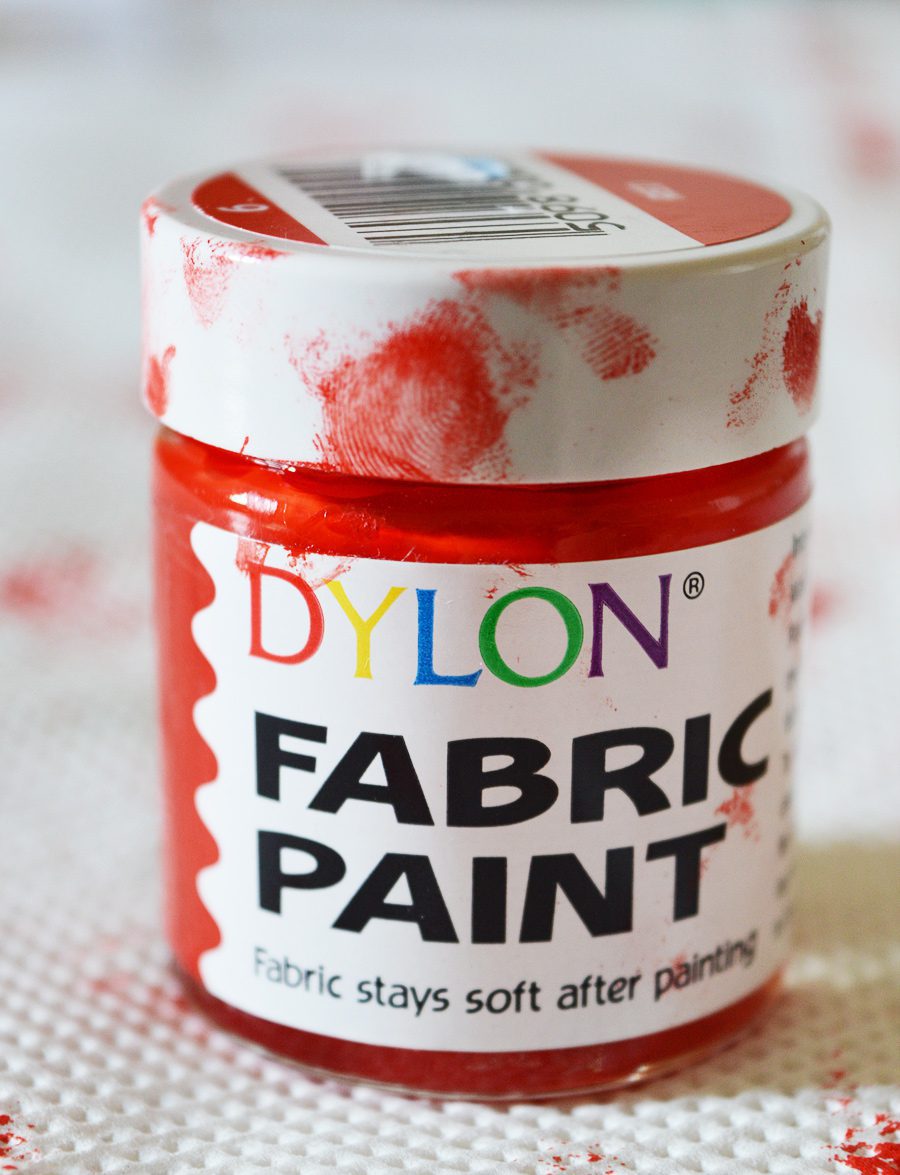
- Choice of fabric paint (I’m using Dylon as shown)
How to DIY the houndstooth pattern
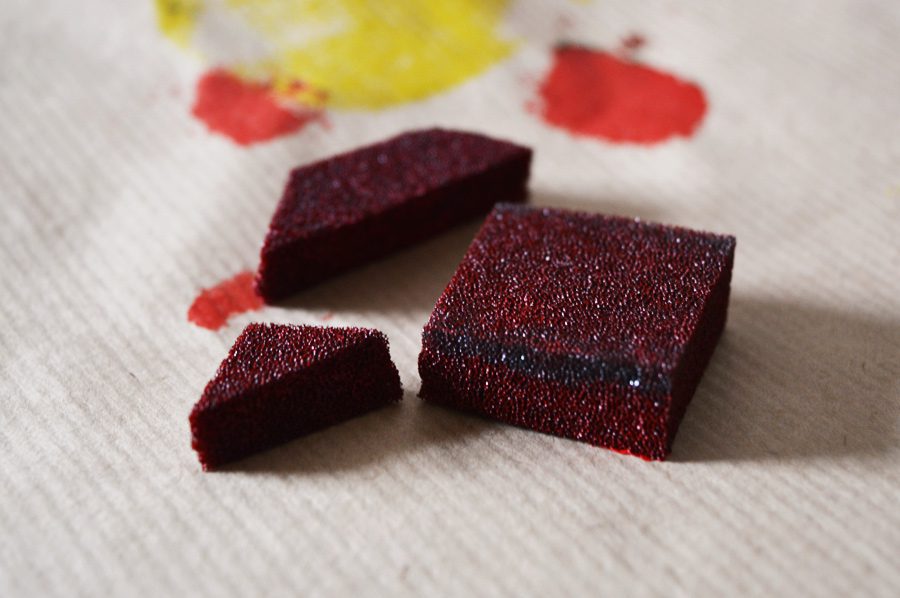
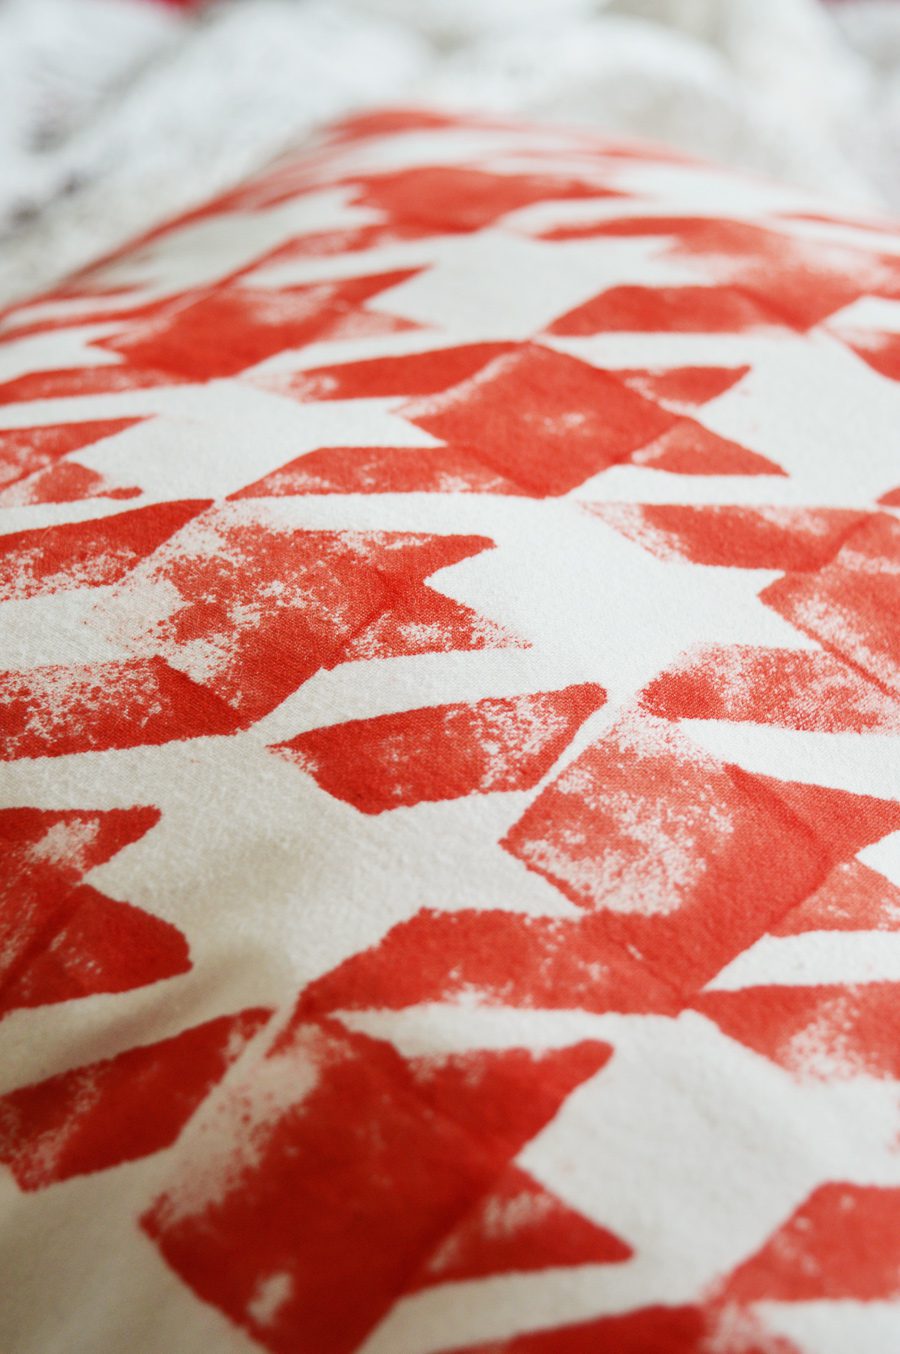
Cut two squares from the foam to make your stamps. Cut one of the squares in half diagonally. Trim off the corner off a half. The square, corner, and trapezoid are all you need to make houndstooth!
For a crisp print, use linoleum to create your stamp. I love the distressed look foam stamps create and that was the look I wanted.
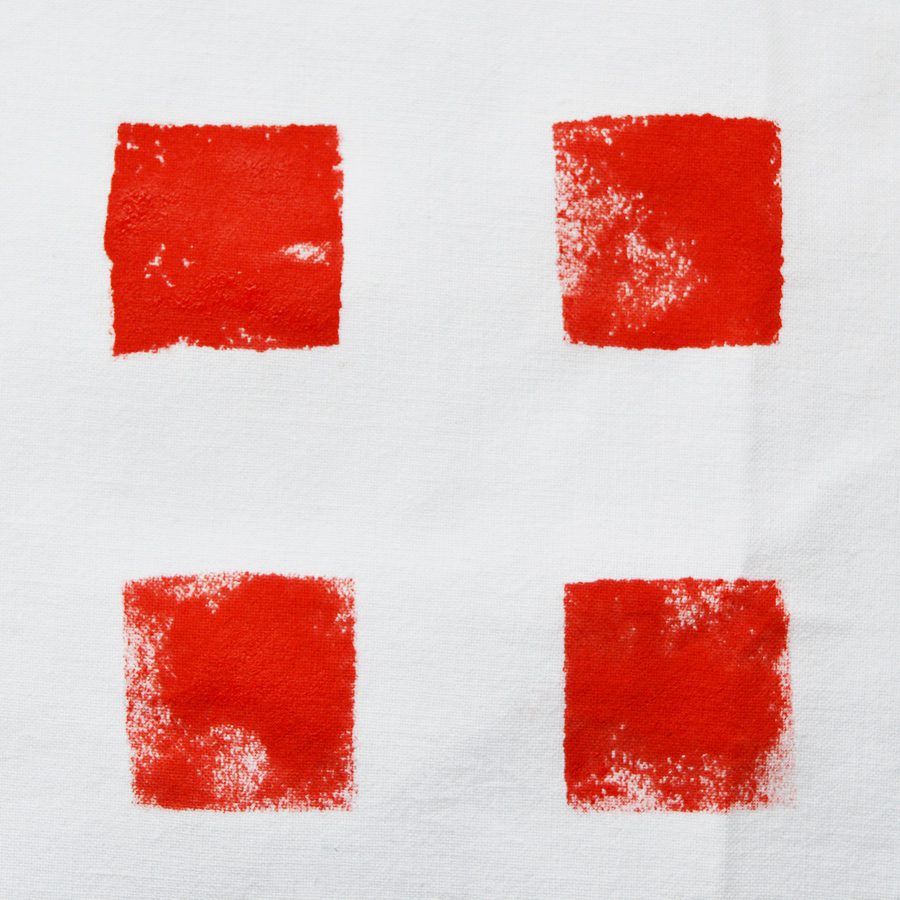
Start with the blocks of colour. They are all one square apart.
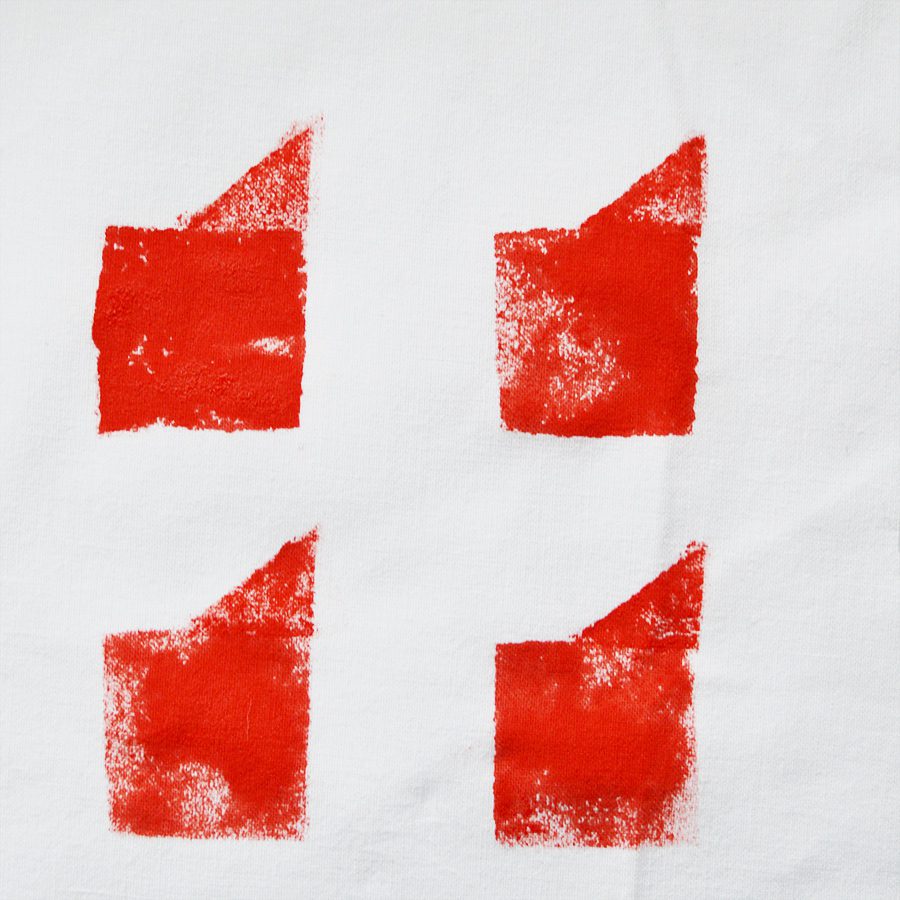
Make a tooth with the triangle on the top right of every square.

Turn the triangle around and make another tooth on the upper right edge of each square.

Use the trapezoid short end down to fill the spaces as shown.

Finish the pattern with the trapezoid short-end up.
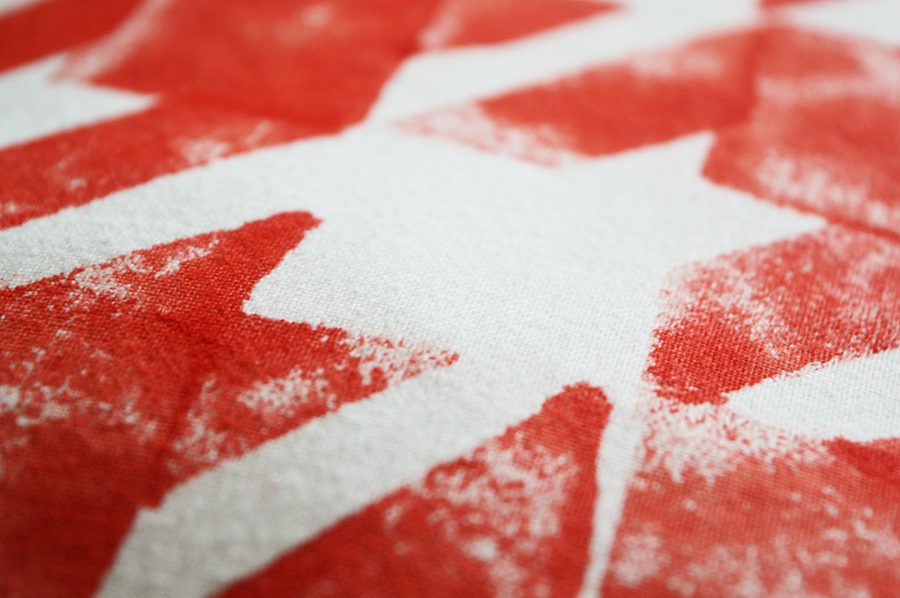
The whitespace is just as important for making this pattern!
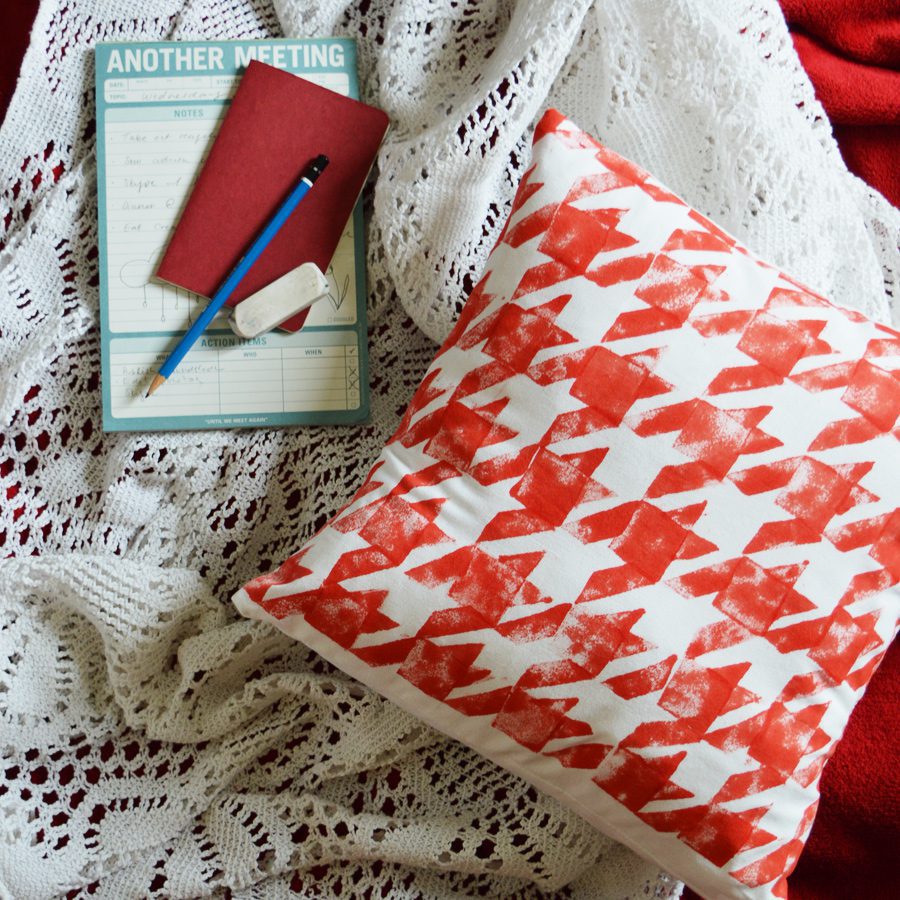
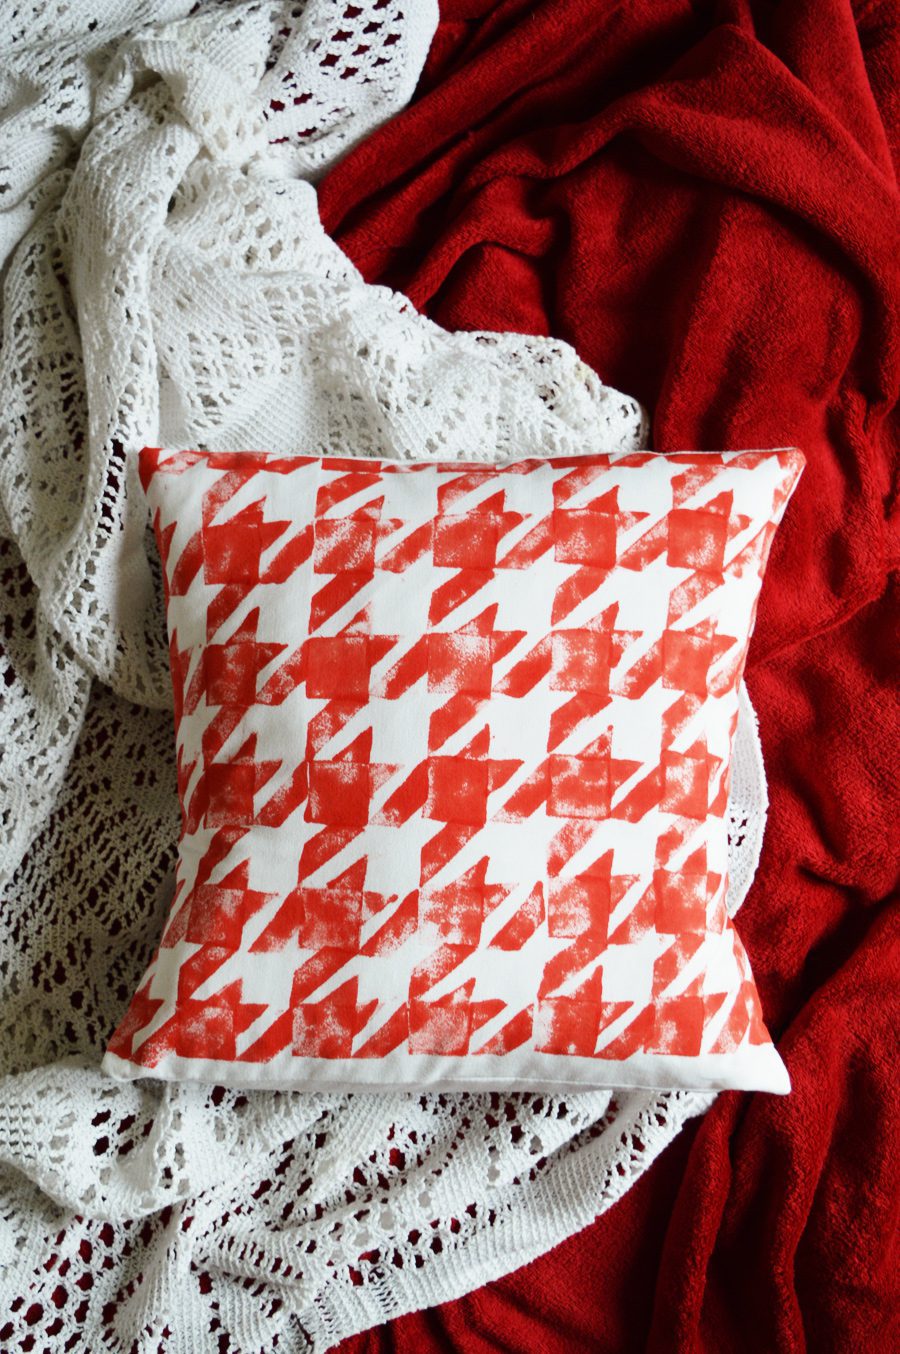
The Easiest DIY Cushion Cover
Someone once told me that the secret to plump cushions is to use a cover 1-2″ too small for the insert. It works! The easiest cushion cover to make is the envelope style.
First, measure your insert (mine is 16″) and use that to measure your cushion front before stamping it with houndstooth. I stamped a 15″ x 15″ square of fabric. (Remember to include seam allowance!)
Follow the directions of your fabric paint before sewing. I let my stamped fabric dry overnight and ironed it on high to set the colour.
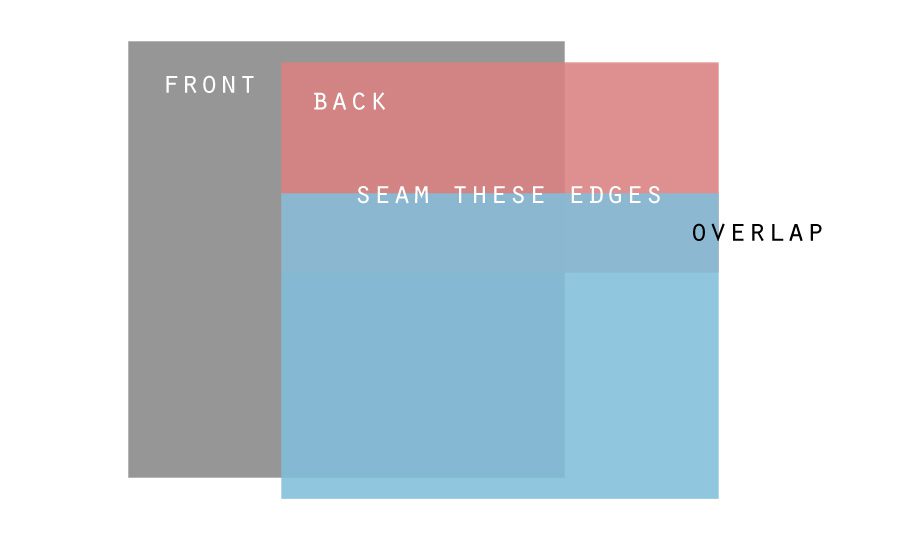
To create the back of the cushion, cut two pieces the same width of the cushion and shorter height. These two pieces need to overlap and will be the opening on the back for your insert. E.g., my cushion front was one 15″ x 15″ piece, the back was one 15″ x 8″ and one 15″ x 10″. (Remember seam allowance!)
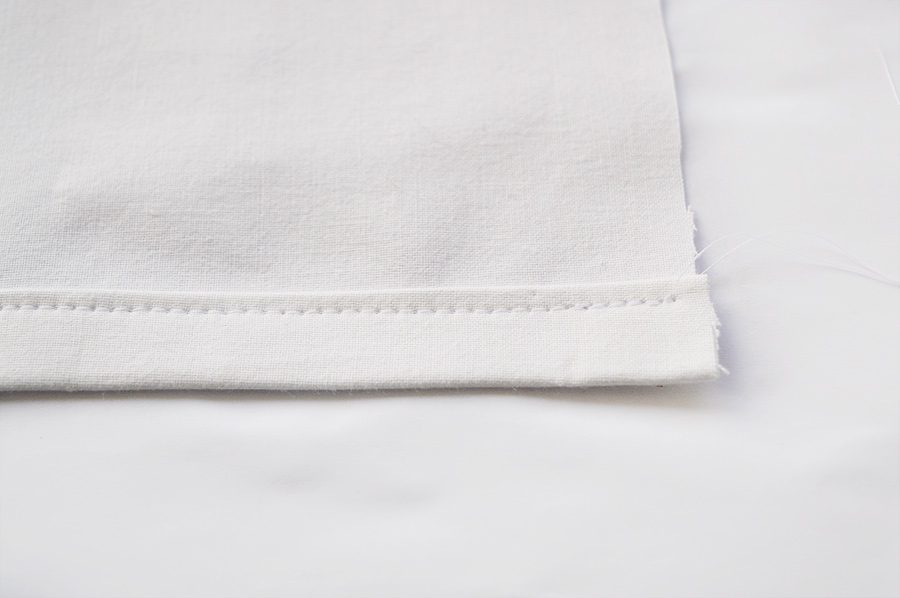
Sew one edge (width-wise) of both back pieces. For a decorative back you could use bias binding. I simply folded the edge over twice and pinned it in place to sew.
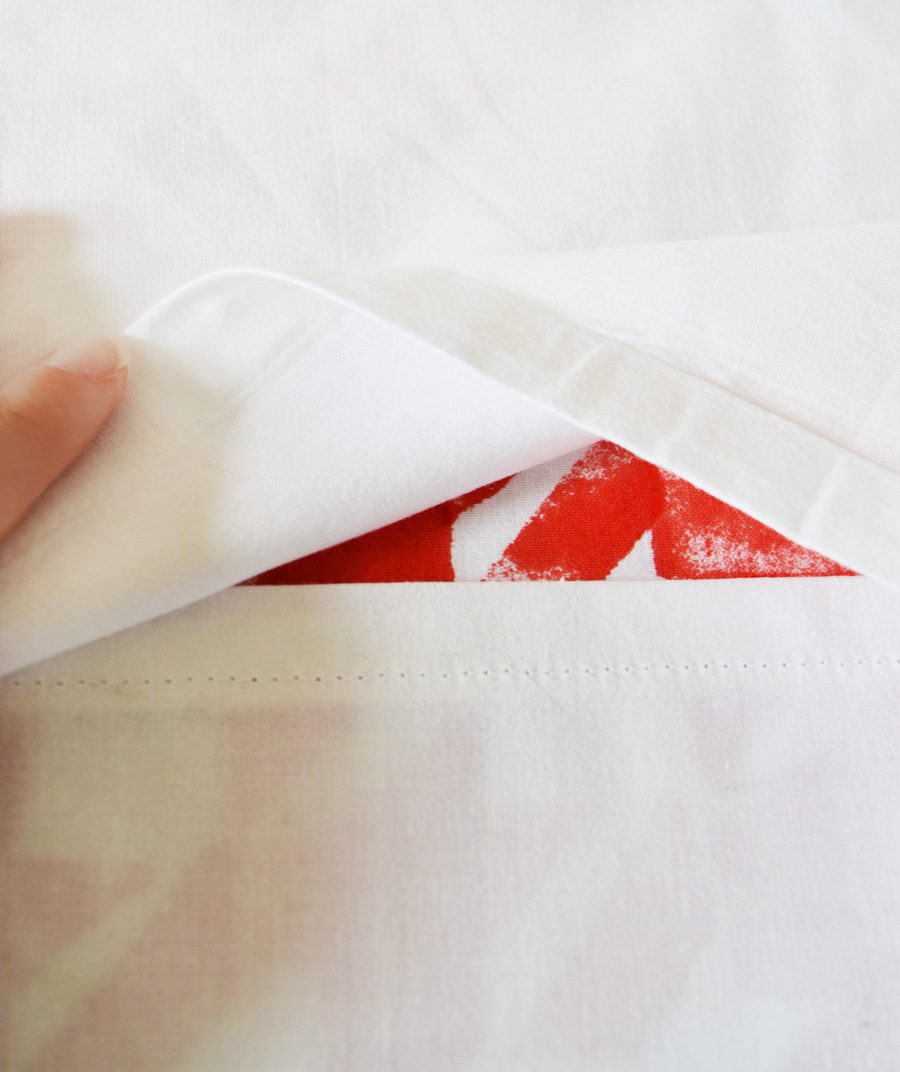
Pin all the layers in place, right-sides together.
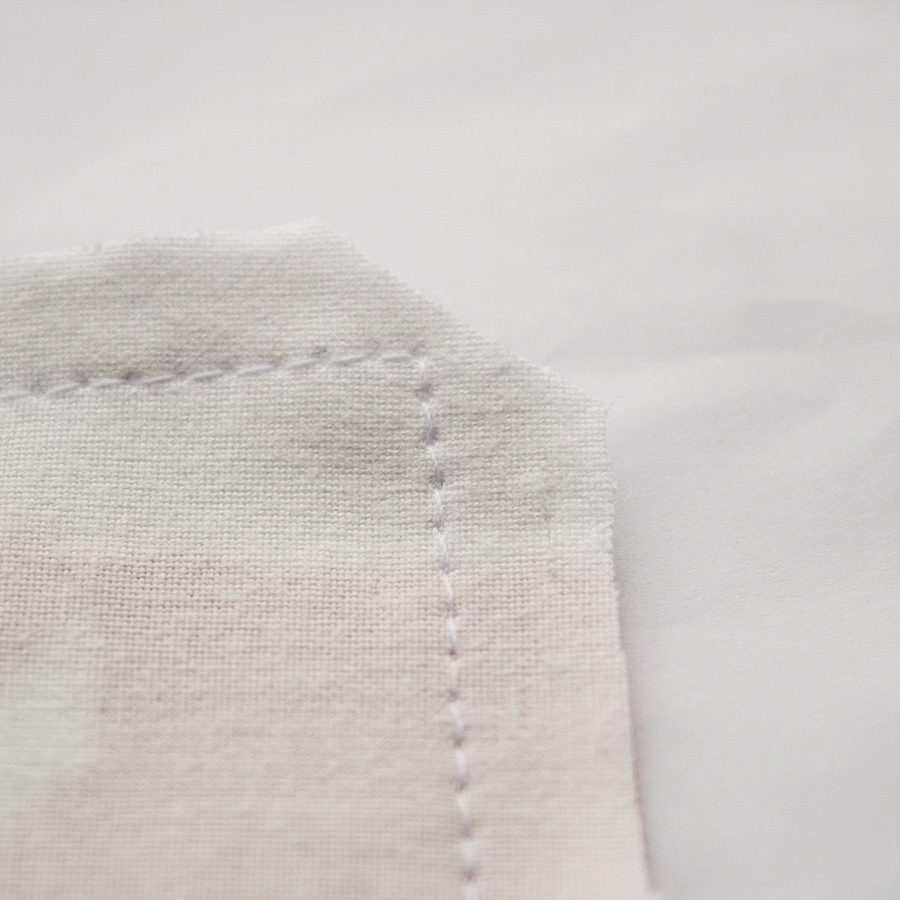
Sew one continuous straight seam, pivoting on the needle at each corner. Trim the corners, iron, and turn right side out through the envelope opening.
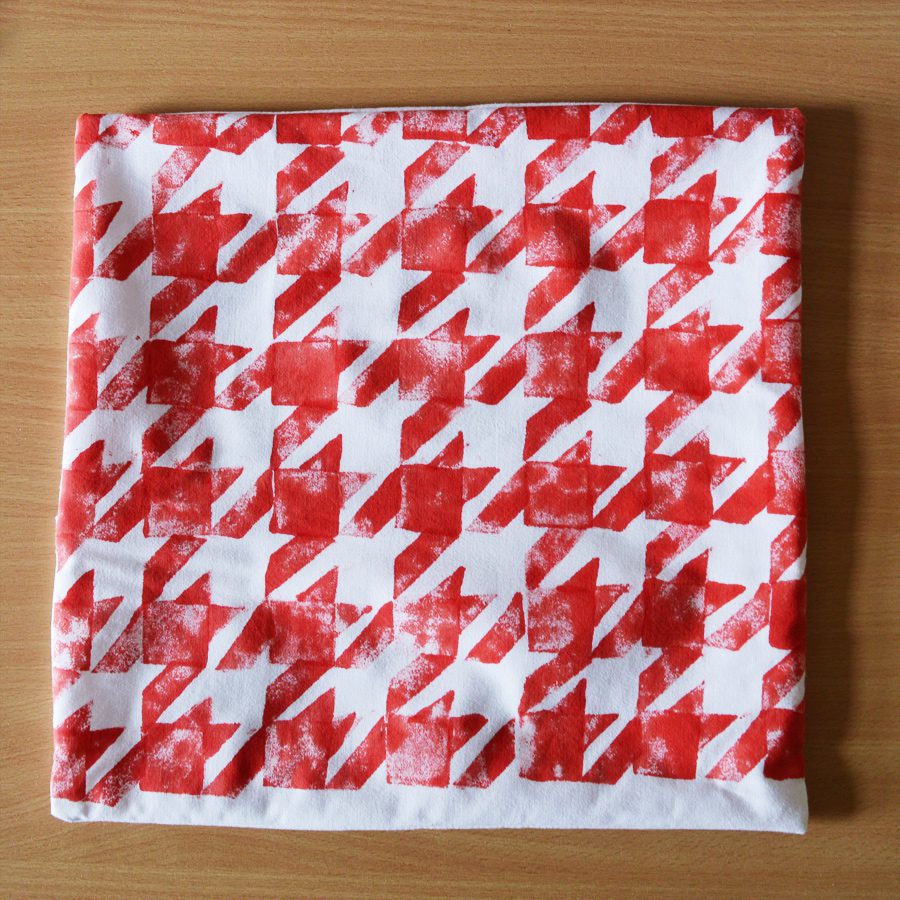
And you’re done! Fill, style, and admire.
Secrets to having a DIY home (without going crazy)
It doesn’t HAVE to be handmade every time
DIY isn’t always the best option. In other words, just because you can doesn’t mean you should. Make something that is worth your time and materials. If making the project would be a chore, buy it instead. Even if it’s technically cheaper to buy materials and make it yourself, a project is going to sit half-finished for months if you don’t enjoy working on it.
Confession: I love knitting, yet I’ve never even tried to knit a sweater!
Invest in the right things
Before buying materials, ask yourself a few things:
- How often will I use this?
- How long will I need it?
- How will I clean it?
- What is it being used for?
Sometimes the thrifty option is actually the expensive, wasted-time-and-effort option. Use materials that suit the purpose. Always use the best tools you can afford. Don’t compare how much the materials cost to buying something from a bargain brand. Compare your DIY costs to brands like John Lewis or Garden Trading. Not Wilko.
Investing in a workshop or class can help make your future projects even better, too. (And what price would you pay for good entertainment?)
Let your home reflect your life
Make things that will improve your day-to-day life. To me, having a comfortable home office and cosy kitchen are top priorities. Simple loop curtains to hide blind fittings, a cushion to suit your decor, reupholstering dropseat chairs, and painting up old furniture are easy ways to make your home cosy and reflect your personality.
Don’t be afraid to try something new
You can get beautiful results without being a professional. Cushion covers are the perfect example. A simple envelope cushion can even be sewn by hand which cuts out the investment of a sewing machine. Painting furniture is beginner-friendly, too.
What have you made for your home?
In my next stamping project I’ll be trying multicoloured houndstooth!
Lots of crafty love,
![]()


Awesome! Thank you! Looking forward to the multicolored one … =)
Awesome – love this! And love the tips about having a handmade home – making your home reflect you is the most important thing whether it’s DIY or not! X
Thanks so much Hannah! It’s so true, and you’ll never feel cosy at home if it doesn’t reflect your life and style. A bit of DIY is an easy (and fun!) way to get YOUR look x