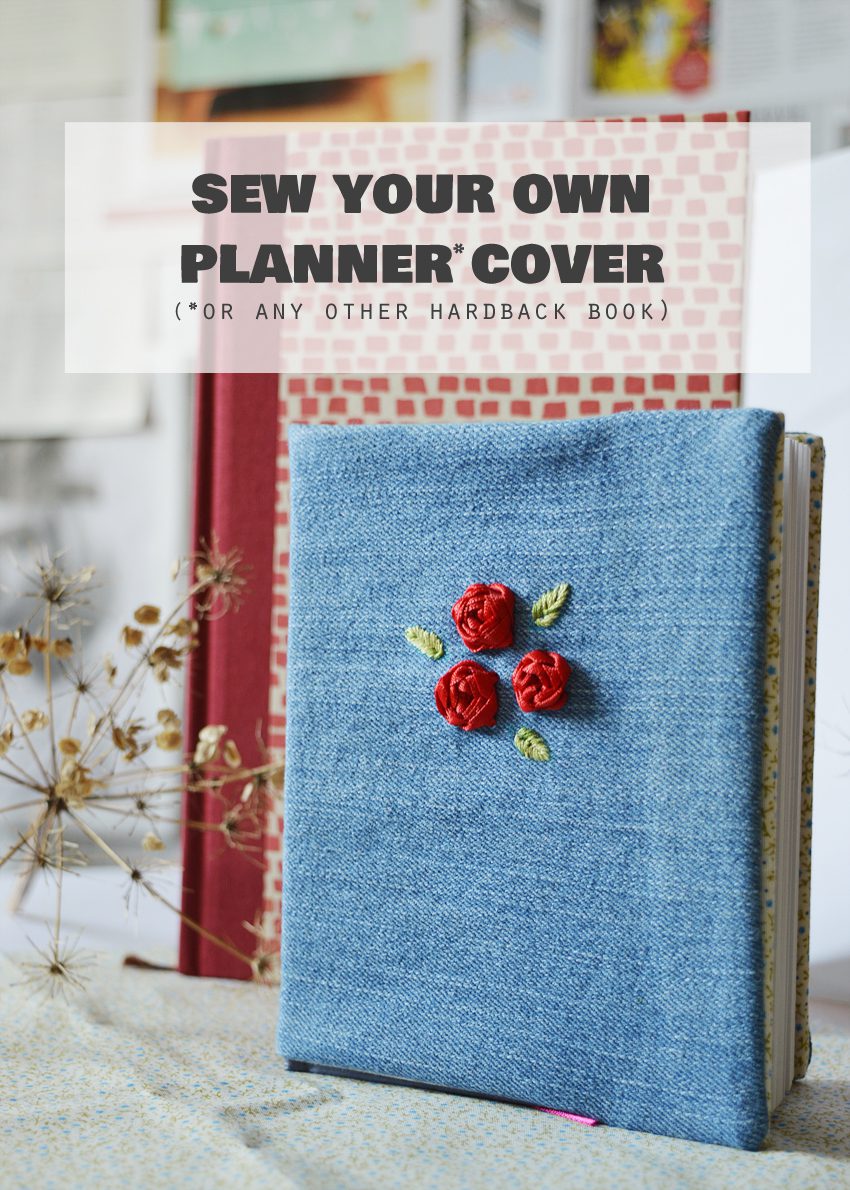
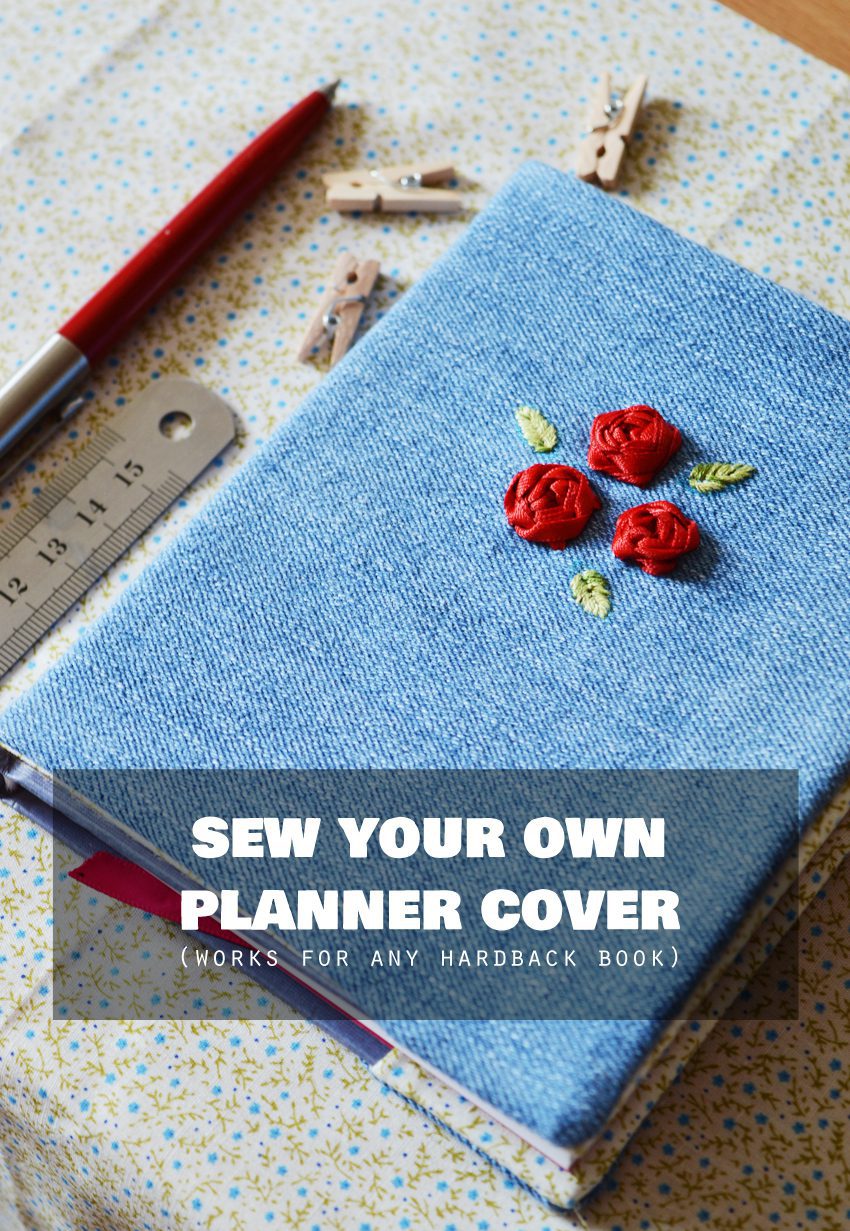
How to sew a cover for any hardback book
A week into the year my new planner was already showing some wear.
Living in a handbag does take its toll!
To be pretty and practical I made a fabric cover that will fit future A6 planners and hardback notebooks. Size doesn’t matter, though; this tutorial can be used for books of all sizes!
What you’ll need
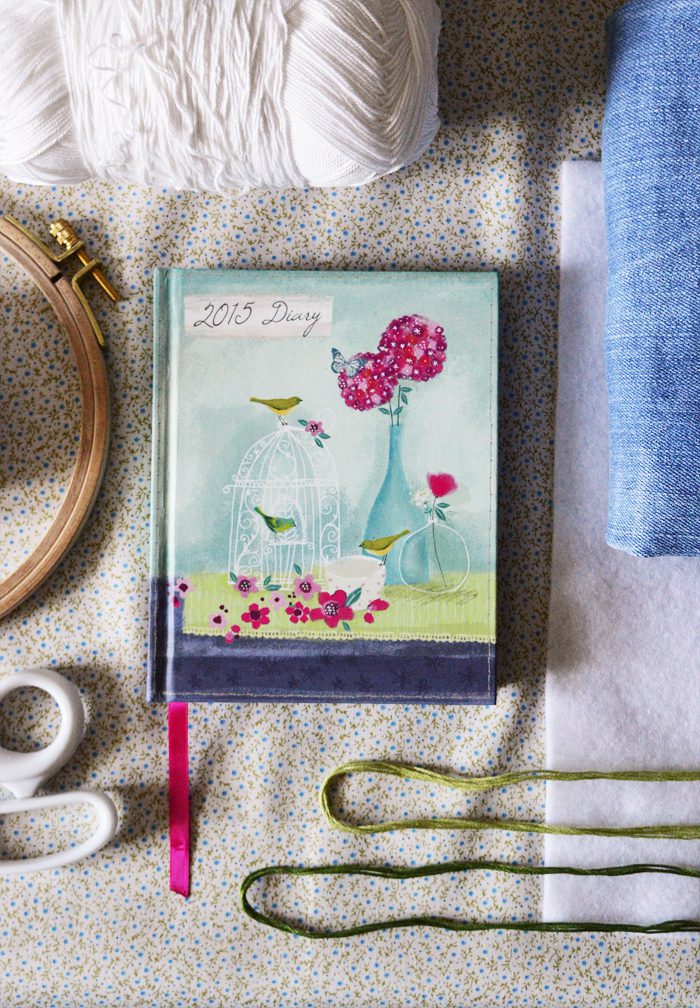
- A plastic tape measure
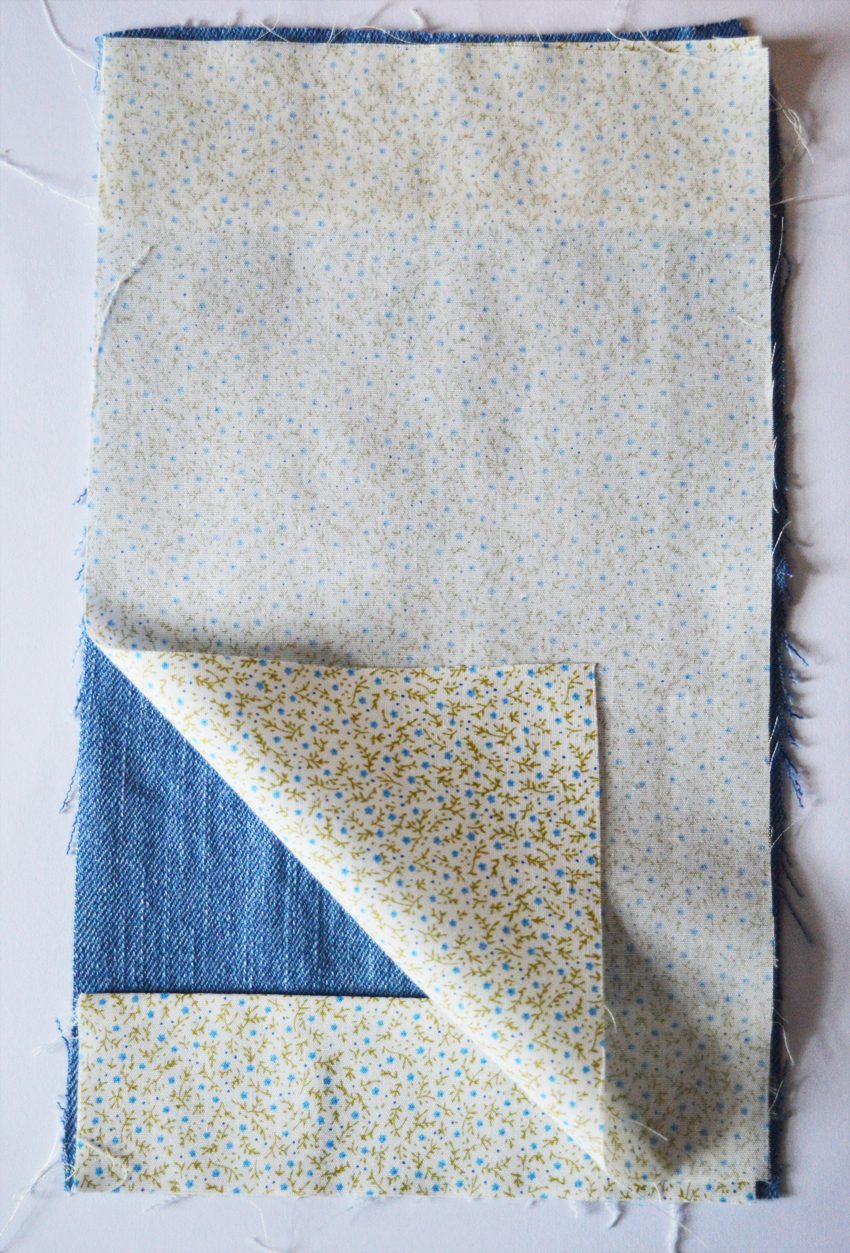
- Your choices of fabric (I used an old pair of jeans and a floral cotton)
- Sewing thread and needle
- Iron, sewing pins, scissors
- Optional: Sewing machine (would easy to sew by hand)
- Optional: Embroidery thread/yarn/ribbon to embellish & embroidery hoop
Putting it all together
Measure your planner/book. A plastic tape measure will make it much easier to get the right width measurement. Twine or ribbon could be used in a pinch.
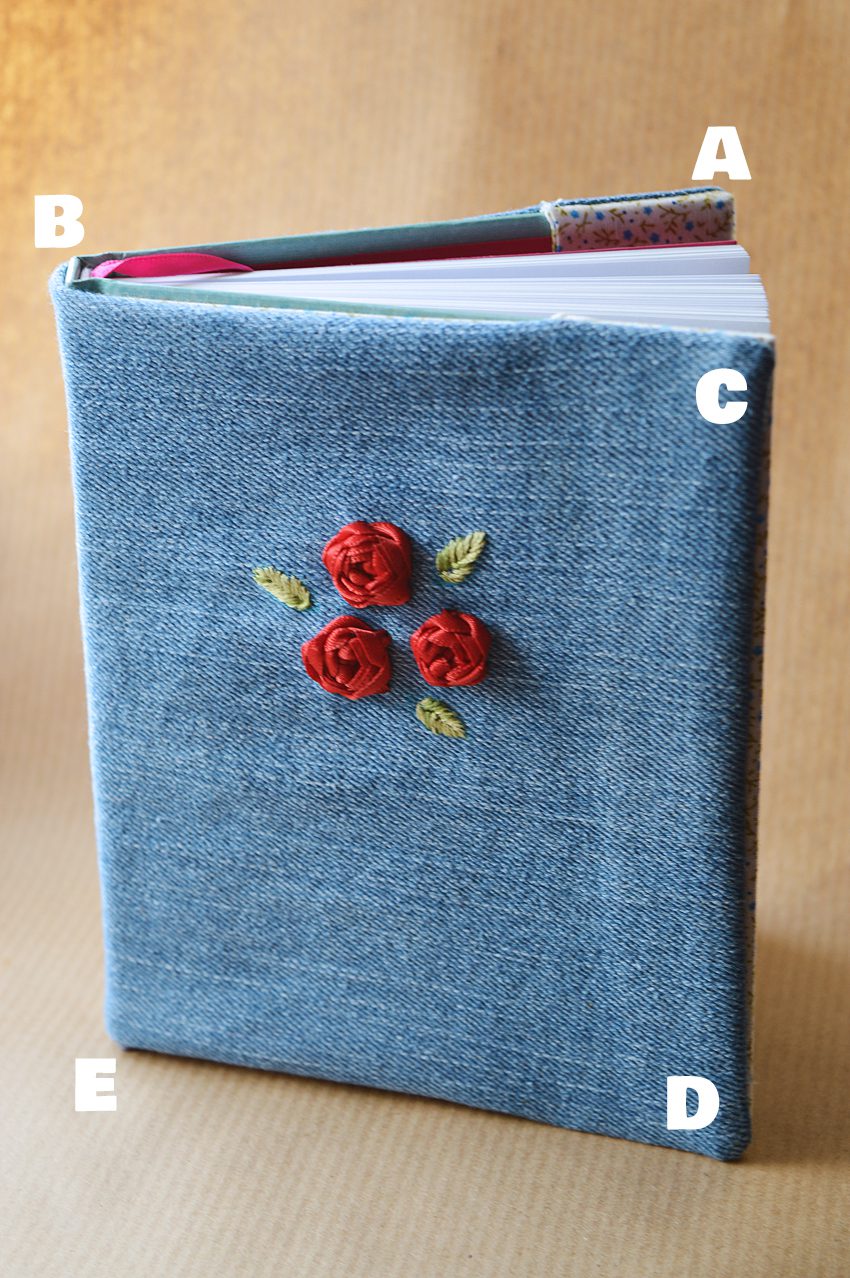
Width: A to B to C | Starting at one edge, wrap the measure around the binding and to the edge on the other side of the book. After measuring, add 1/4″ to 1/2″ to the width. (Depending on fabric thickness.) Make sure to keep the tape measure level.
Height: C to D | Easy peasy! Measure from the top edge to the bottom edge.
(Optional) Front: D to E | If you want to embroider the front, measure the width of just one side so you can find the centre after cutting the fabric.
Seam allowance: Add at least 1/4″ seam allowance to the height and width measurements.
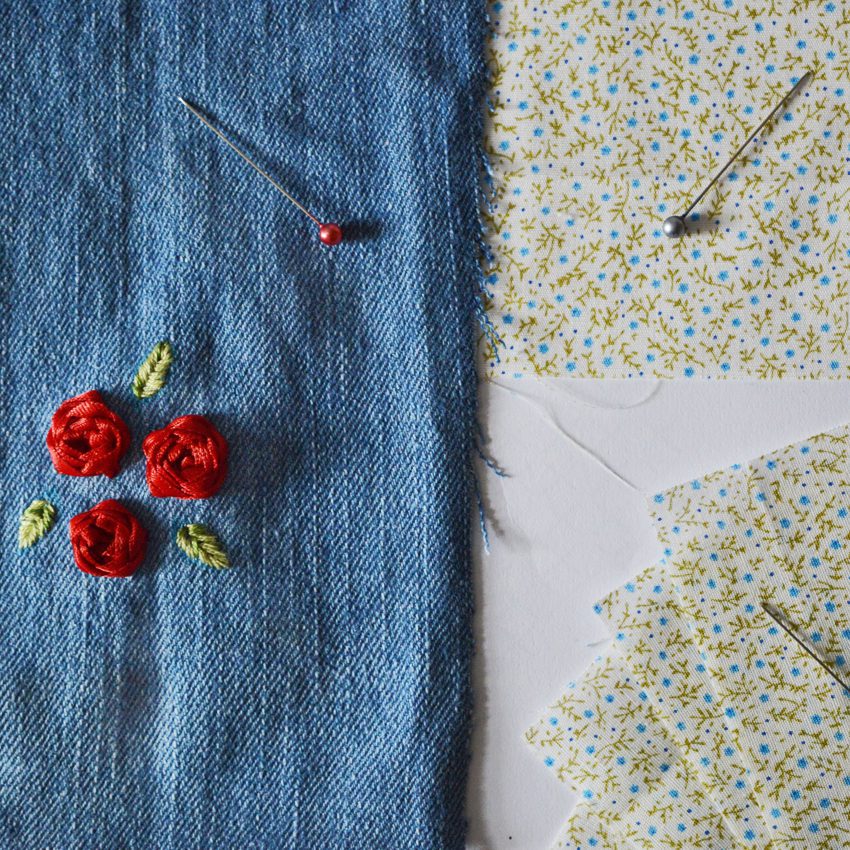
Cut your fabric and iron:
- 2x pieces for the body. = (height + seam allowance) by (width + 1/2″ + seam allowance)
- 4x strips for the “pocket” edges. = (height + seam allowance) by 2″ wide (approx 1/4 the width + allowance)
Embellish. If you want to embroider your cover, this is the time to do it!
Sew the edge pockets. With two strips wrong sides together, sew one long edge. Fold right sides out and press flat. Repeat.
Piece everything together. (Make sure everything’s nicely ironed!) With your front and back pieces right sides together sandwich the pocket strips in-between, raw edges out. Pin.
Sew all the edges, leaving a 1-2″ gap. I left the gap on the bottom edge so it’d be less visible. Snip the corners, trim the seam excess to 1/4 inch, and turn right side out. Iron flat and finish the seam by hand. Done!
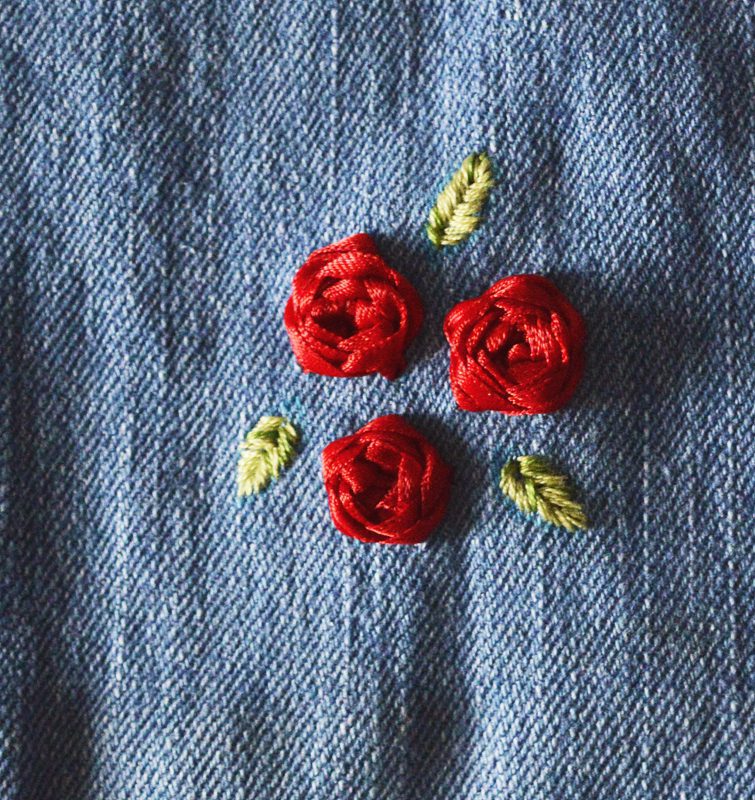
It was so much fun to try some ribbon embroidery. Roses are so quick and such a great stash buster! These 1-1.5cm roses used about 15″ of ribbon each.
What have you got planned for this year? (Anyone else going to Blogtacular? I can’t wait!)
Lots of crafty love,
![]()


This is the easiest tutorial for book covers yet! I will have to make some very soon. =)
Oh thank you so much Juliana! I’m so glad you find this method approachable. It was a fun challenge thinking of how to piece it together.