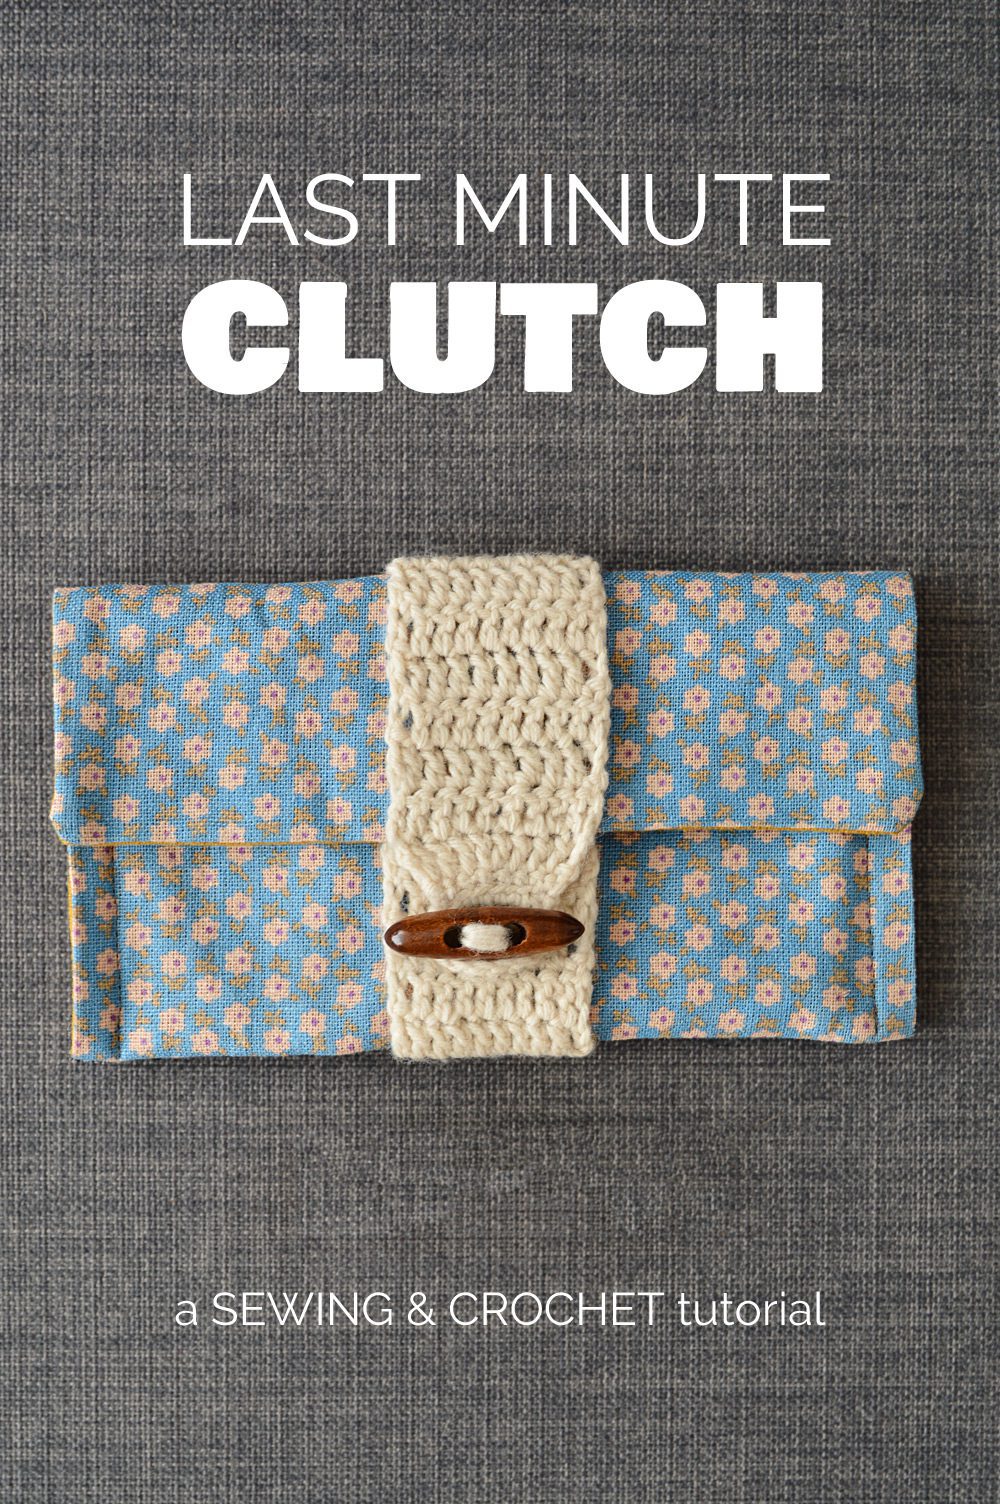
DIY Clutch with Crochet Band
When I had dinner plans the other week I realised—the day before—that I didn’t have a suitable bag.
When you’re spending the night somewhere, an overnight bag isn’t exactly practical or stylish at a restaurant table.
Instead of rushing to the shop I decided to make my own clutch. Ultimately, it was a much more satisfying choice—this way my bag was one of a kind. My latest craft obsession is combining sewing and crochet. I love how fabric and yarn complement each other.
If you need a last minute clutch too, here’s how to make your own:
Materials
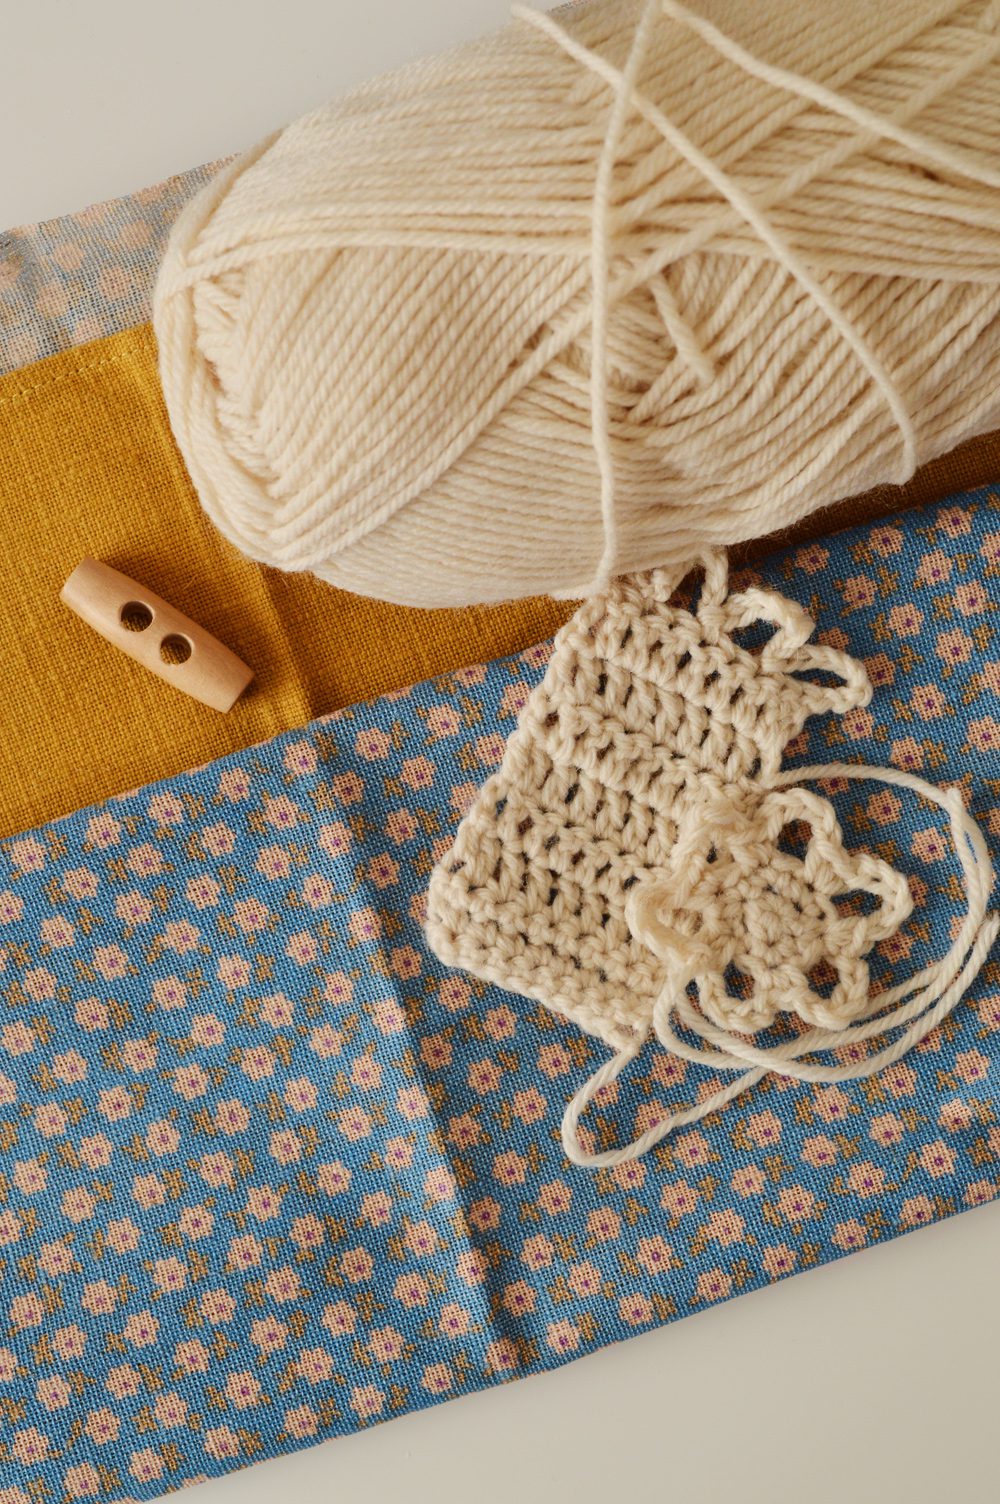
- Outer fabric of your choice, size A4 (21cm x about 30cm)
- Liner of your choice, size A4
- DK weight yarn
- 2.5mm & 3.5mm crochet hooks
- Button
- Sewing needle and thread
- Recommended: Iron-on interfacing
- Optional: Sewing machine
Sew the clutch
I used a piece of A4 paper as a template to cut both my outer and lining fabric. I didn’t use any interfacing, but I recommend you do. Even with heavier fabrics my clutch got a bit floppy.
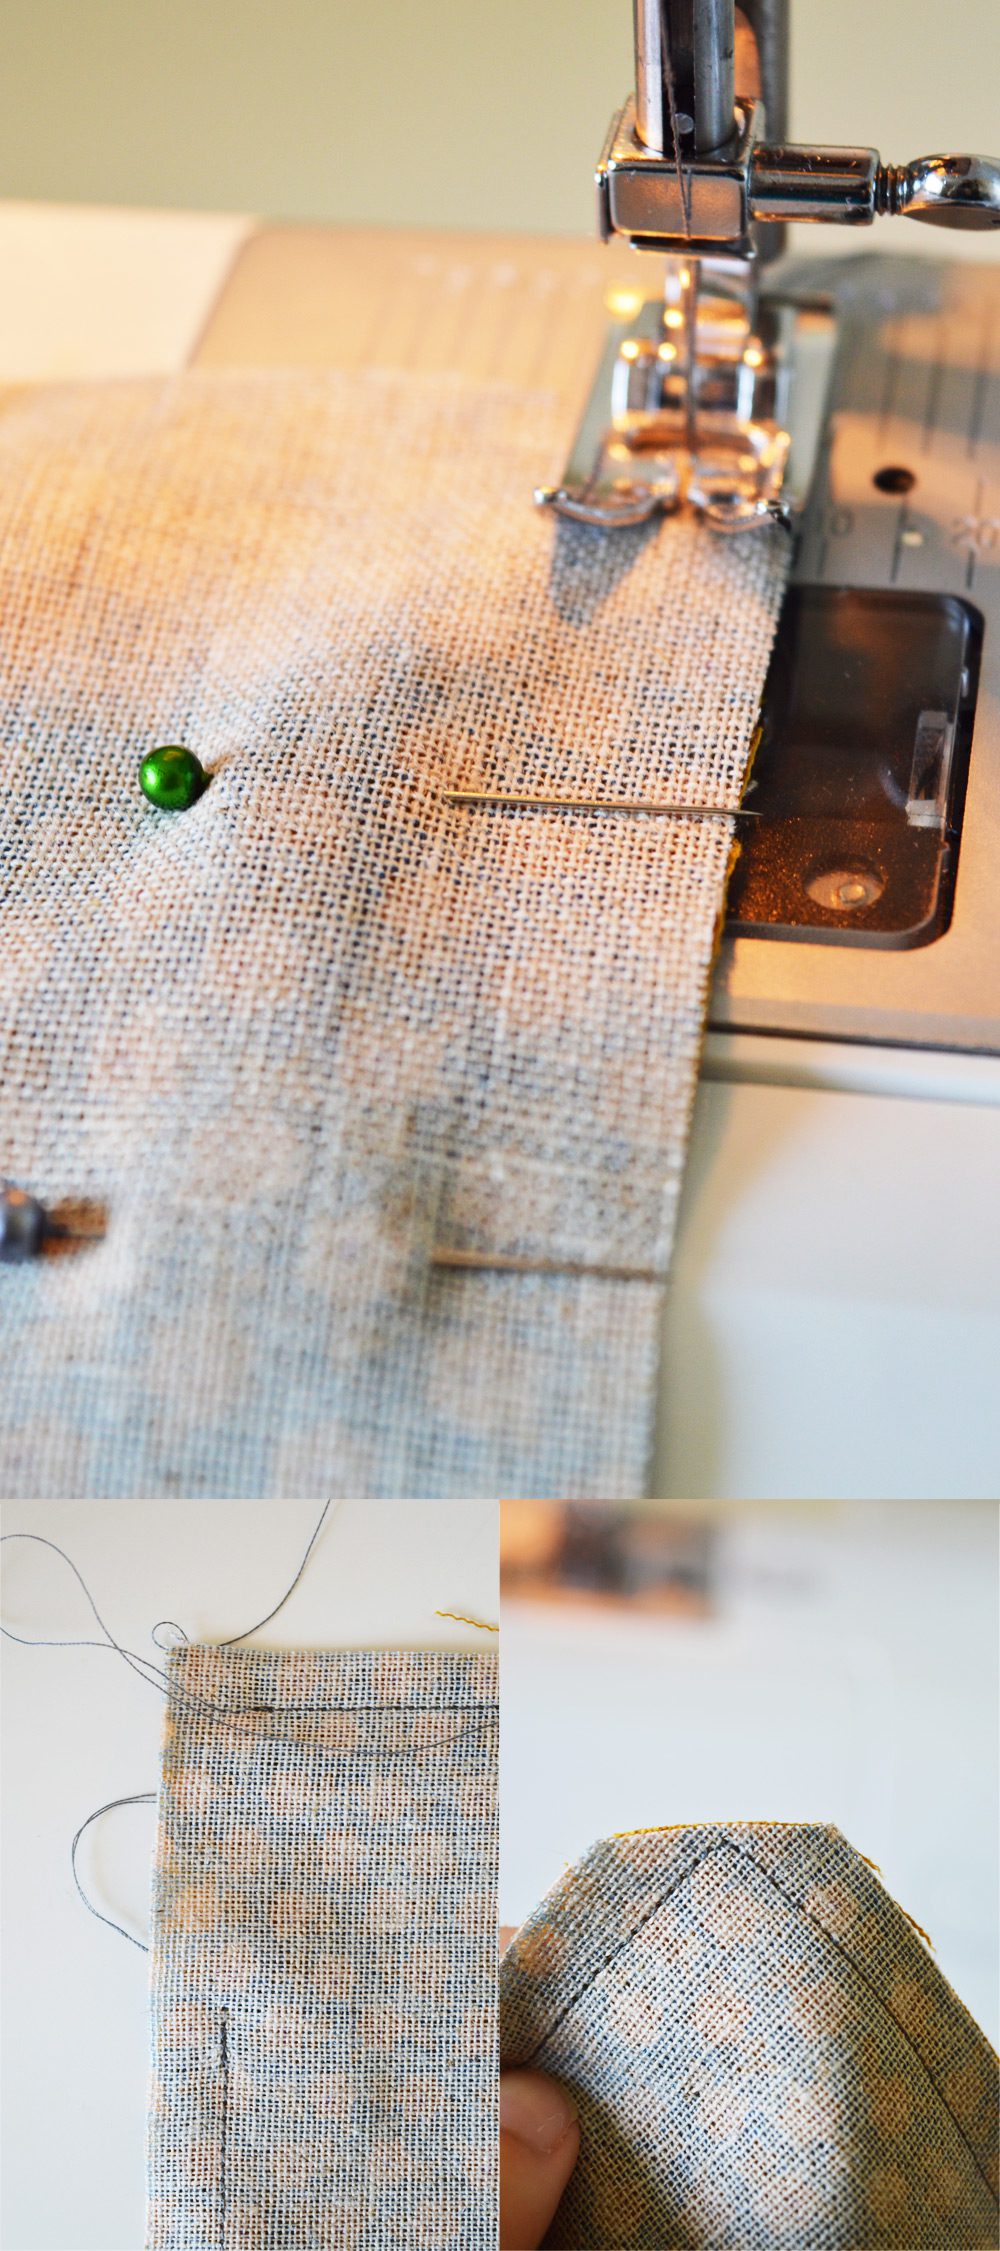
Pin the fabric right sides together and sew all the edges with a 5mm allowance. Leave a 2″ gap on one edge. Trim the corners and turn the fabric right side out. Iron flat, taking care to crease the fabric on the gap in line with the sewn seam.
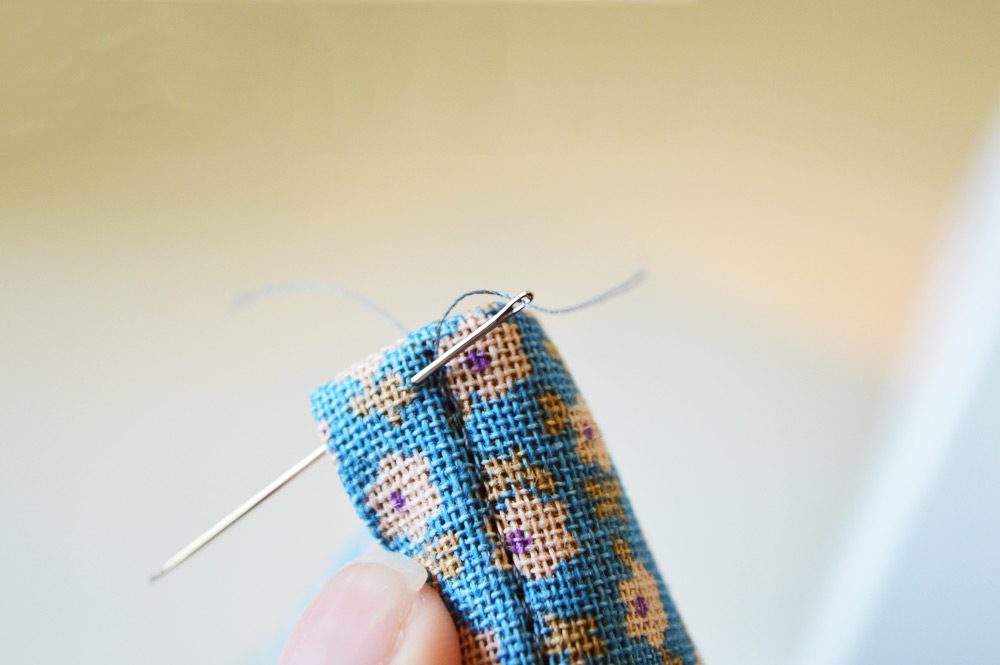
Use invisible stitch to sew the gap closed.
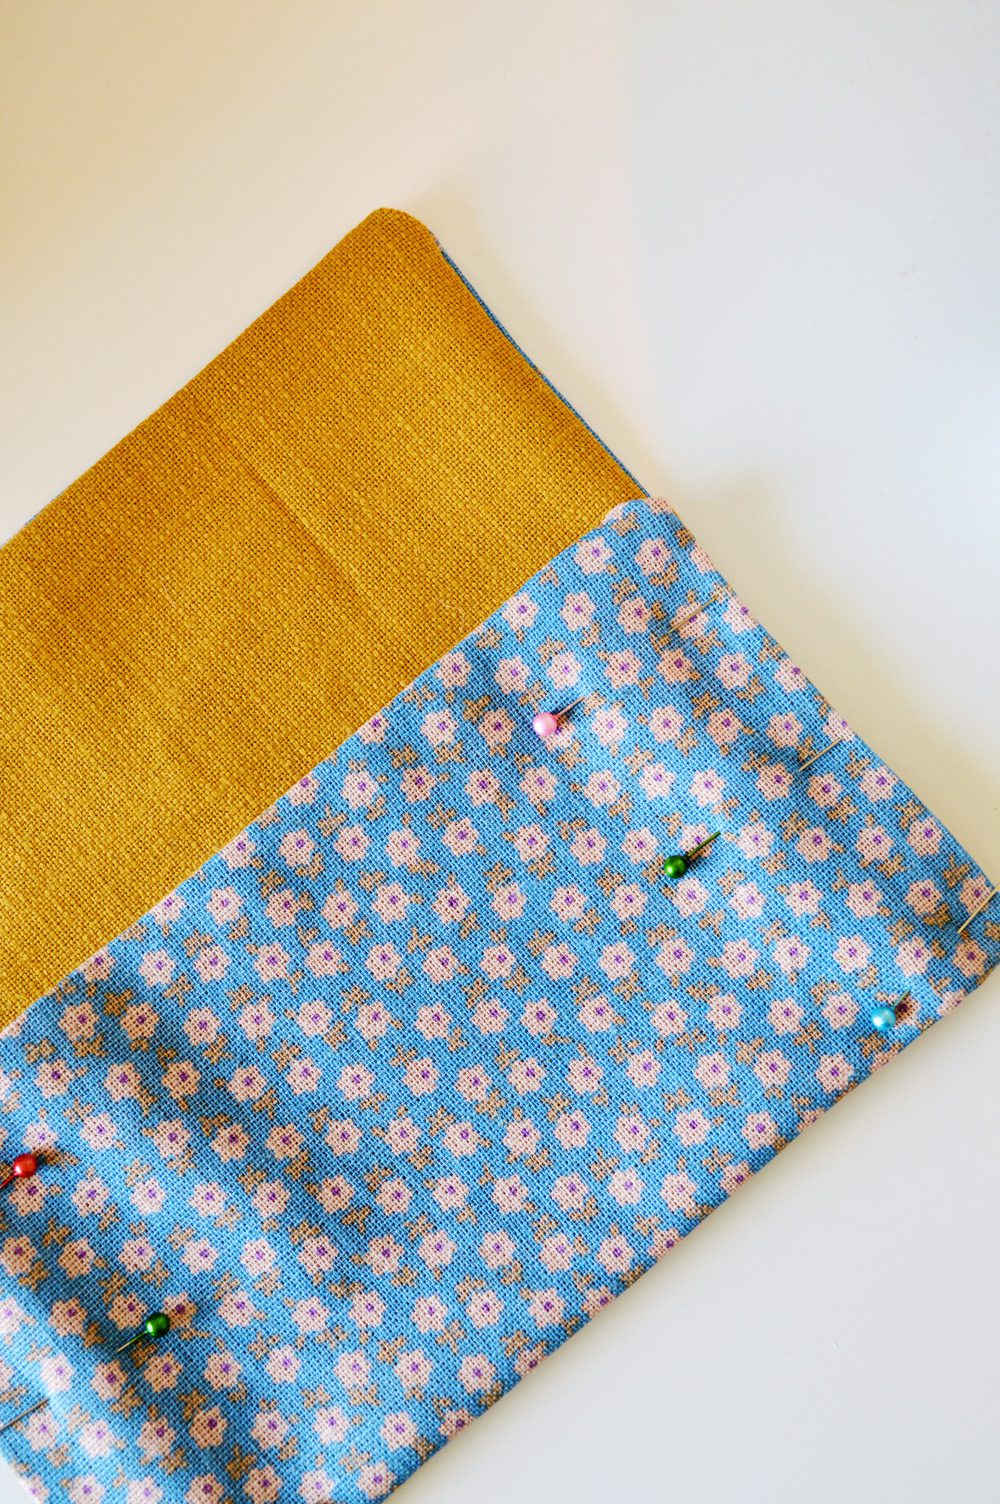
With the liner facing up, fold the bottom edge up by 10cm. Press the crease flat and pin the edges in place. Top stitch 1cm in from the edge on both sides to create the clutch pocket. Hide the thread ends within the edge as shown below:
Fold the top of the clutch over the pocket and iron to establish the crease.
Crochet the band
The crochet band uses UK double crochet (DC) and treble (TR) stitches.
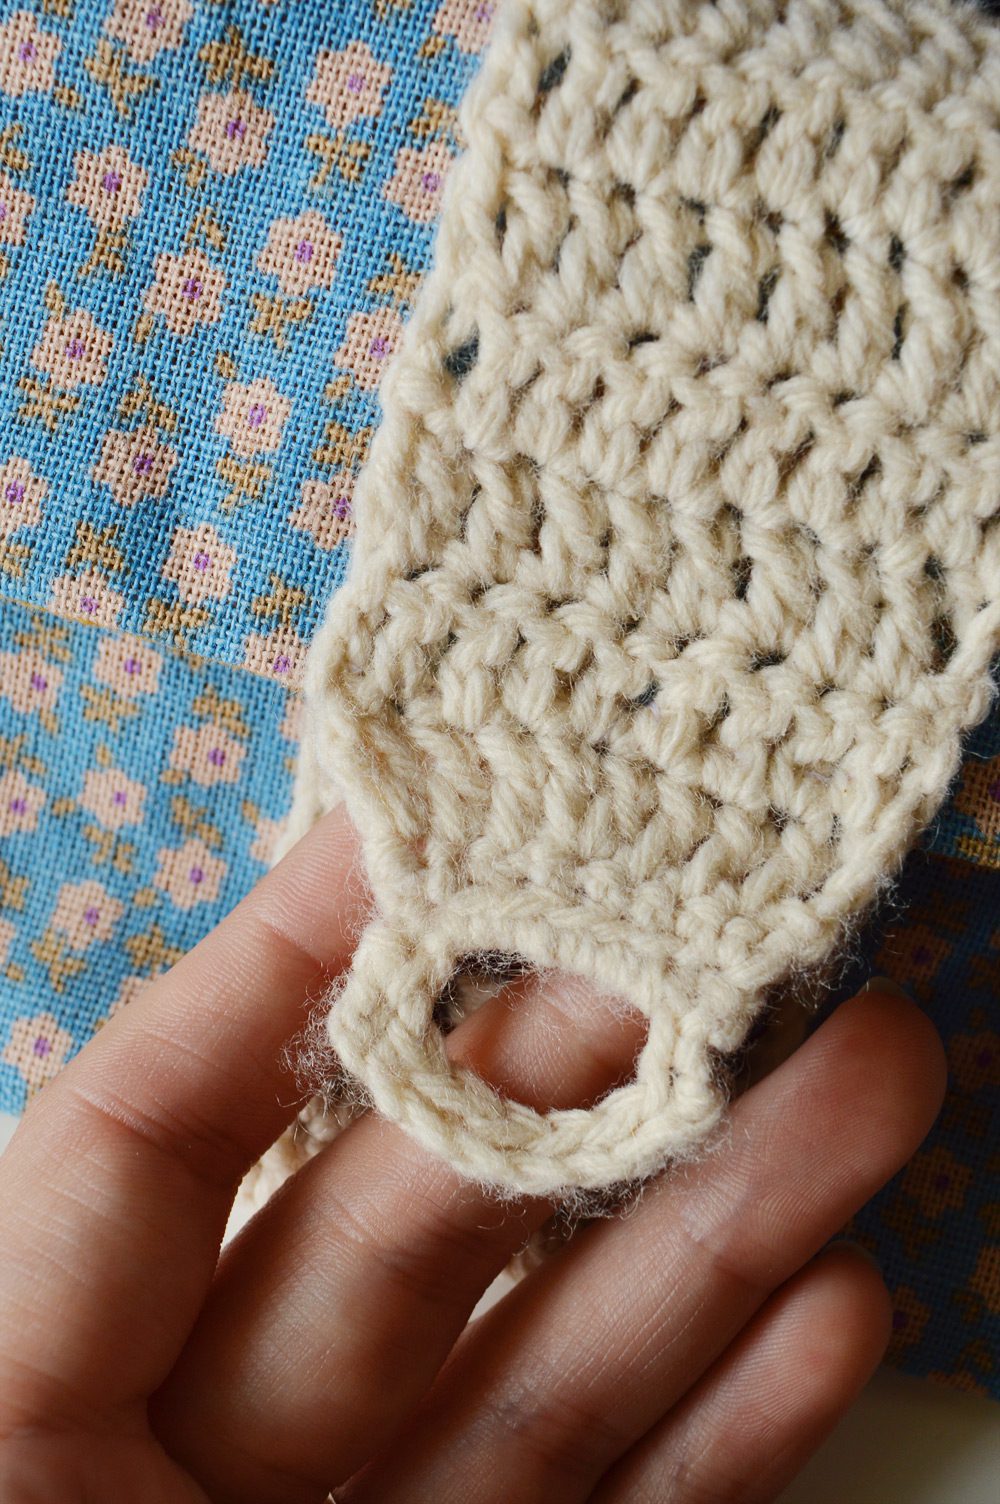
Foundation row: Start with 2.5mm hook. Chain 7
Row 1: DC 7 (7)
Row 2: DC, ch 5, DC (7)
Row 3: 2DC in the same stitch, DC 5, 2DC (9)
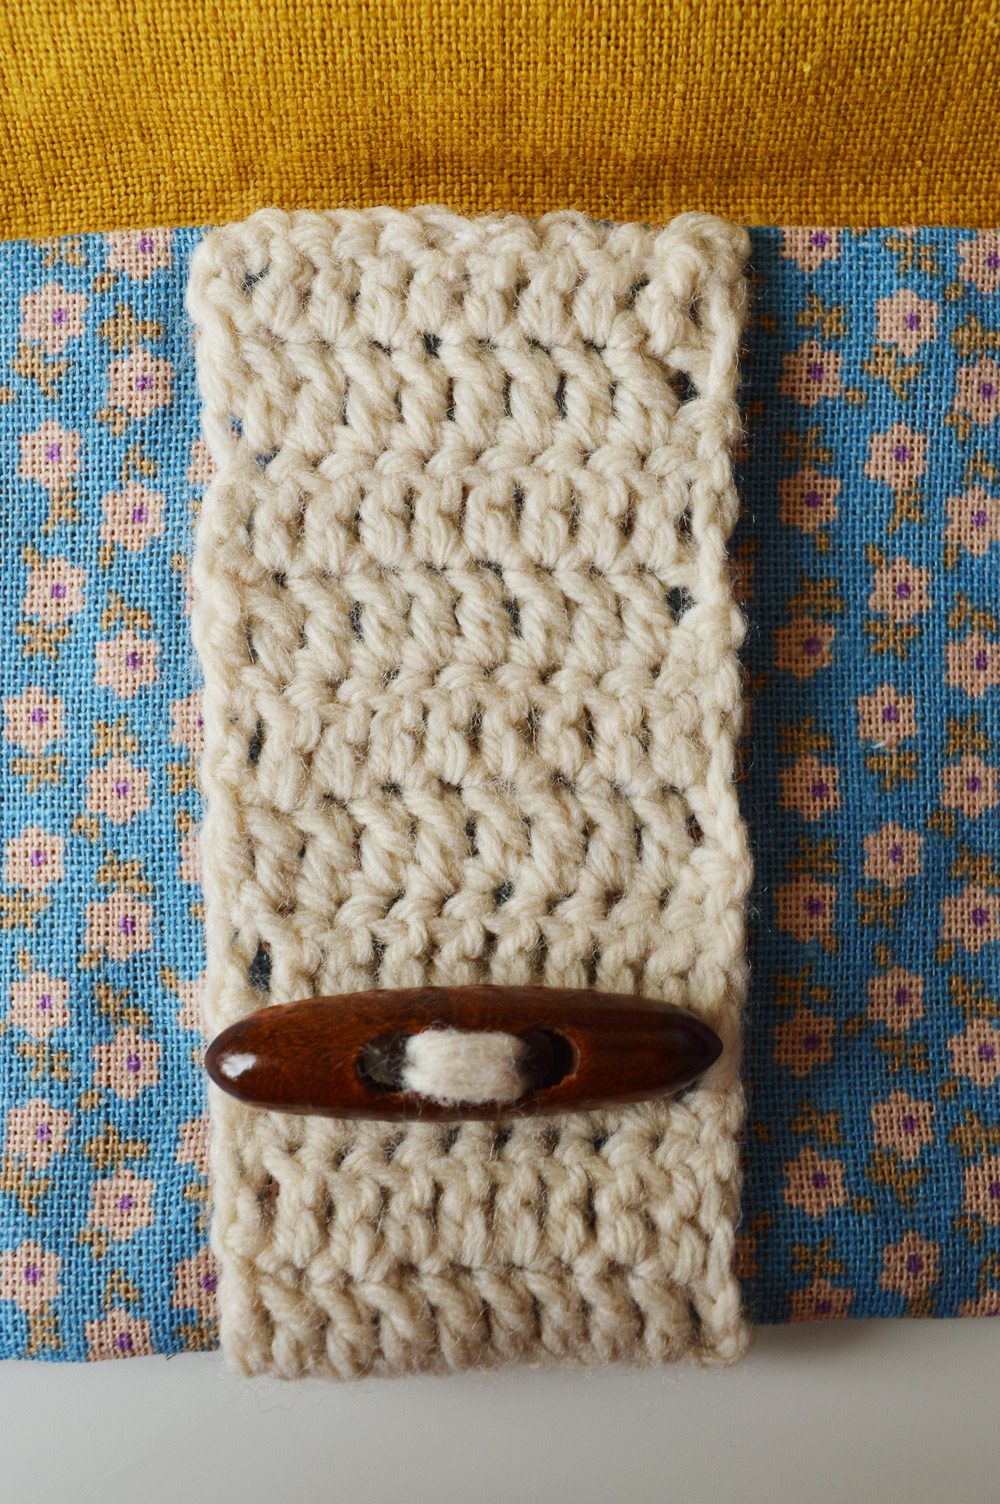
Row 4: Switch to 3.5mm hook. TR 9 (9)
Row 5: Ch3, TR 3, 2TR, TR 4 (10)
Row 6-27: Ch3, TR 9 each row until band reaches around the clutch from edge to edge.
Optional: Block the band. Rows 6 to 27 should reach about 27cm in length; the buttonhole (rows 1-5) will hang over the edge of the fabric.
Putting it all together
Start with the top of the clutch pocket. Find the centre of the crochet band and pin through onto the centre of the clutch’s edge. Use thread that matches the yarn colour to sew the edge of the band in place.
Wrap the band along the back of the clutch and over the edge. Match row six to the edge of the clutch. Sew into place with matching thread.
Use a pin to mark where the buttonhole rests. With a length of yarn, sew a button through the band and fabric of the clutch.
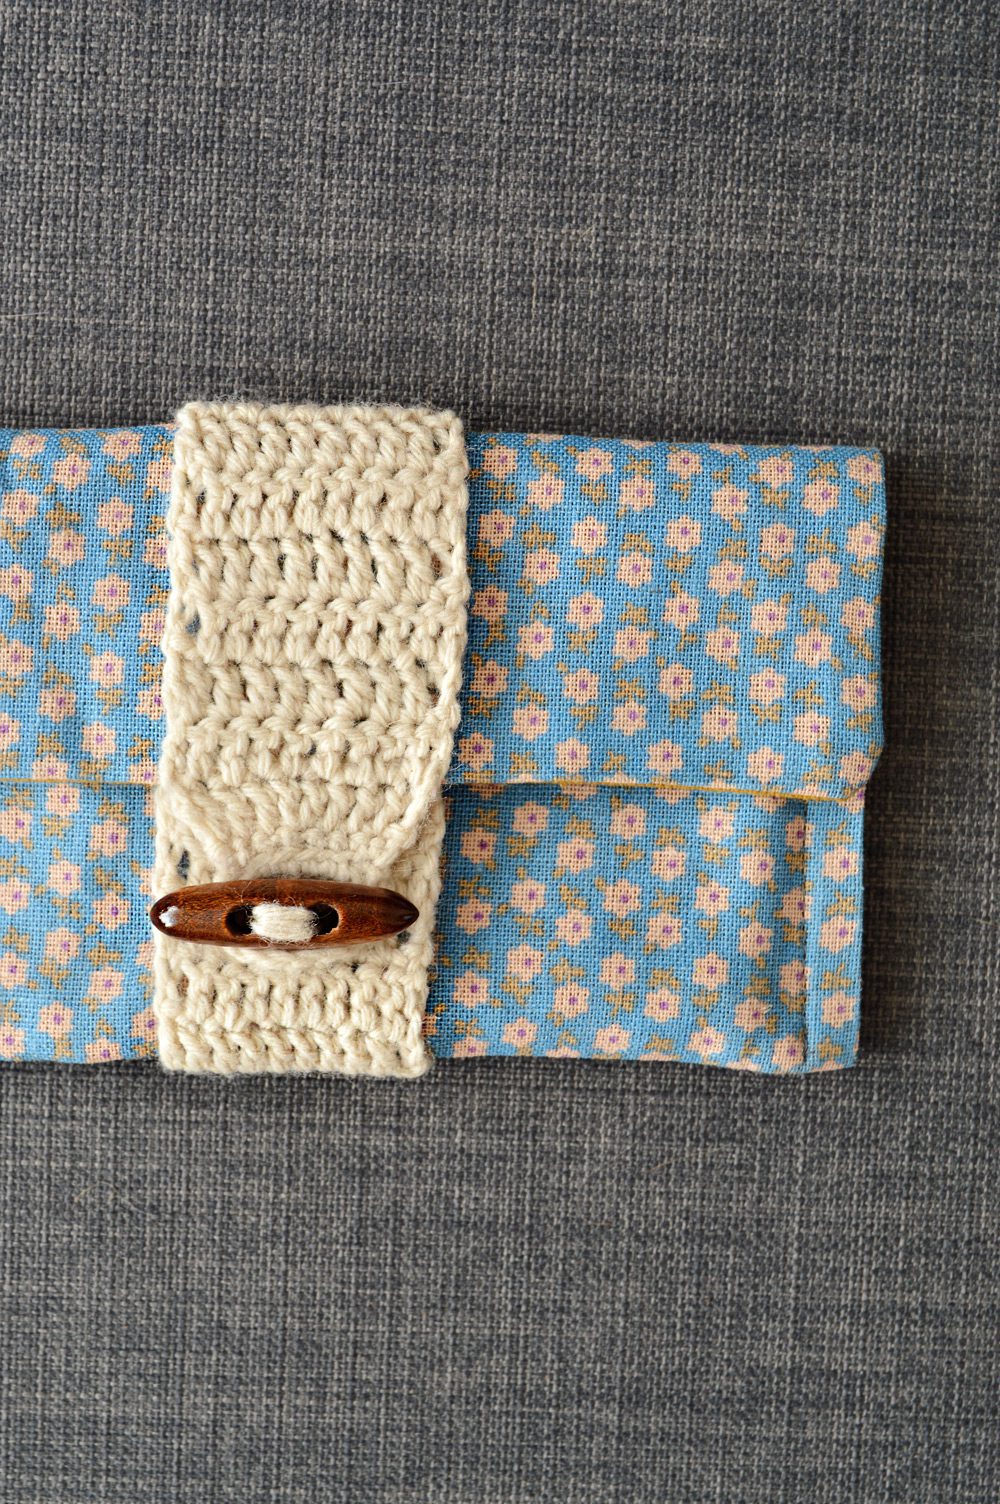
This clutch was just what I needed. There’s just enough space for my phone, some cash, lipbalm, and a card or two. Made to measure!
What about you? When do you make instead of buy?
Lots of crafty love,
![]()


Sweet! I love the crochet combined with the fabric. Thank you!
It’s an addictive combination for me! Expect more to come :)
[…] a creative clutch? Let’s make this one from craftingfingers.co.uk! You’ll need outer fabric of your choice, size A4, a liner of your choice, size A4, DK weight […]
[…] craftingfingers.co.uk […]
[…] craftingfingers.co.uk […]