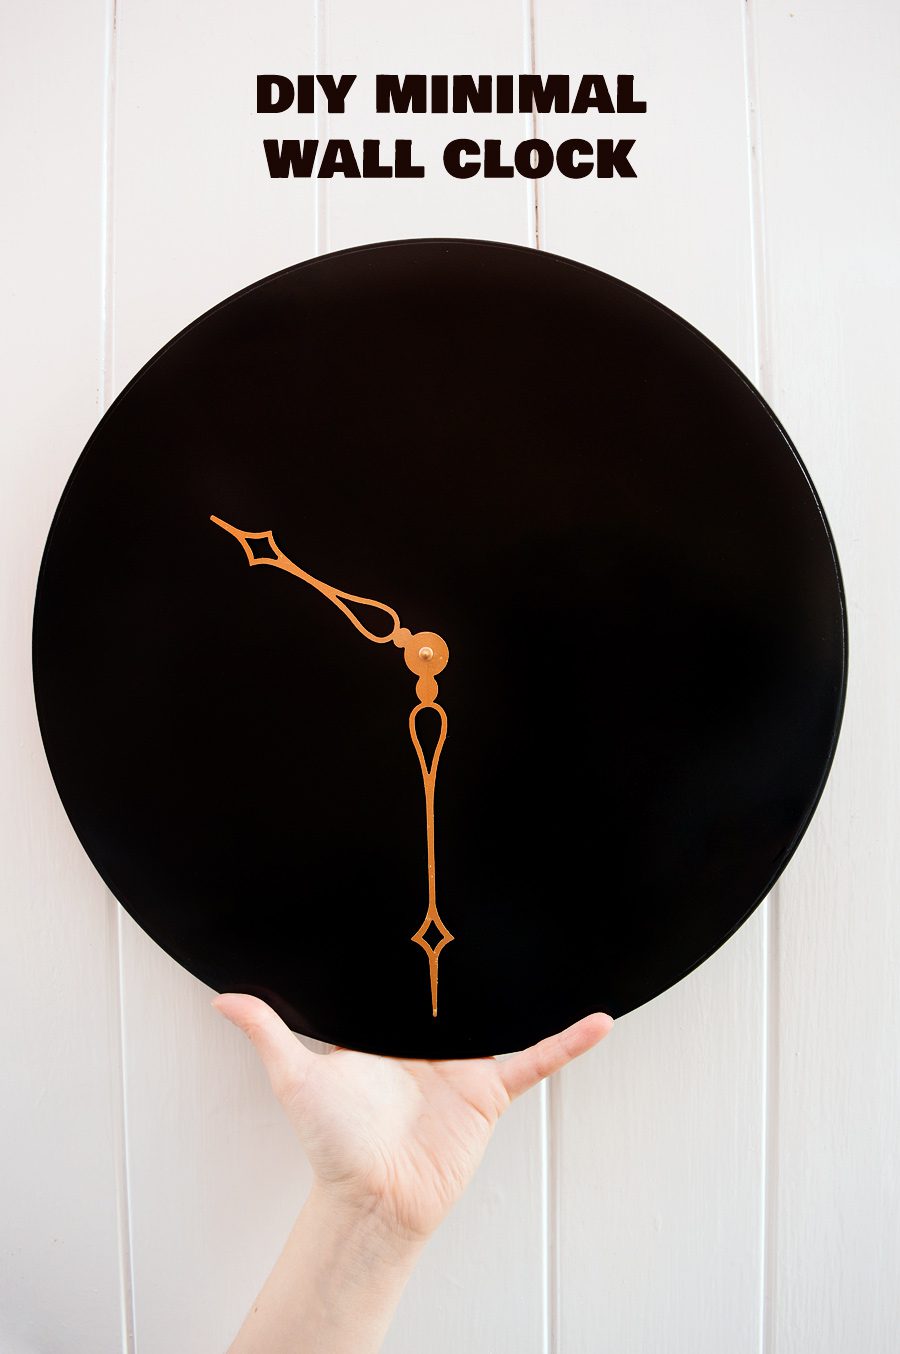
DIY Minimal Wall Clock
Disclosure: This post was made in collaboration with Rust Oleum
Here’s a project to celebrate longer days and brighter evenings as the clocks go forward.
Our house is still full of boxes and we’re living out of luggage bags until the wardrobe gets set up. I needed a break from unpacking! This quick makeover was just the thing.
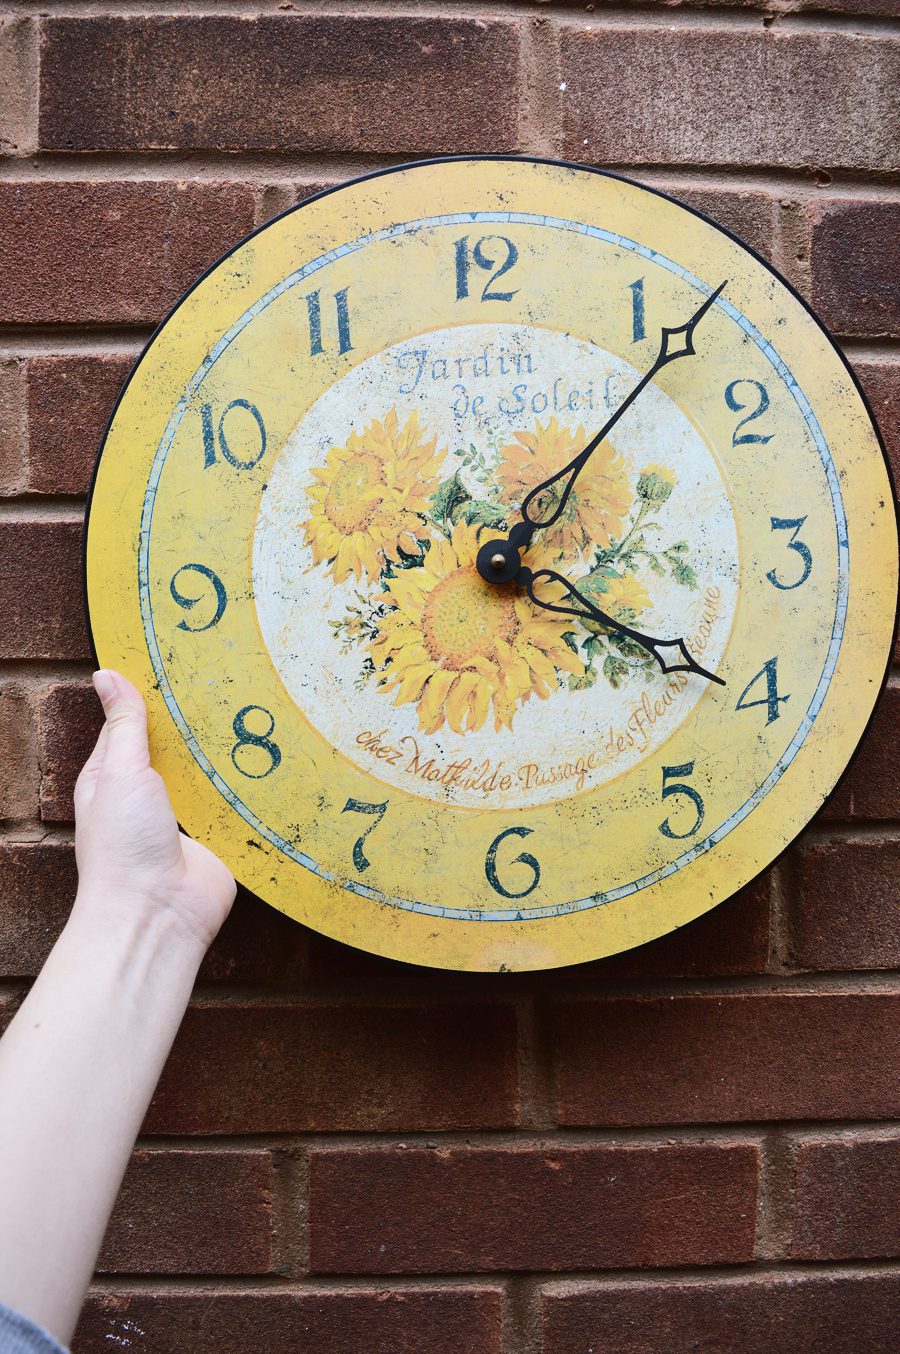
I found an old, French-themed clock at a secondhand shop. It was pretty as-is, just not my style.
Here is the before:
Materials
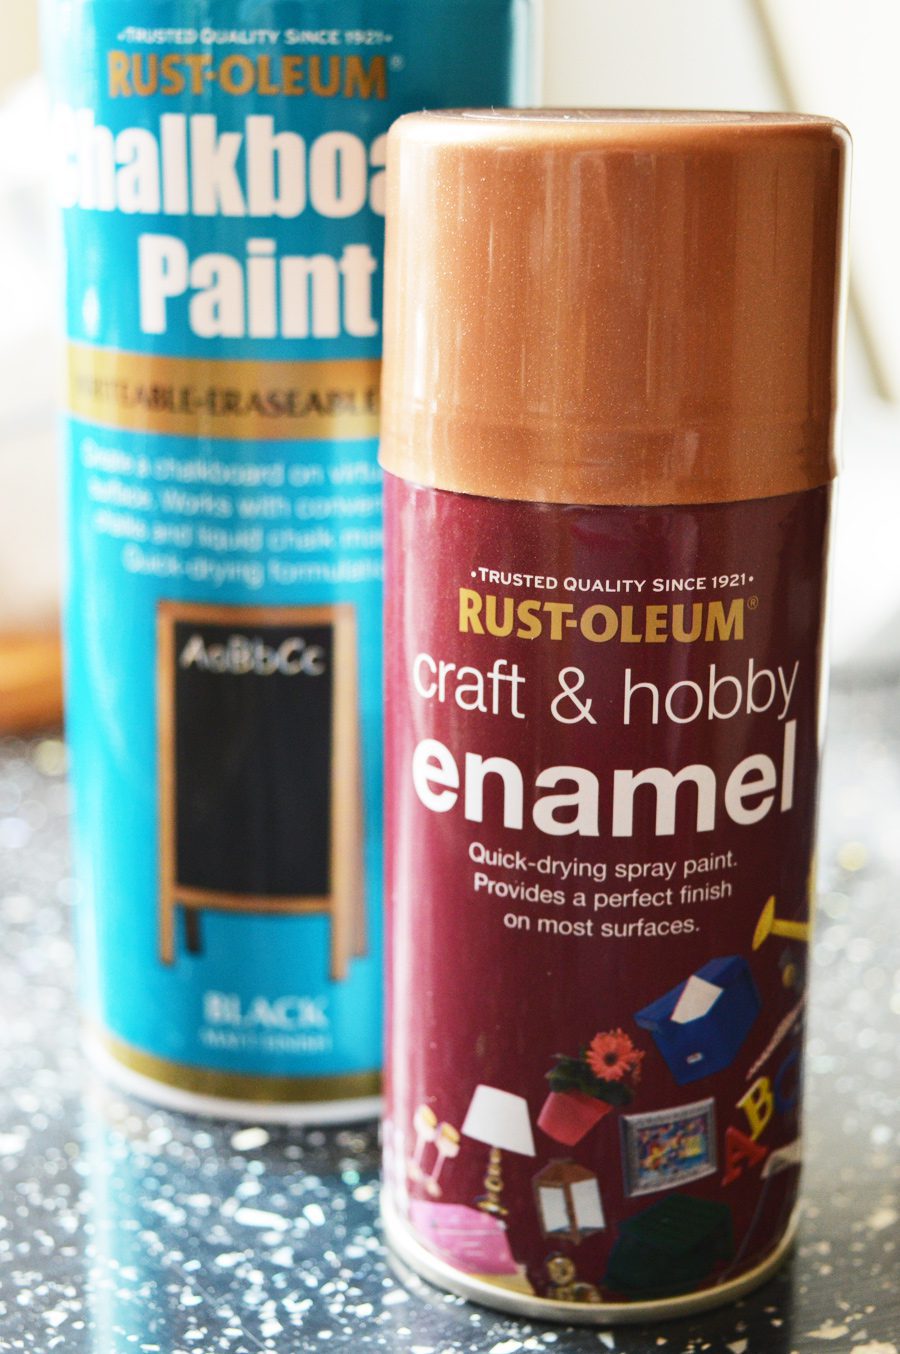
- Rust Oleum Craft Enamel in copper
- Rust Oleum Chalkboard Paint (Black Matt)
- Clock to paint
Before & After
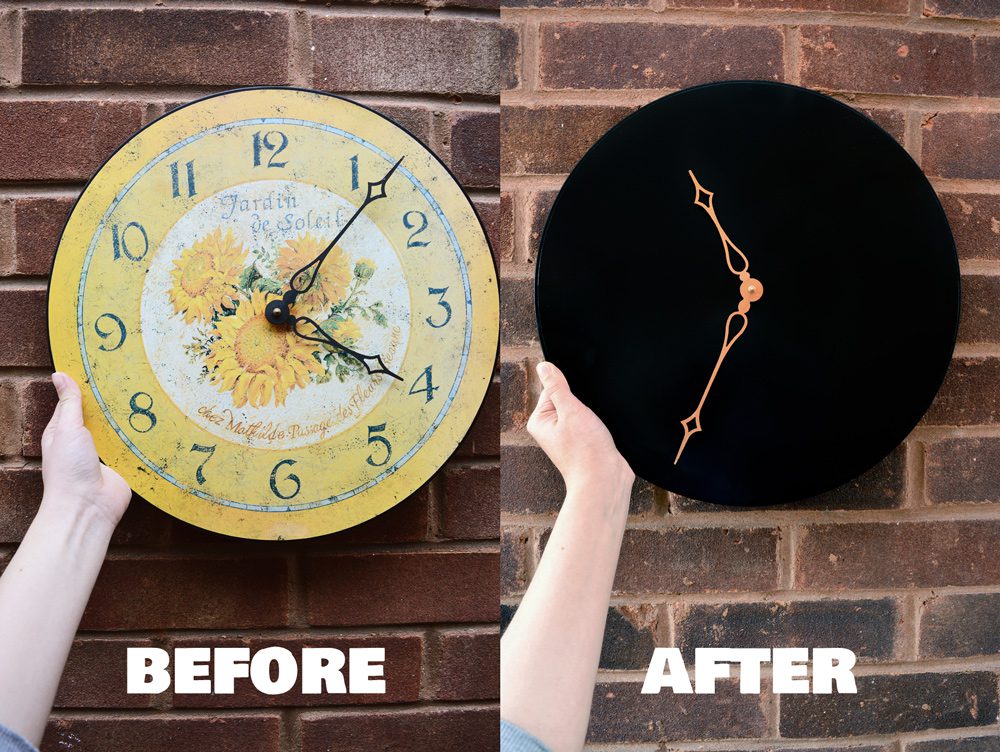
The final result is bolder, minimal, and neutral enough to use all year round. Love it!
The right technique
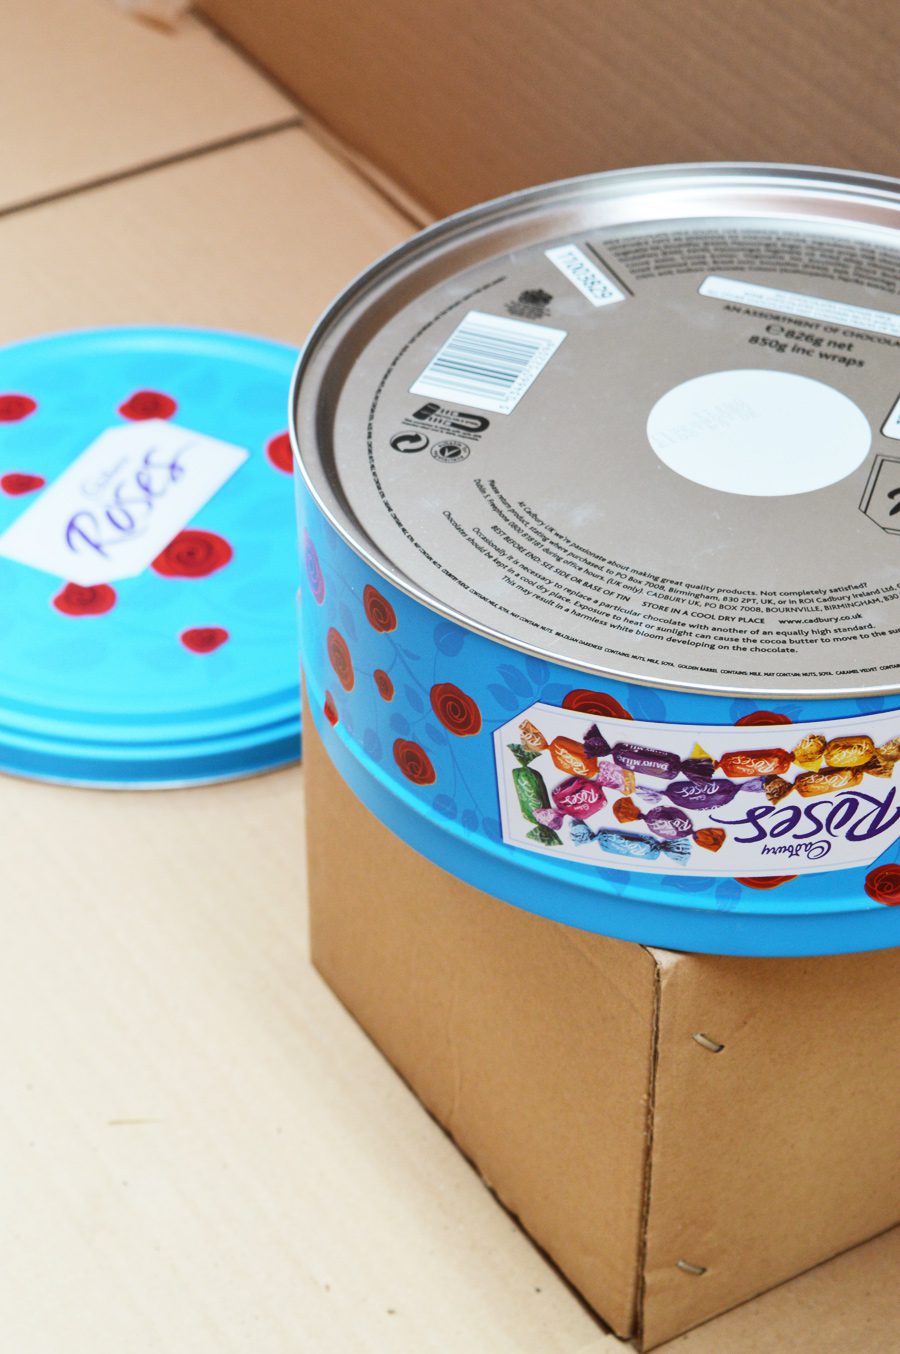
To get the right technique I practised on some old candy tins.
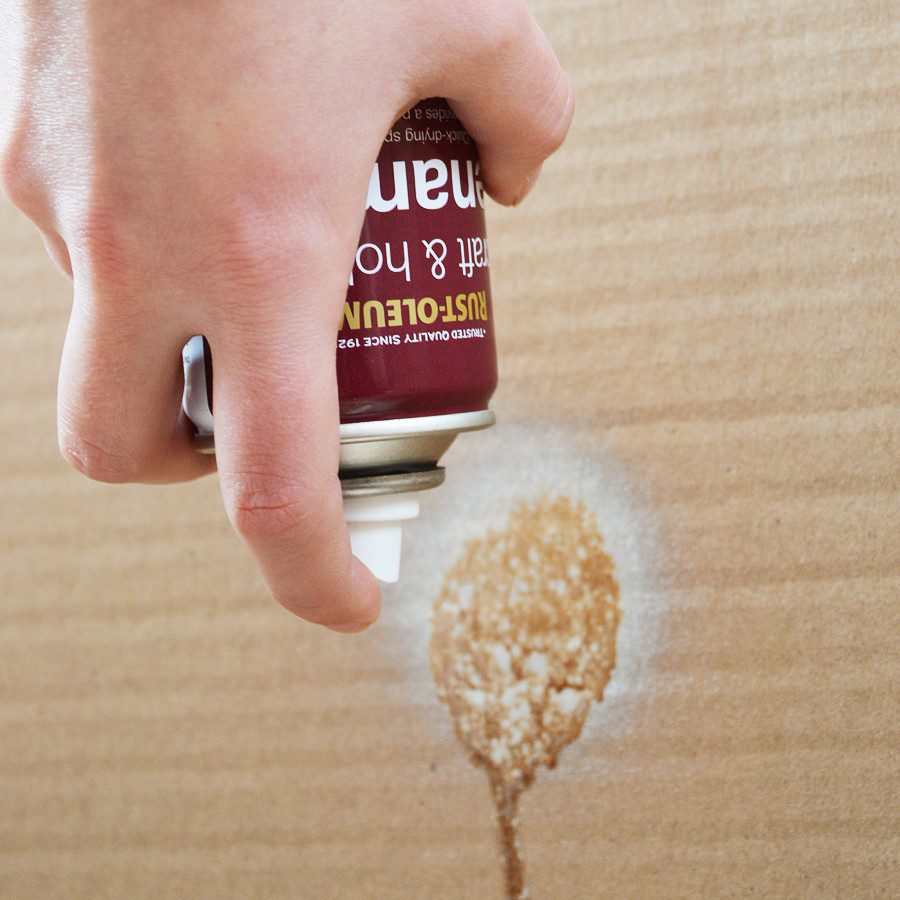
Set up your materials in a well-ventilated area. (We used the garage hallway!) I used cardboard left over from moving to protect the floor. Another scrap bit of cardboard was used to lift the practise tin off the floor to make it easier to rotate and spray.
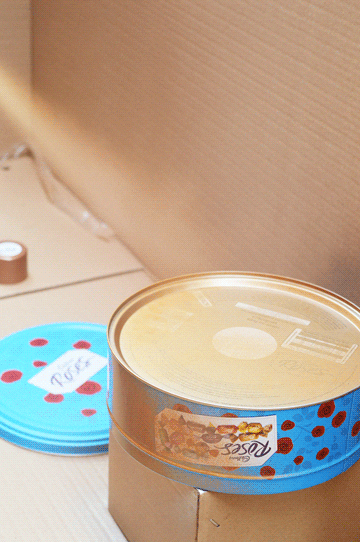
Get shaking! Each Rust Oleum product will have instructions on how long to shake before use. Alex (my husband) took over at this point and showed me the right spraying technique:
- Clean the surface of what you’re painting before use. Even finger prints might show through!
- Sweep the can from side to side. Rotate the item you’re painting as you go to cover it evenly.
- Spray once for each sweep, not continuously. = Less wasted paint and it’s easier to control.
- Shake the paint a couple times between sprays.
It’s important to paint in a room that’s clean of dust and particles in the air, too, or dirt might settle onto the paint as it dries.
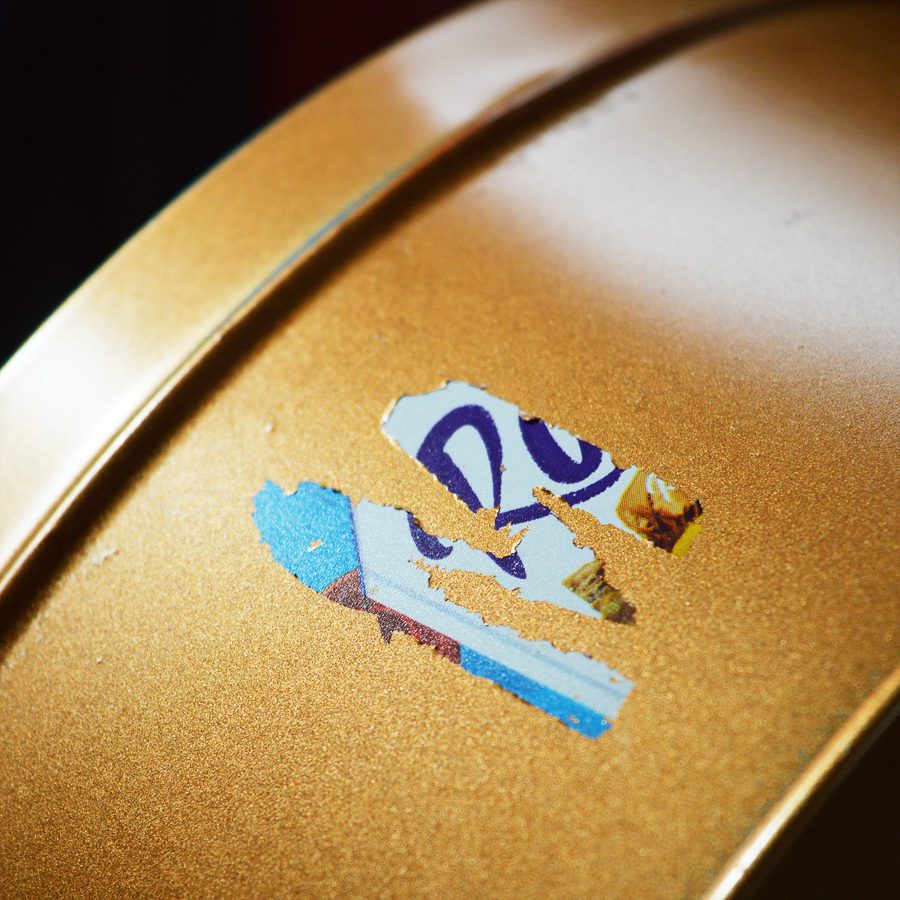
Not every project goes to plan! My dreams of an easy stencil-free cake tin design went out the window. The saga of that idea will have to finish in another post!
Putting it all together
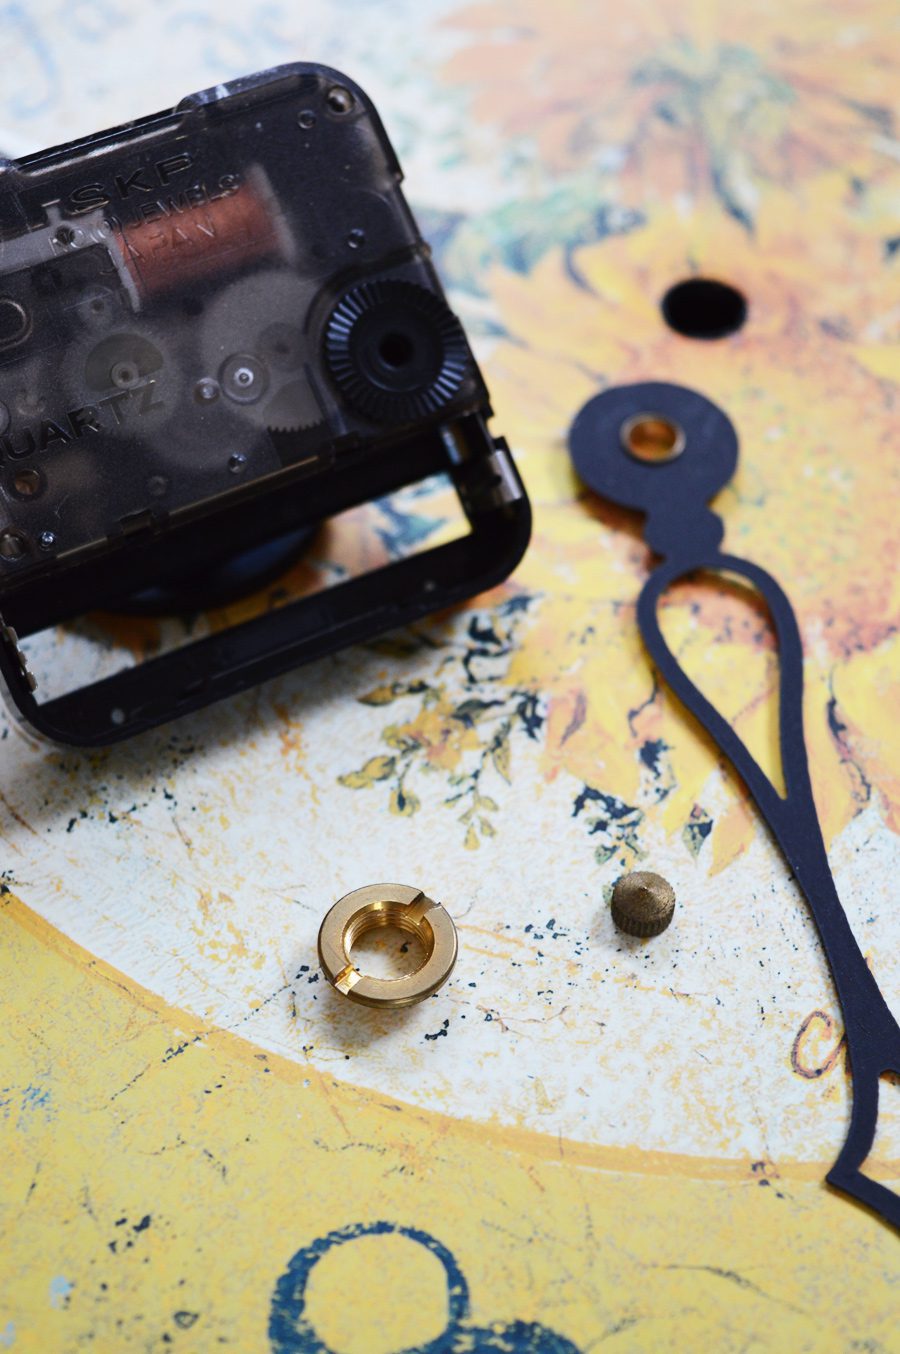
Back to the clock. To start, carefully remove the clock hands by unscrewing the pieces. Wipe all the surfaces clean and dry before painting. (You won’t be painting the battery holder, so leave it to one side.)
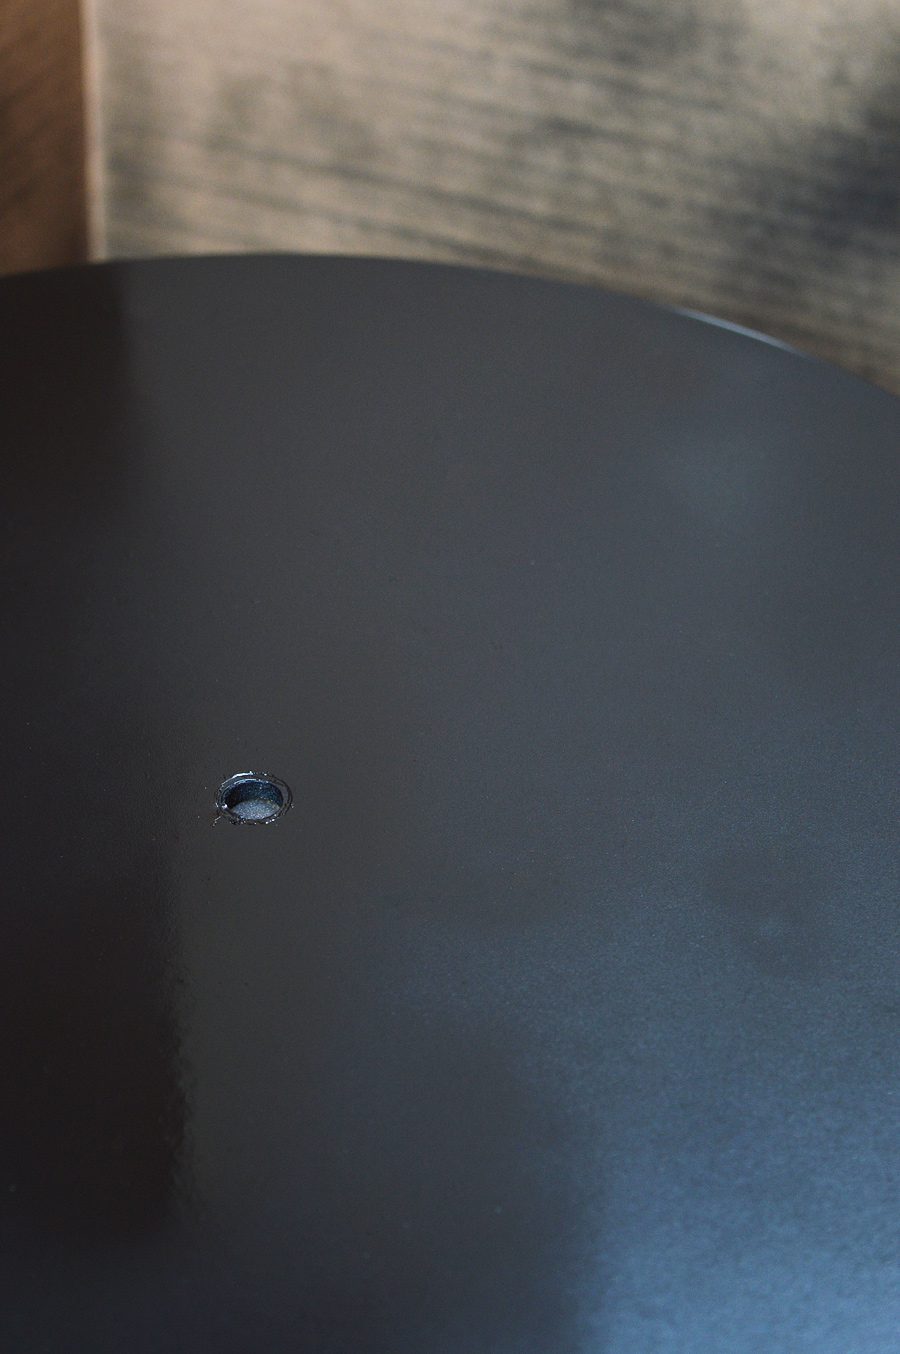
Spray! Use the sweeping motion to coat evenly. I applied a second coat after 10 minutes to both the chalkboard clock face and the copper clock hands. Leave to dry (watching it do so is optional!).
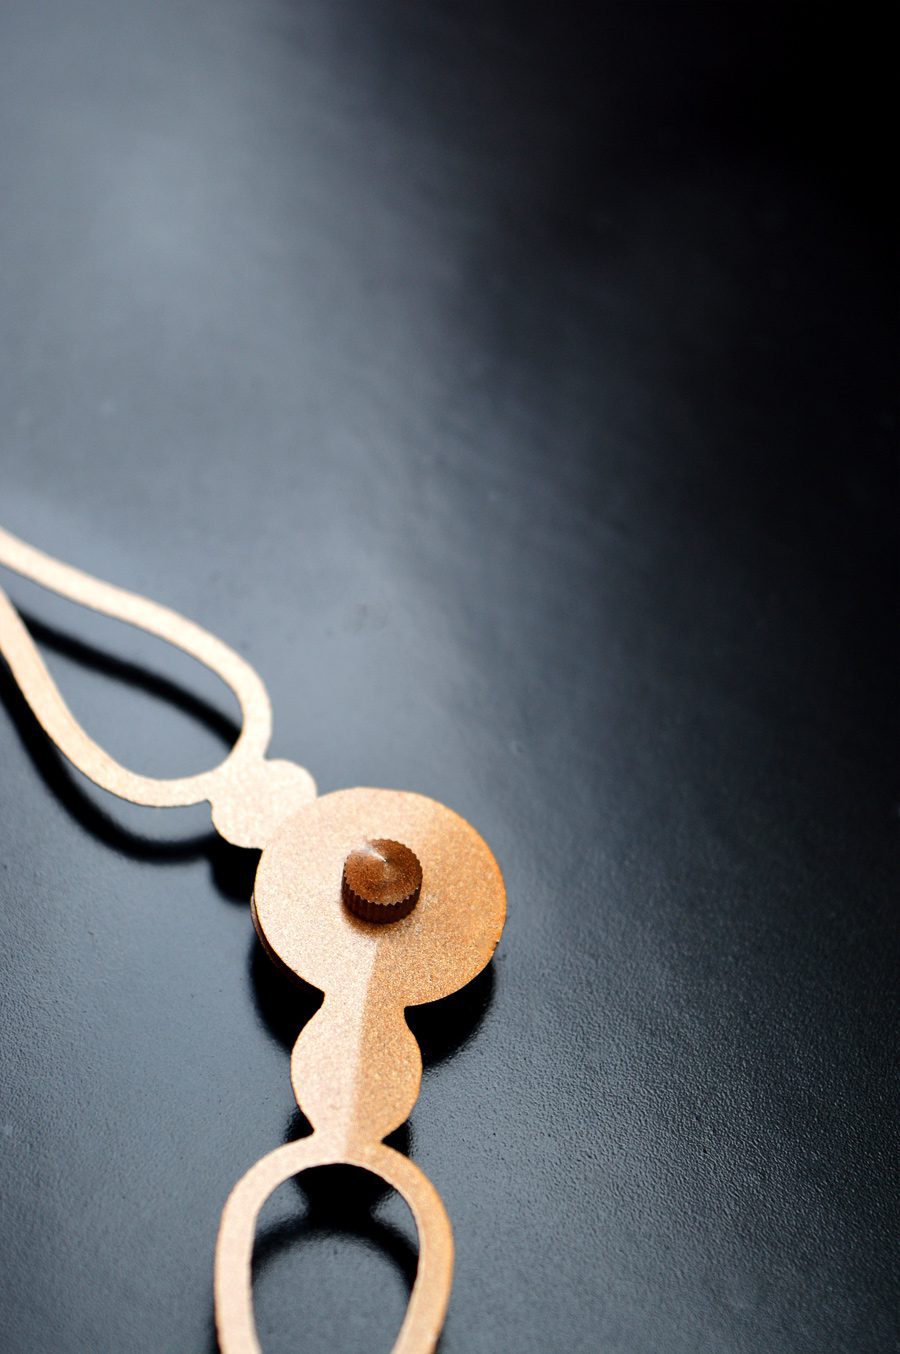
Reassemble the clock hands. Feel free to admire the colour combo at this point. It’s like big copper-coloured buttons on a leather coat. Totally rock and roll.
When you’re done, empty the cans’ nozzles to prevent blocking. (Another tip from my husband!)
Simply turn each can upside down and hold the nozzle until it sprays air.
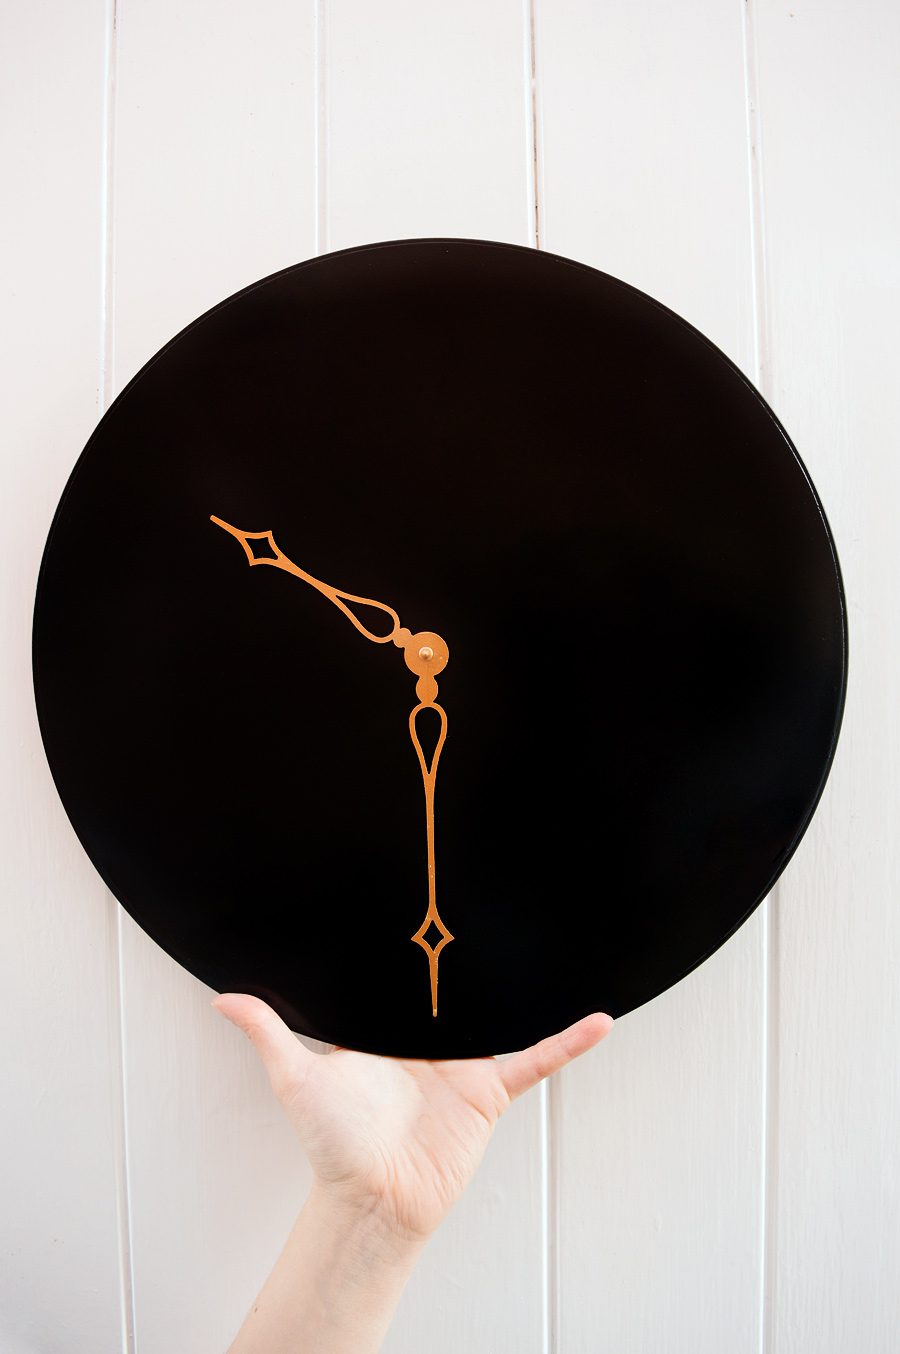
The chalkboard paint was so easy to use and I love the solid, matt finish. The best bit? You can always add the numbers to the clockface in chalk!
Let me know your thoughts!
Lots of crafty love,
![]()


Love this makeover – so effective!
Thanks Hannah! So simple to do, too!
[…] Here’s a project to celebrate longer days and brighter evenings as the clocks go forward. To make this minimal wall clock you’ll need copper enamel, chalkboard paint and a clock to paint. Set up your materials in a well-ventilated area. Clean the surface of what you’re painting before use. Sweep the can from side to side. Rotate the item you’re painting as you go to cover it evenly. Spray once for each sweep, not continuously. Shake the paint a couple times between sprays. It’s important to paint in a room that’s clean of dust and particles in the air, too, or dirt might settle onto the paint as it dries. Continue reading the tutorial here. […]
[…] | Minimal Wall Clock from Crafting Fingers 4 | DIY Statue Lamp from Claire Brody […]
[…] this minimal wall clock to remember you each time he spares a look to make sure he is well in time. Here‘s how you can craft […]