DIY Woodland Notepad Cover
In collaboration with Fiskars
Organising stationery is a guilty pleasure of mine.
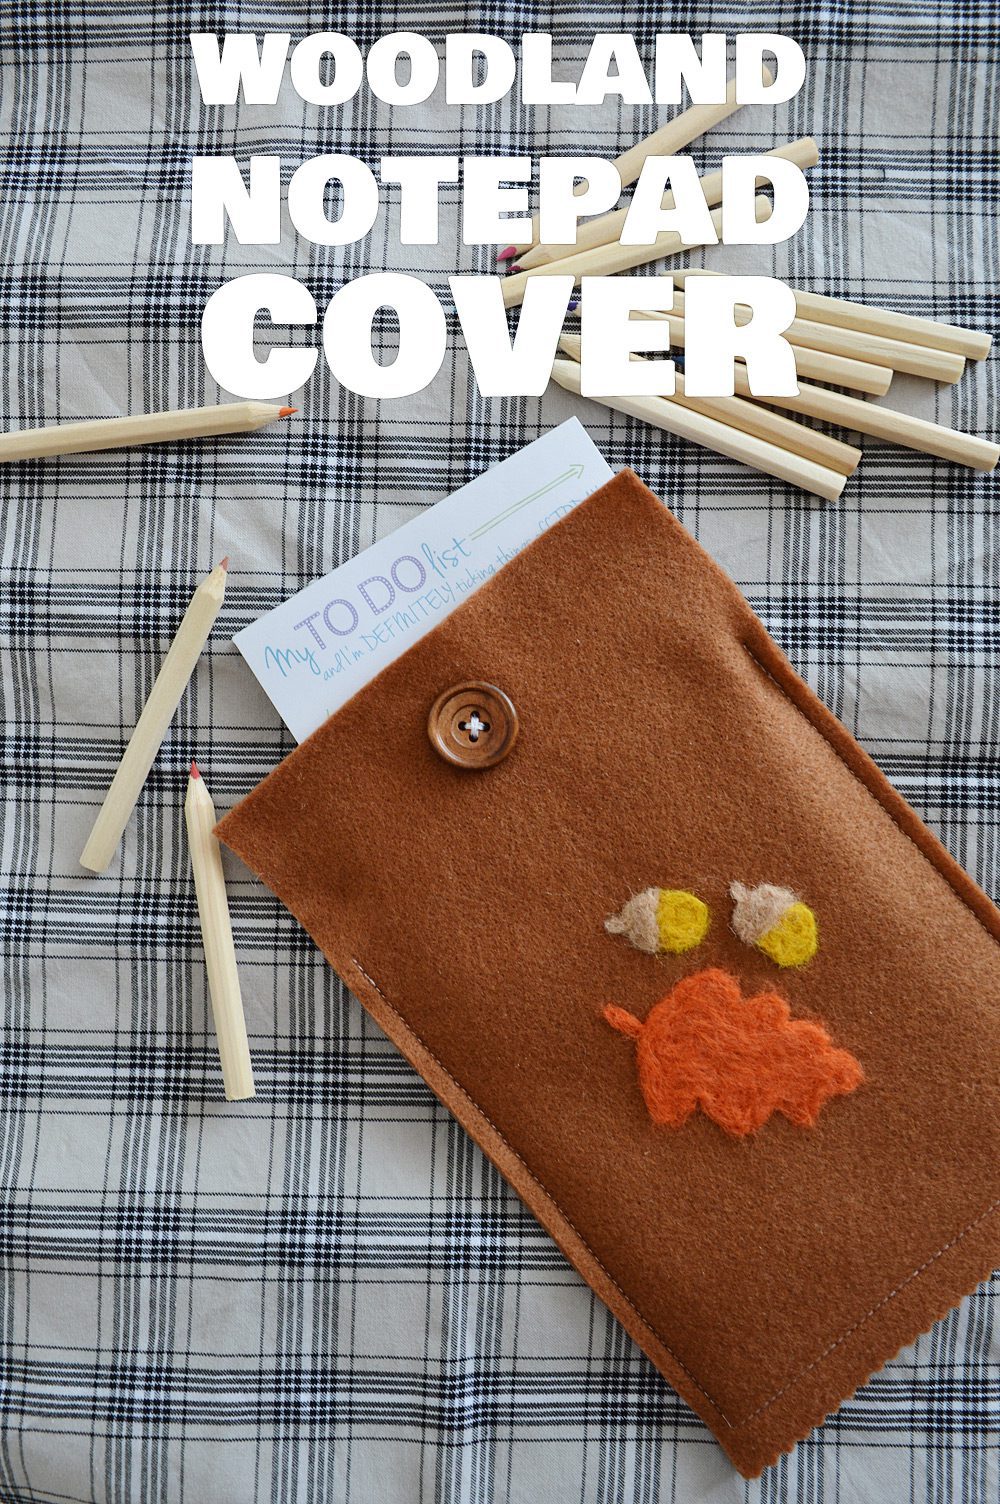
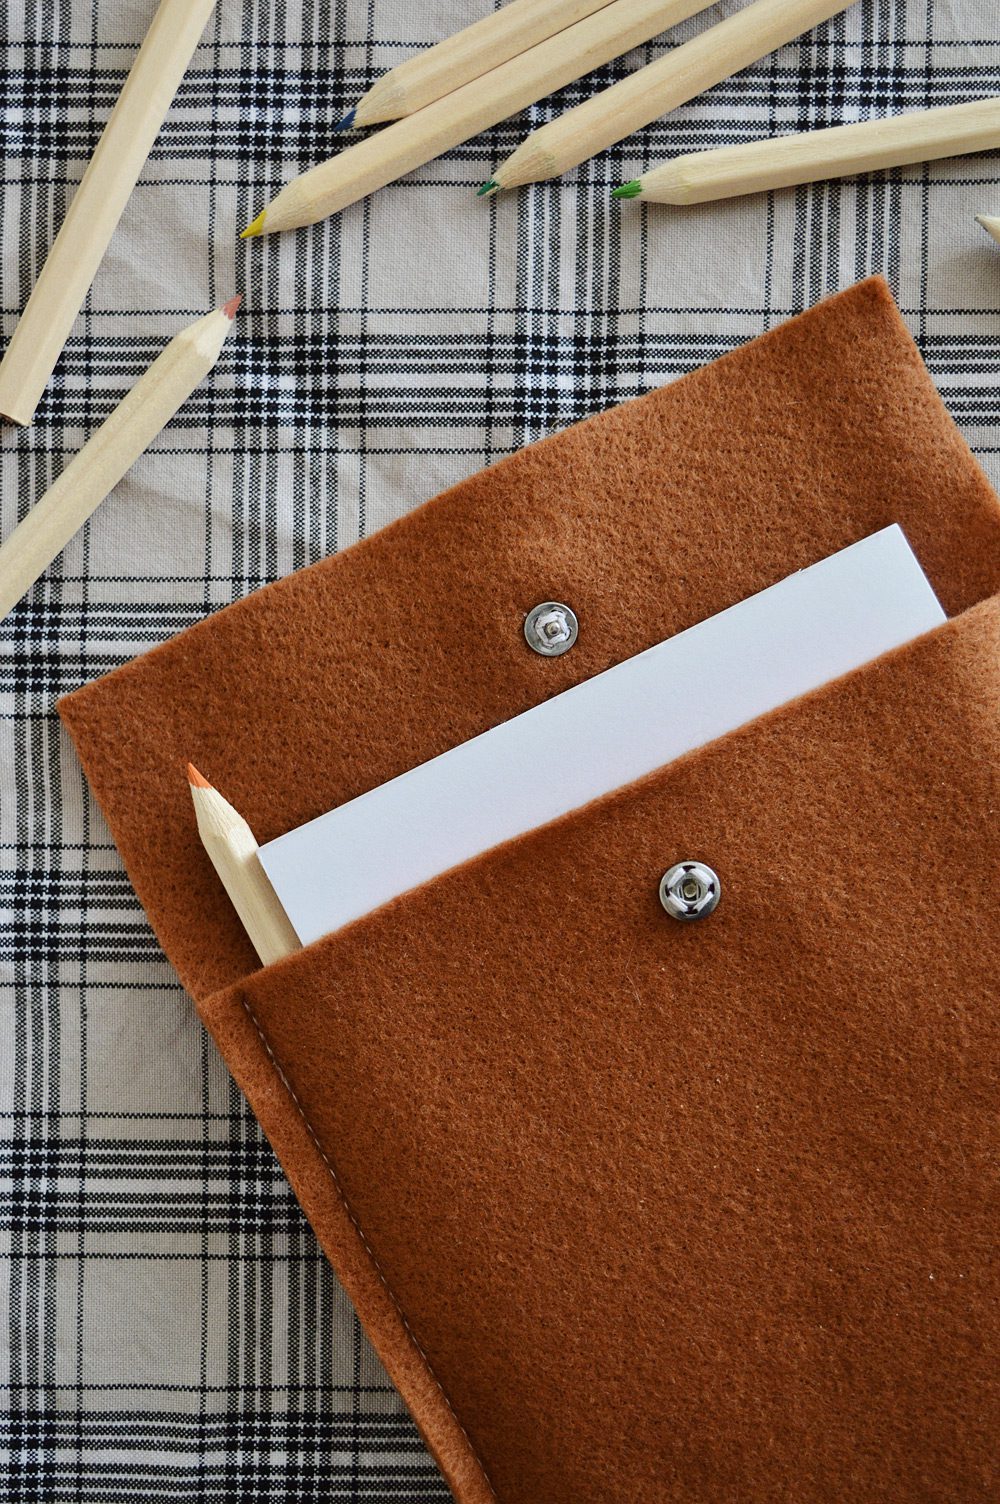
I use a lot of A6 notepads and notebooks. It’s the perfect size for a day’s to-do list or a project sketch. I even like lugging one around in my handbag, which isn’t very notepad friendly. A DIY cover was overdue. This felt sleeve was my solution to bring stationery on the go.
And, to be honest, it just looks nice on my desk too! This tutorial can be used to make a felt sleeve of any size. If you’re not as obsessed with notebooks as I am you can make a gadget cover.
Materials
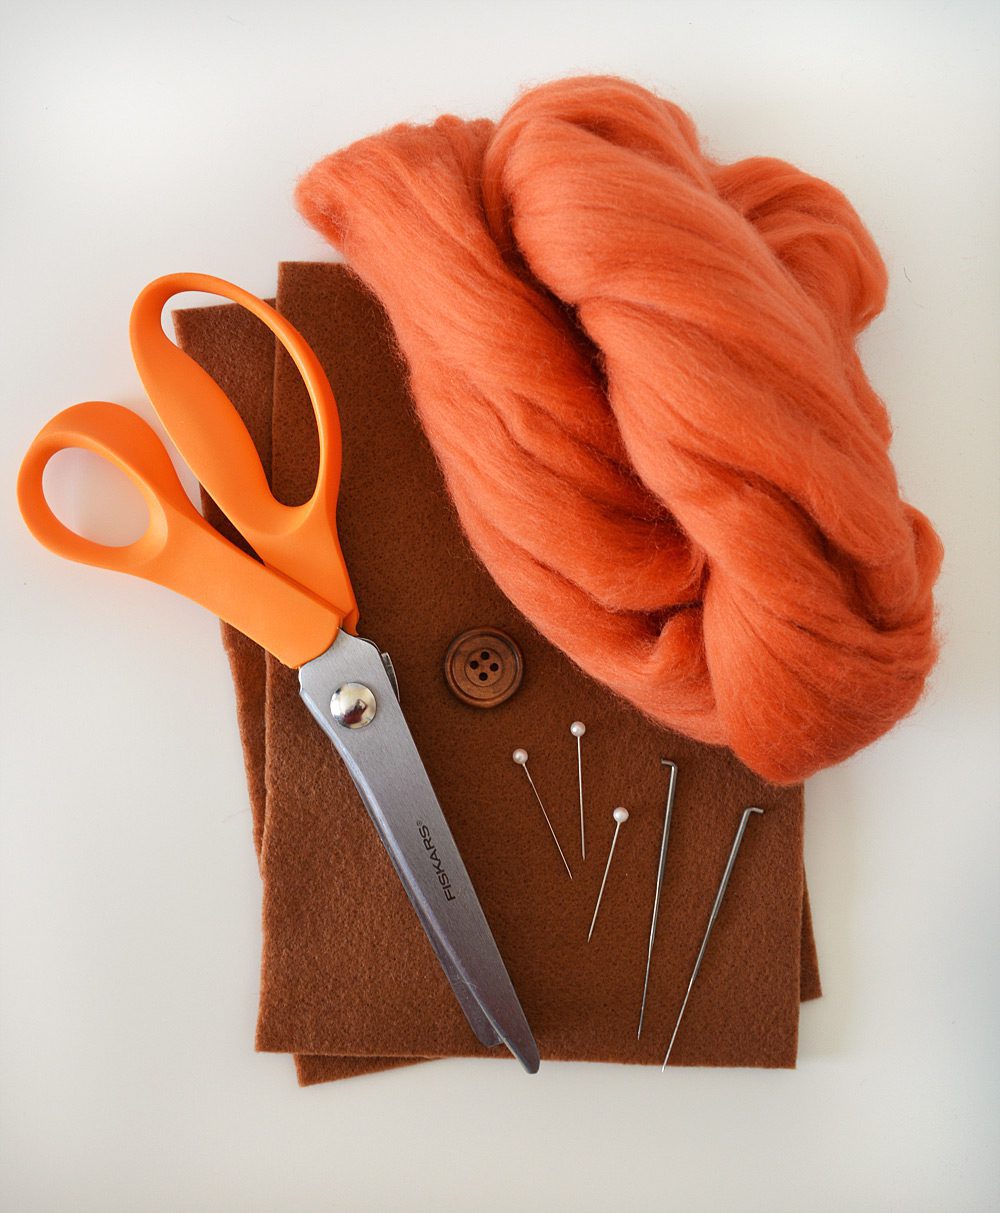
- A4 sheet of brown felt, cut into two A5
- Roving wool in autumnal tones (I’m using cinnamon, mustard, and coffee)
- Felting needles
- Sewing needle, pins, and thread
- Button (decorative, optional)
- Snap buttons (one pair), or magnetic clasp
- Cutting mat and rotary cutter
- Pinking scissors
- Optional: Sewing machine
- Optional: Paper and pencil
Putting it all together
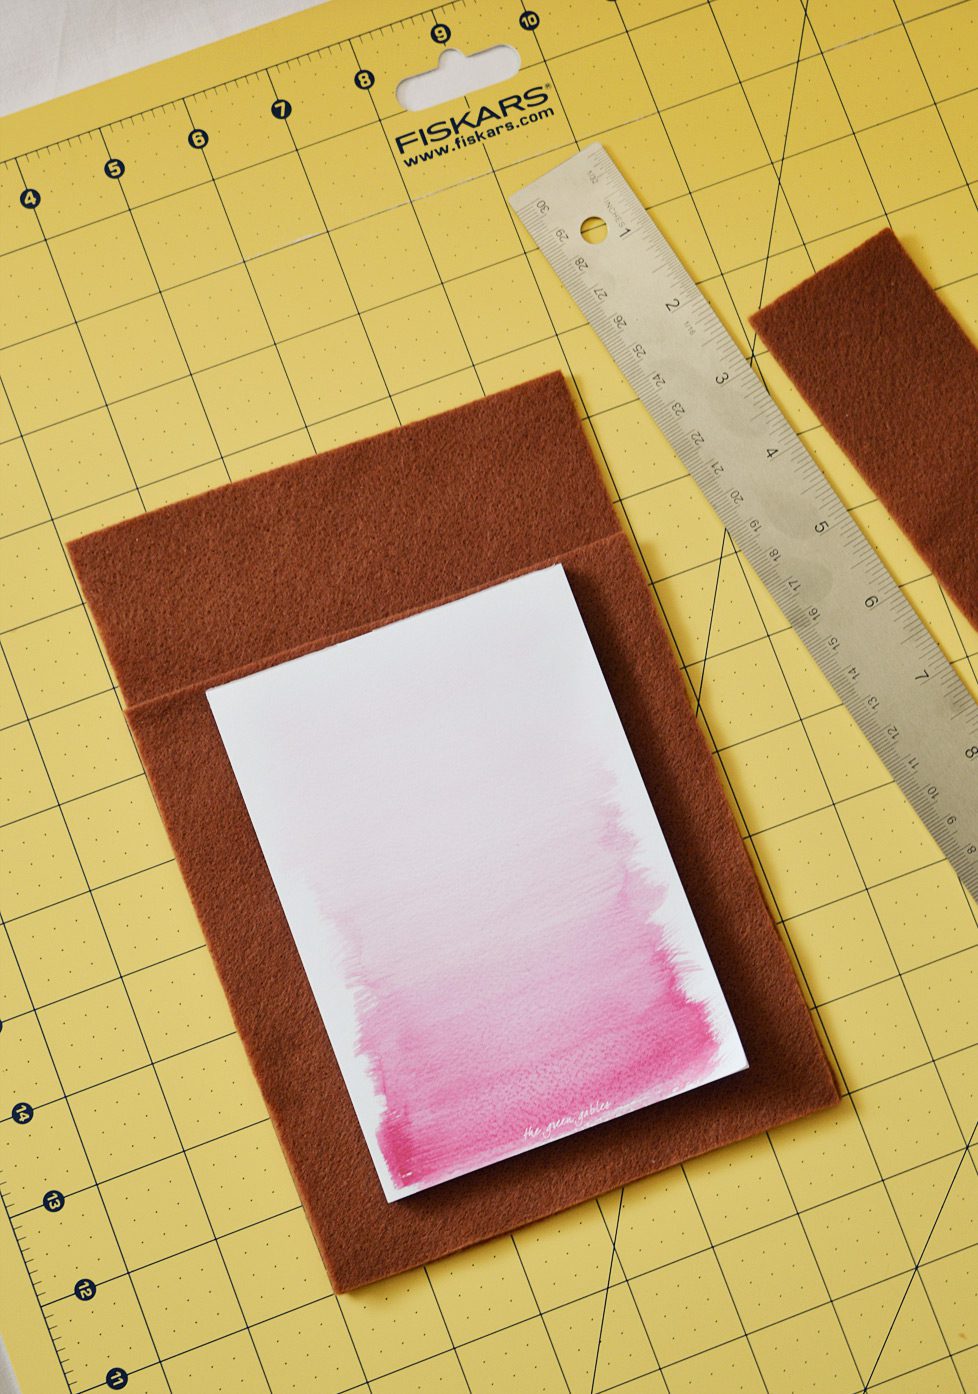
If you’re starting with an A4 felt sheet, cut in half to make two A5 sheets. I’m making a cover for an A6 notepad, so I trimmed 2″ off the top of one sheet. Use whatever you’re making the sleeve for as reference. Don’t forget to account for the thickness of your items when counting seam allowance.
Felt will fuzz up if you use dull scissors. A proper cutting mat and rotary cutter cuts a clean edge.
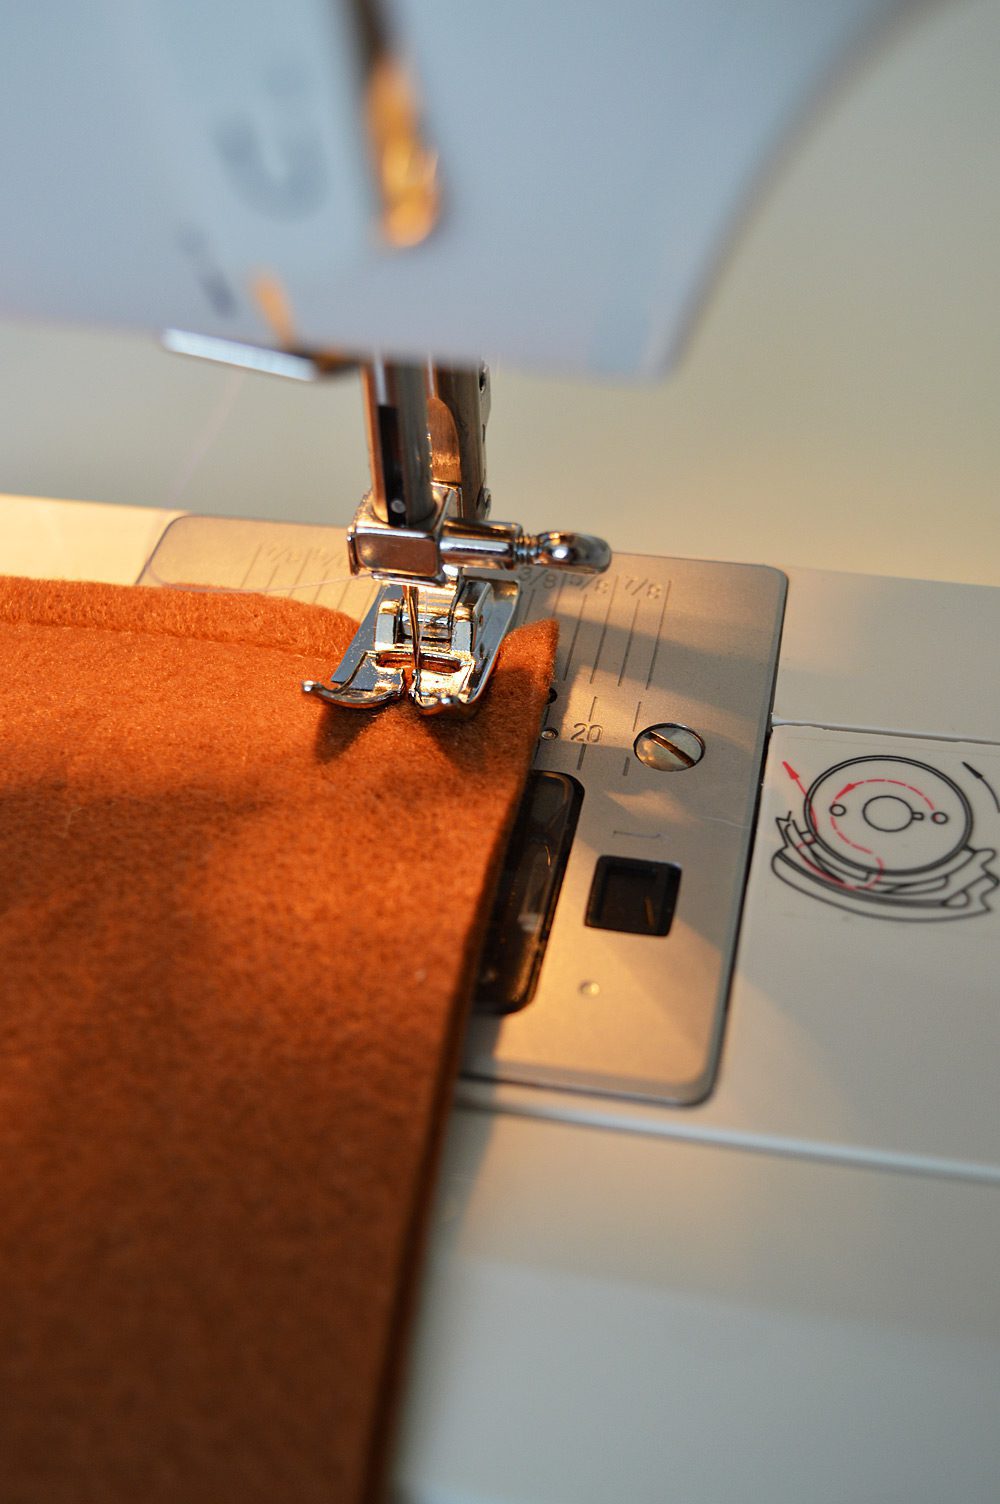
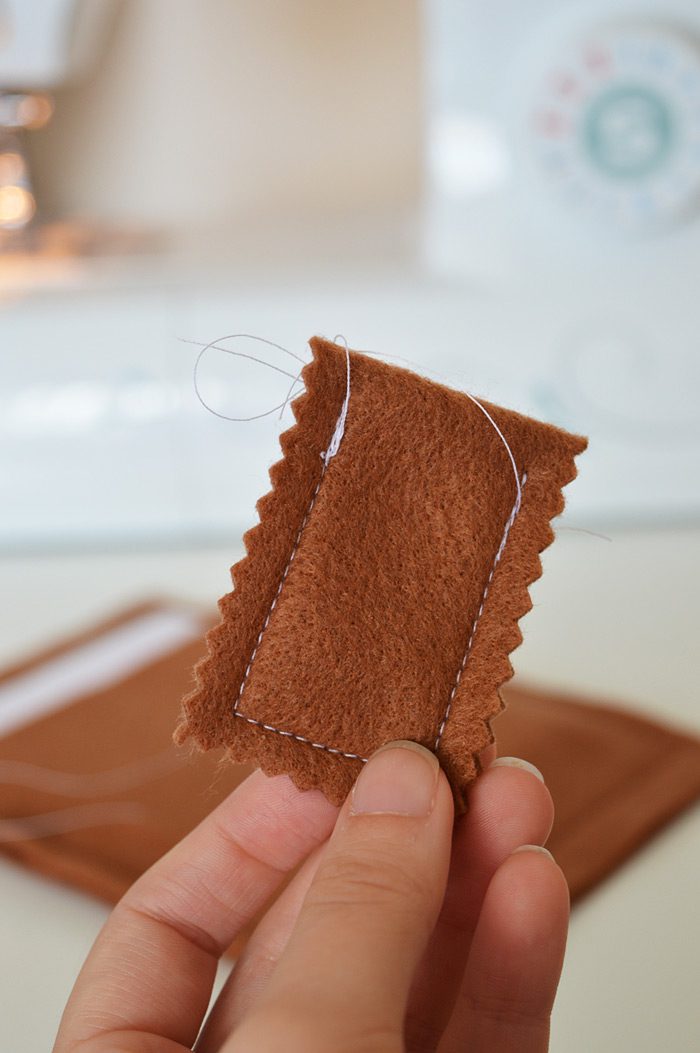
Pin the two brown sheets together and sew the edges. The seam will show, so be sure to test the stitch length of your sewing machine until it looks pretty.
The excess edges will be trimmed later so you don’t have to worry too much about sewing evenly. Pivot around the needle on each corner for a one-seam project.
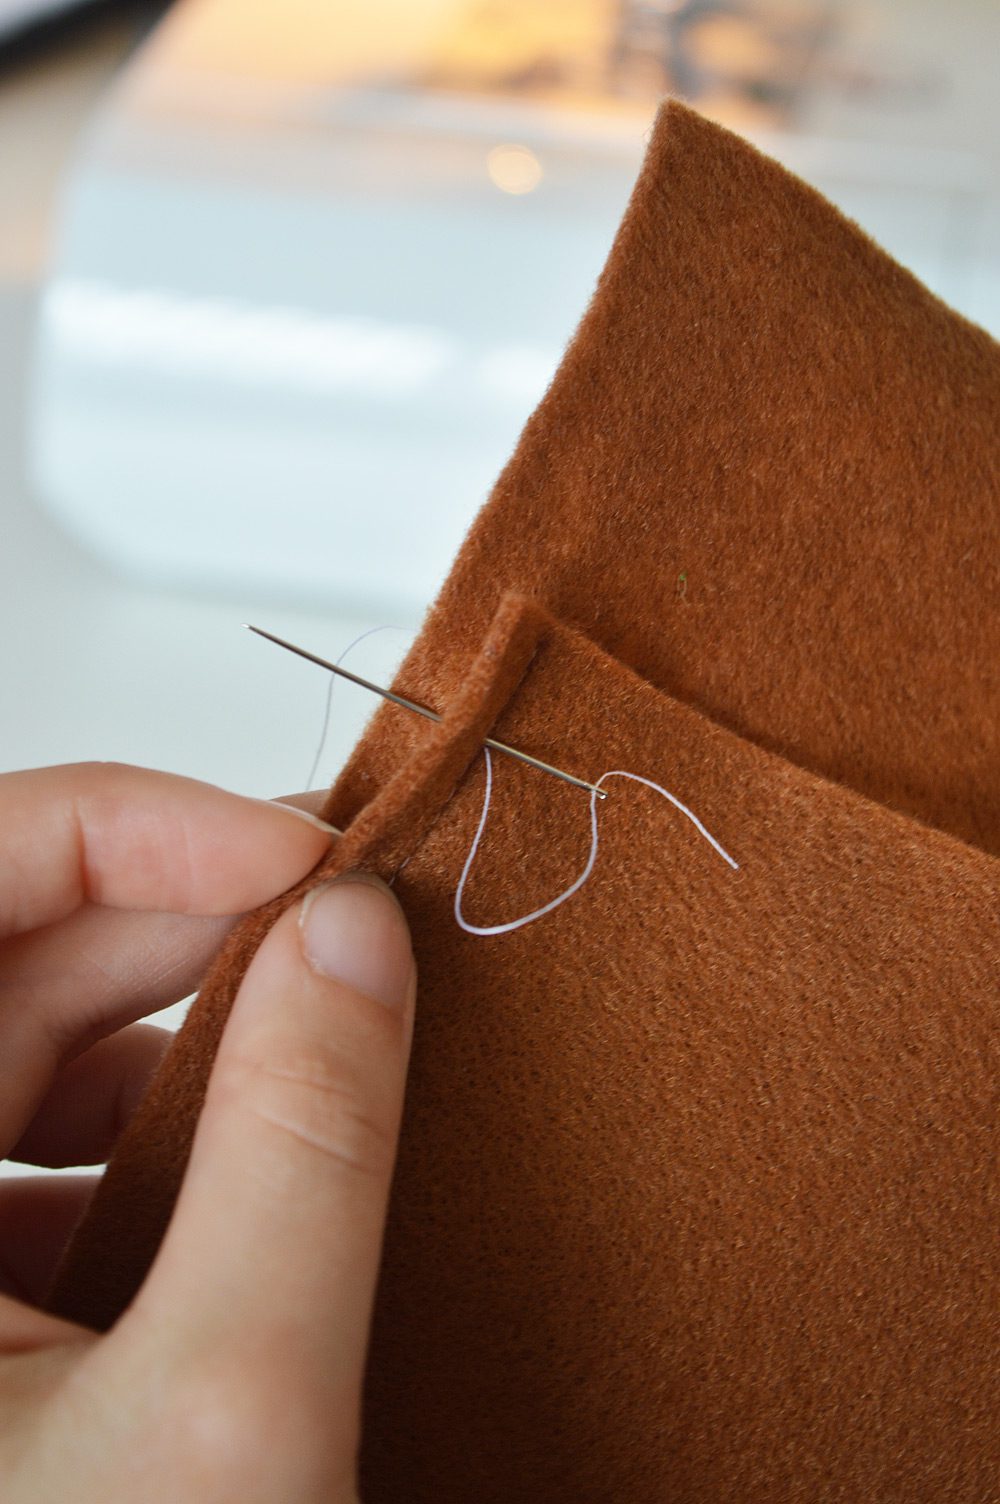
To finish the thread I pulled them through into the seam allowance, tied each pair into a knot, and cut off the excess thread.
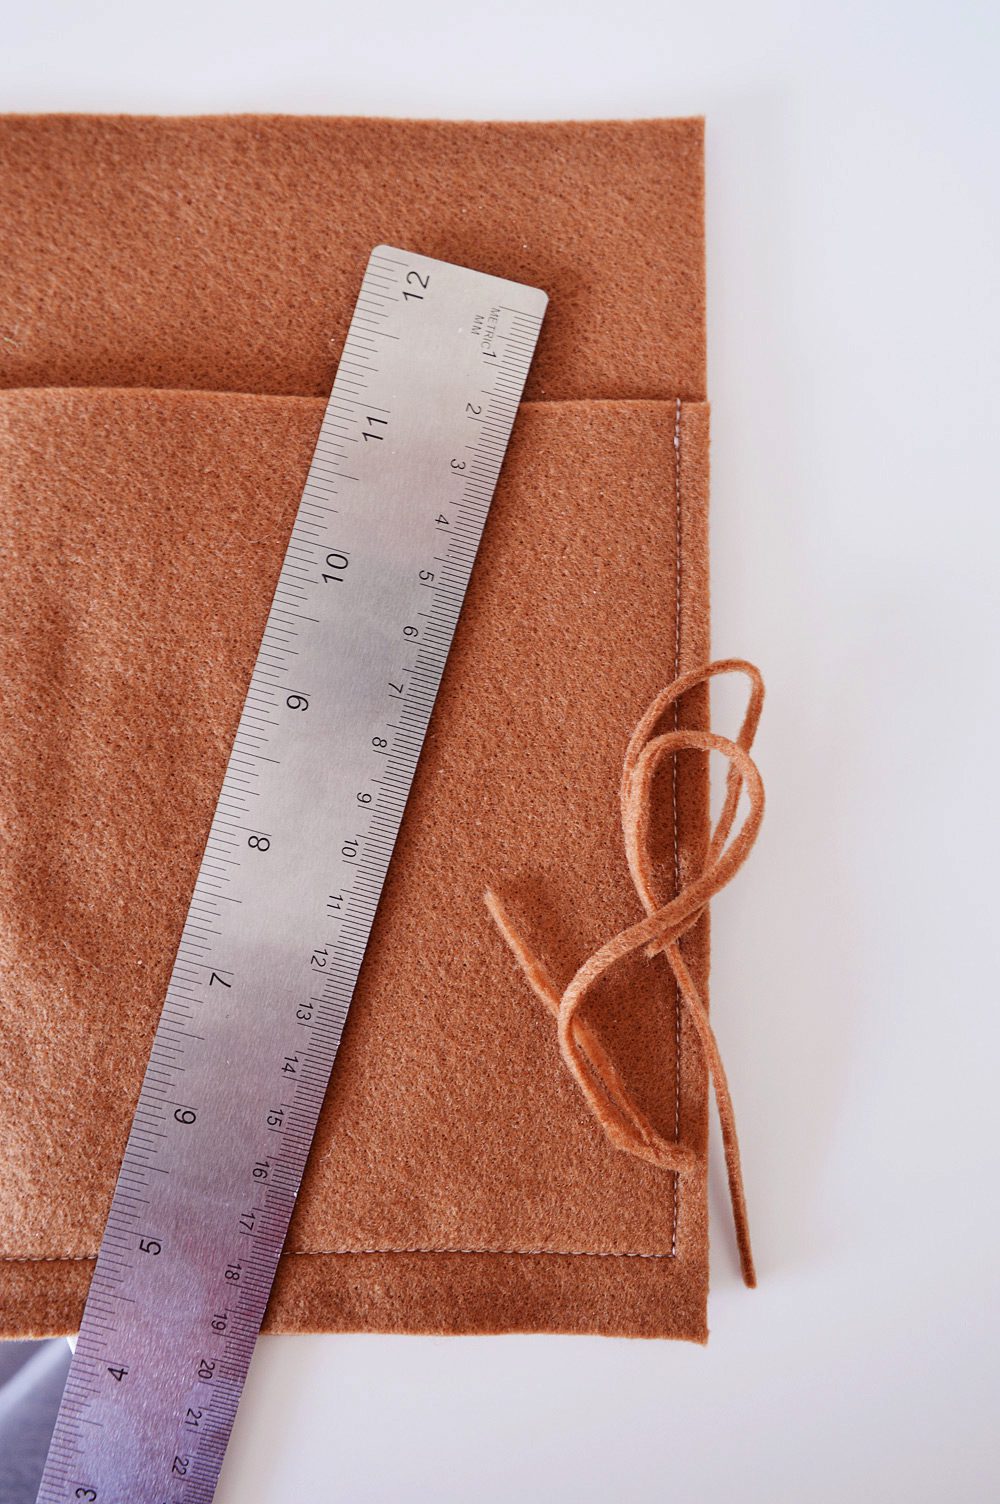
Trim the sides with a rotary cutter for a crisp edge. For the bottom, I used my Fiskars pinking scissors to add some texture.
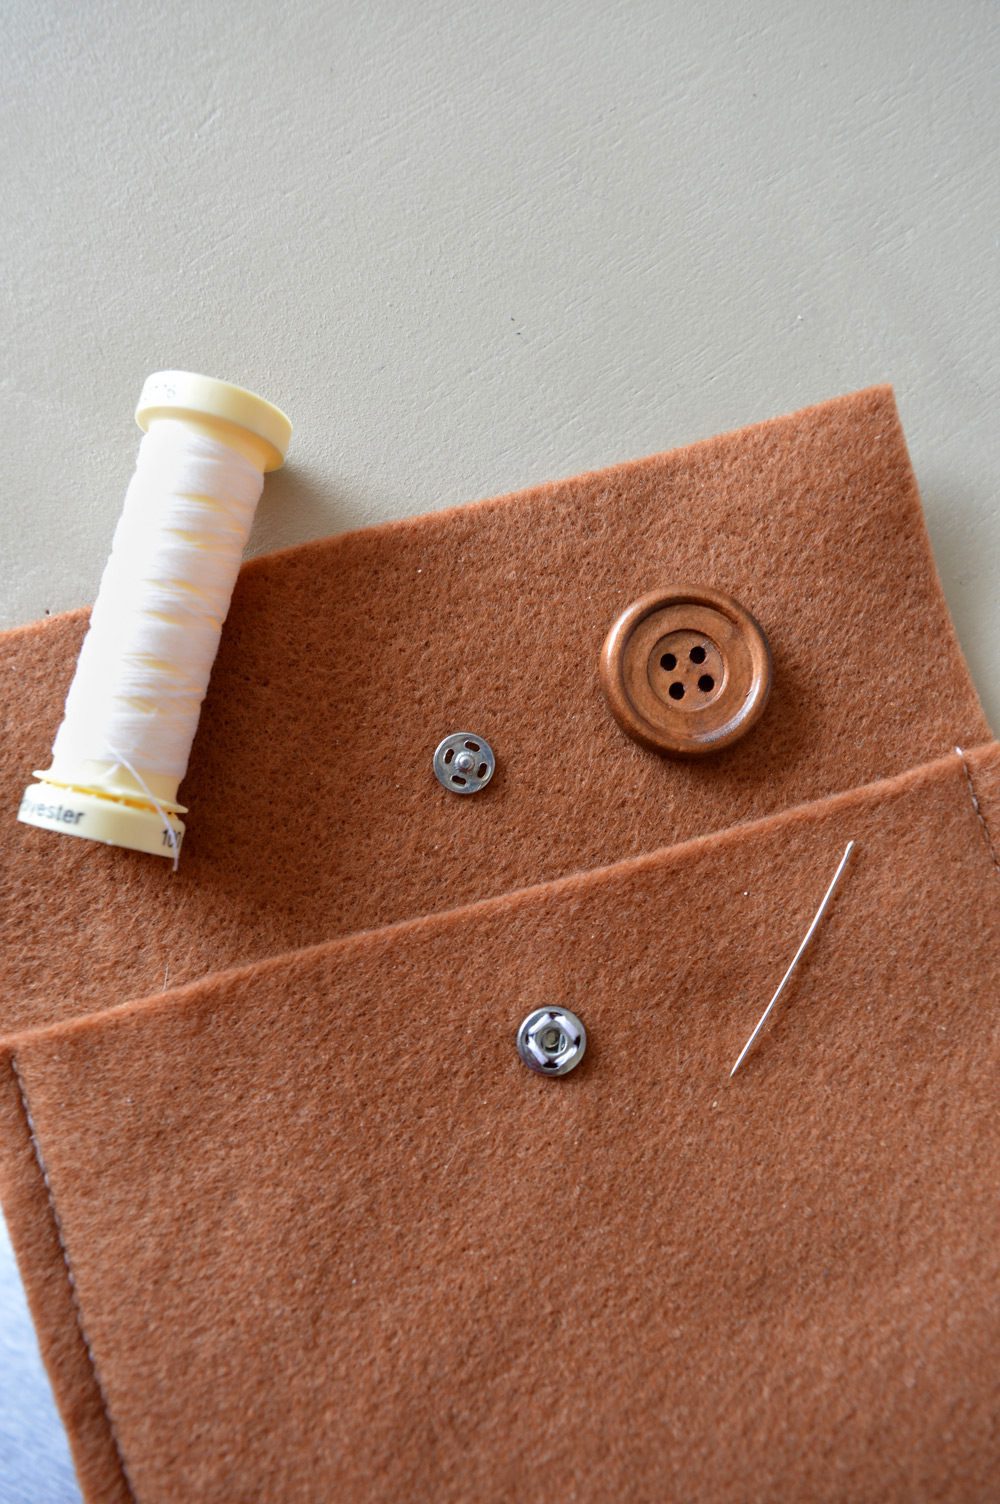
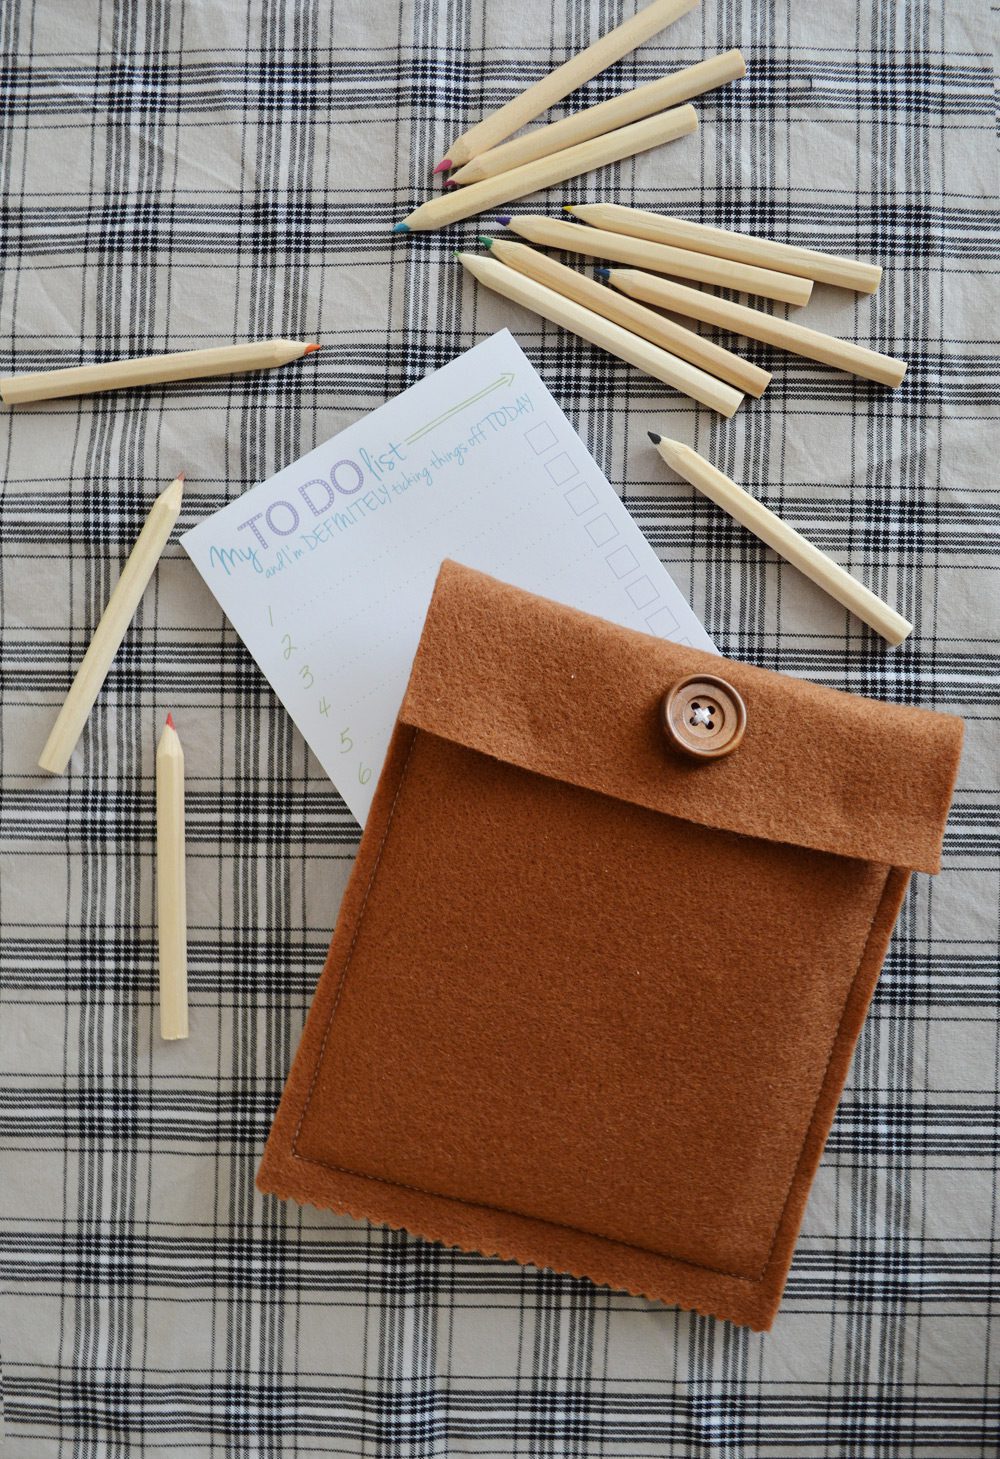
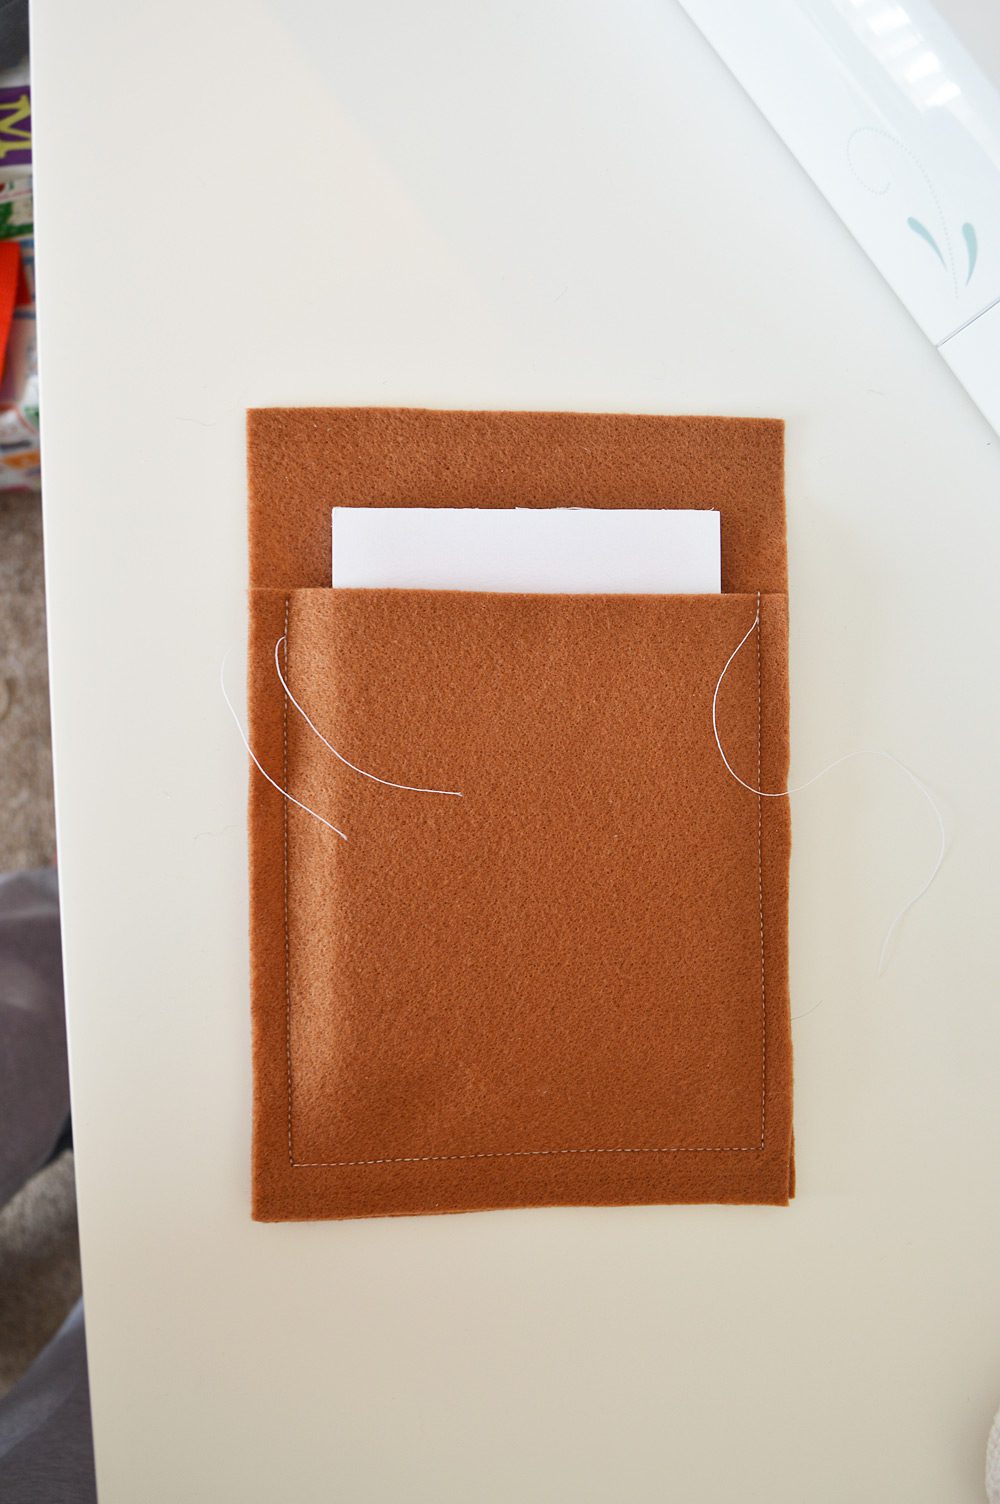
Sew the snap button into place. I sewed the top snap and decorative button at the same time for an easier, sturdier finish. Before sewing it’s a good idea to check that your button holes will match up (roughly) with the snap button.
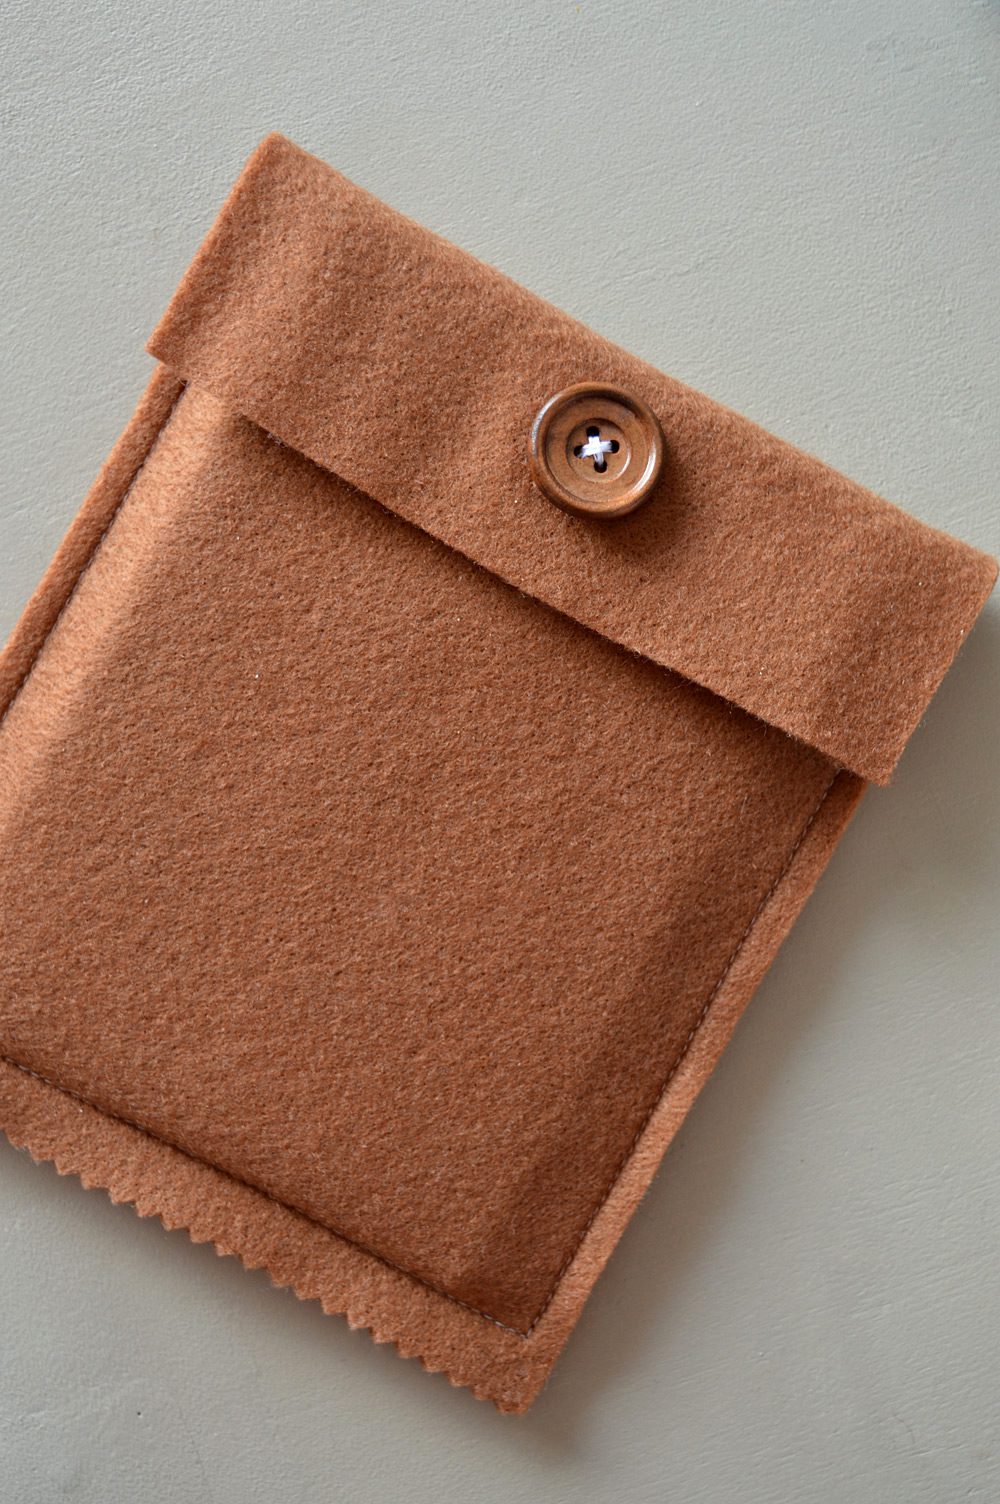
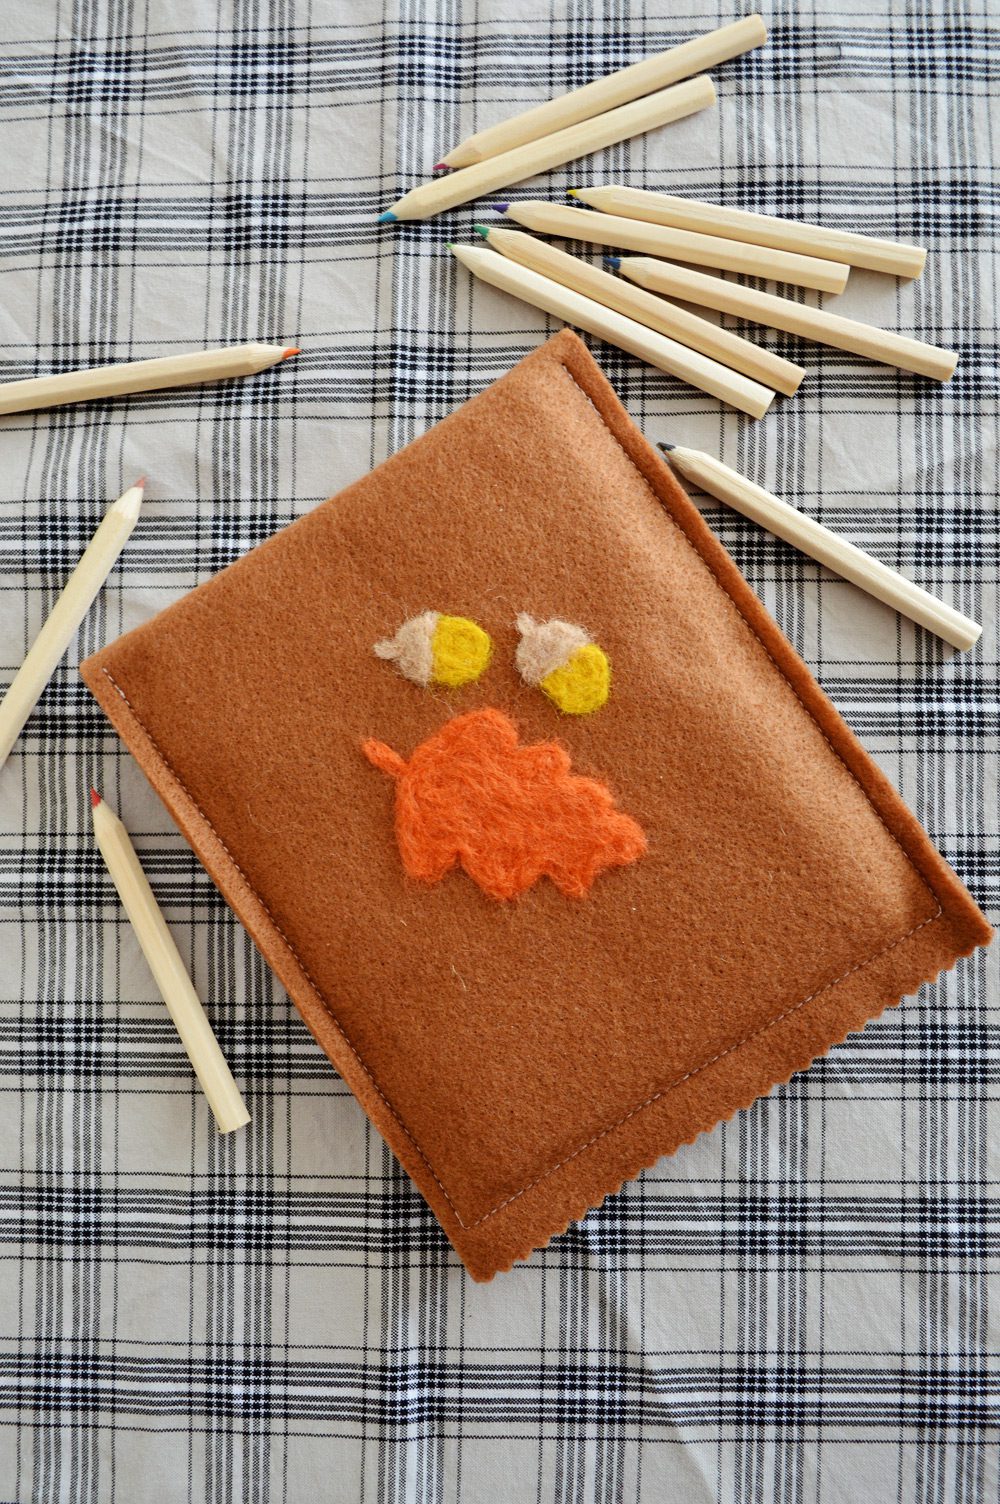
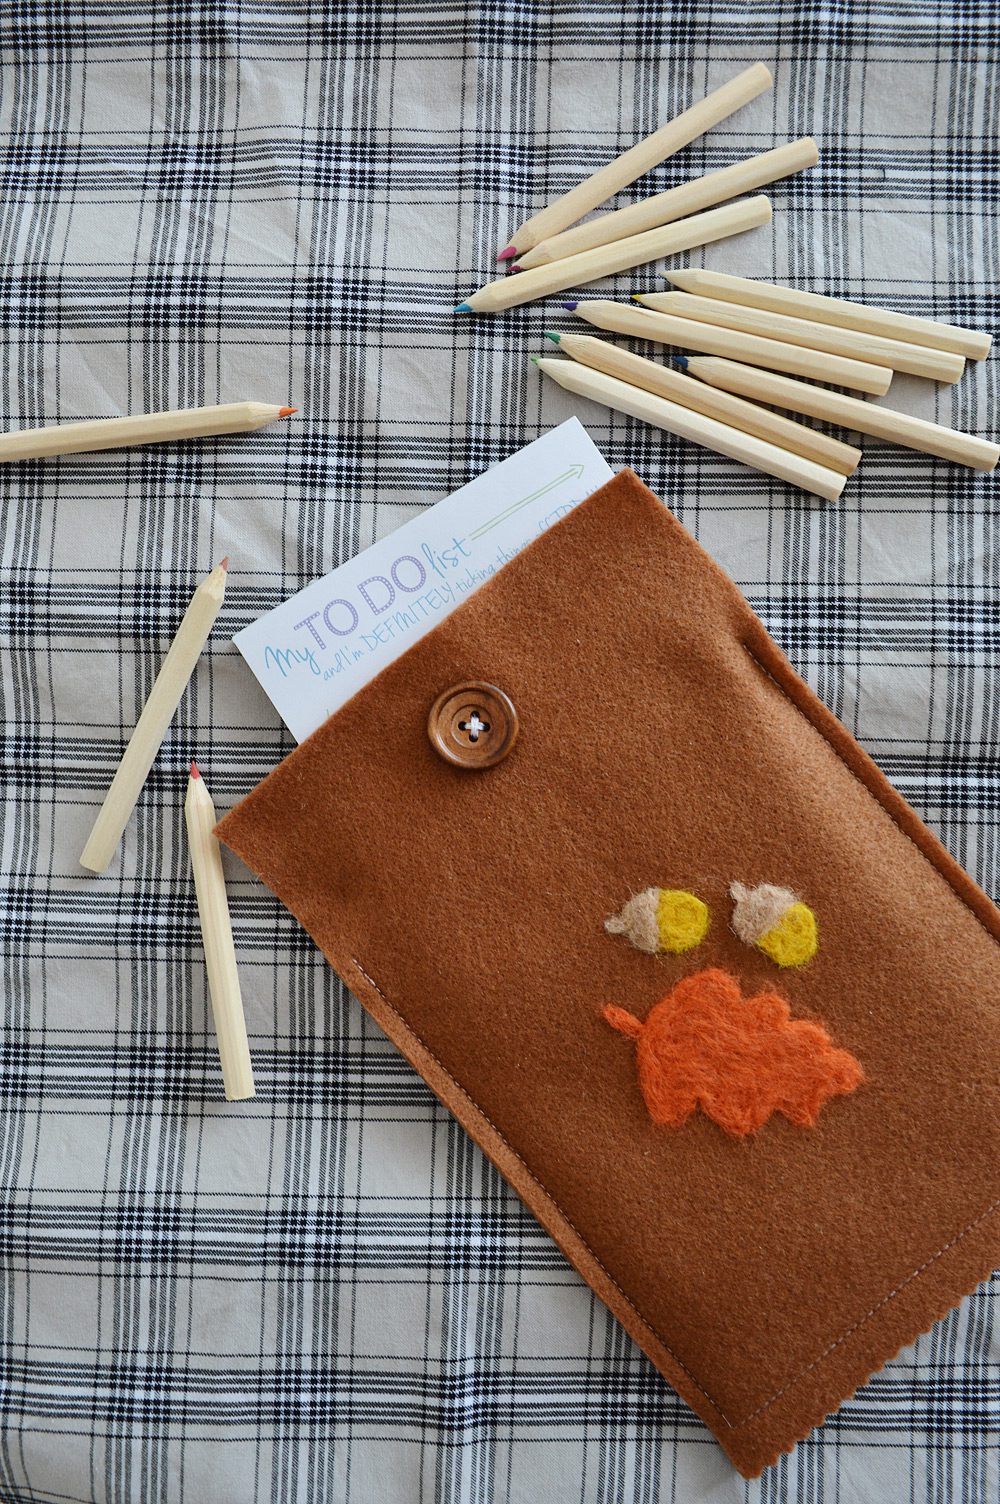
The felt sleeve is done! Now, it’s time to personalise it with some needle felting.
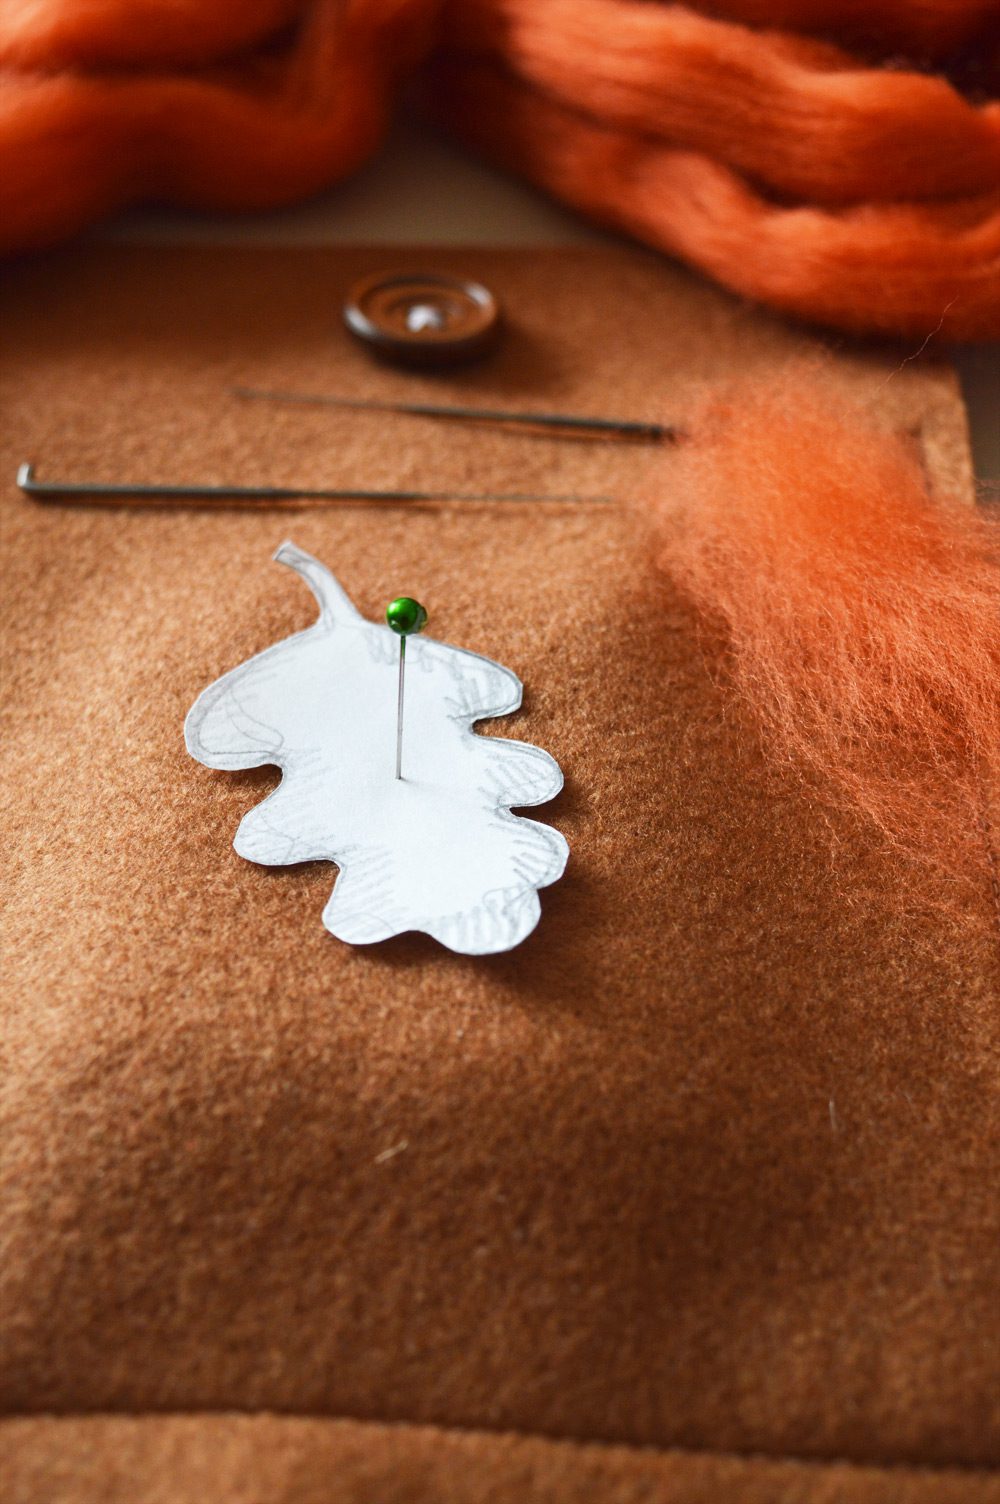
To prepare, I placed four layers of extra felt into the sleeve where I wanted to needle felt. It’s the bump you can see in the photo above. This was to make sure I wouldn’t accidentally felt the layers together and seal the pocket!
I sketched an oak leaf and cut out from plain paper. Find the centre of the area you want to needle felt—I’m decorating the back of the sleeve—and place the template as you like.
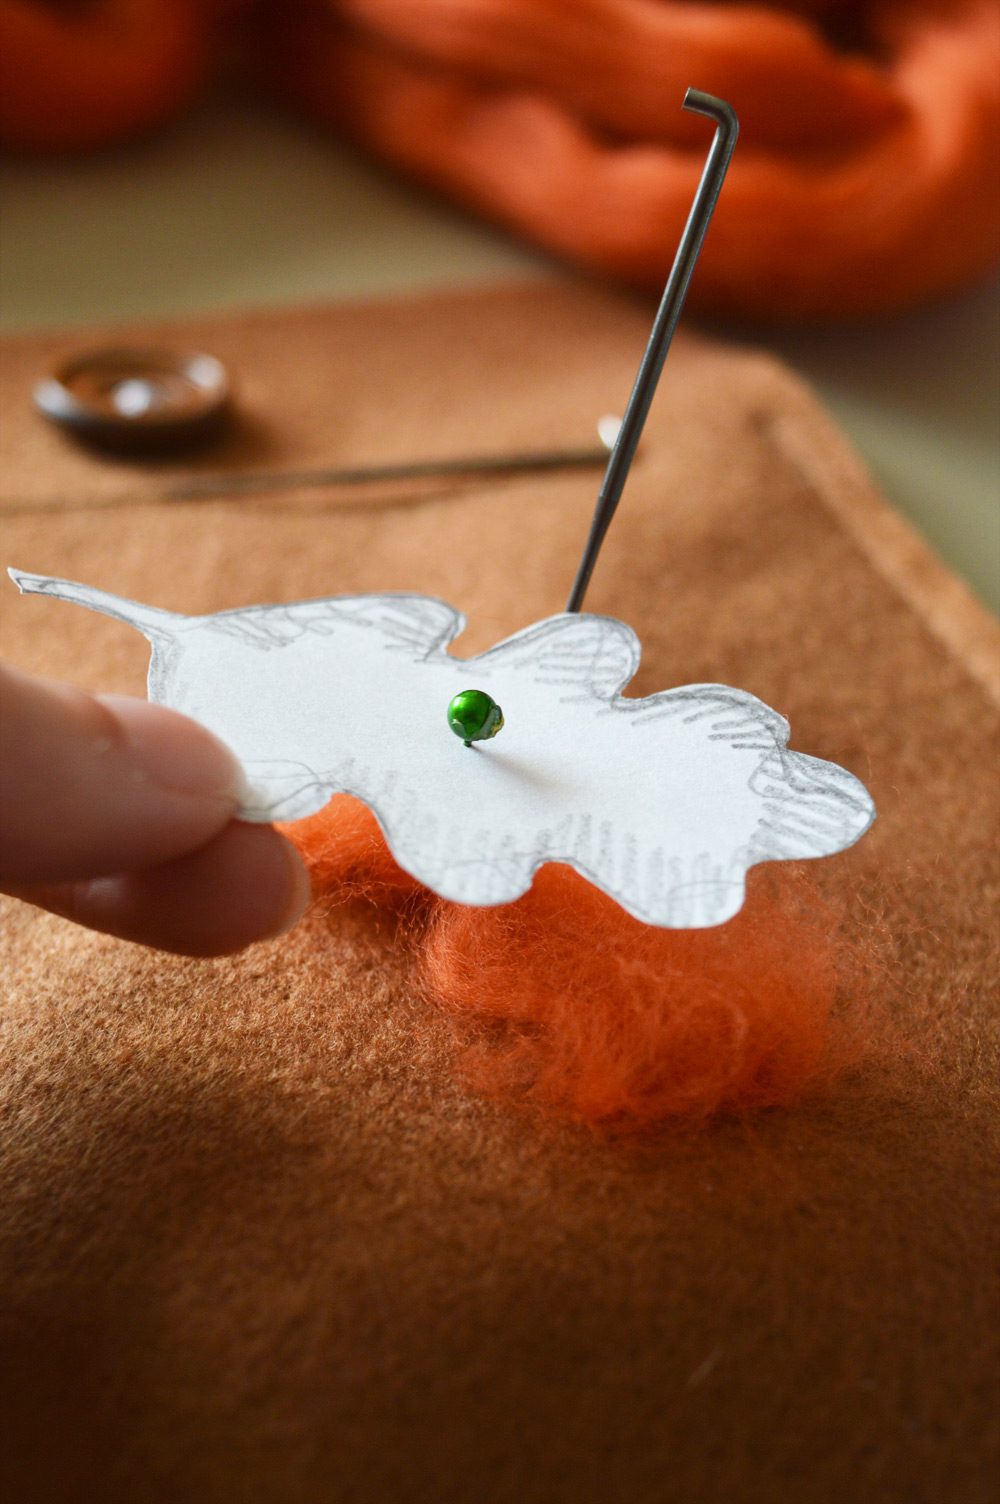
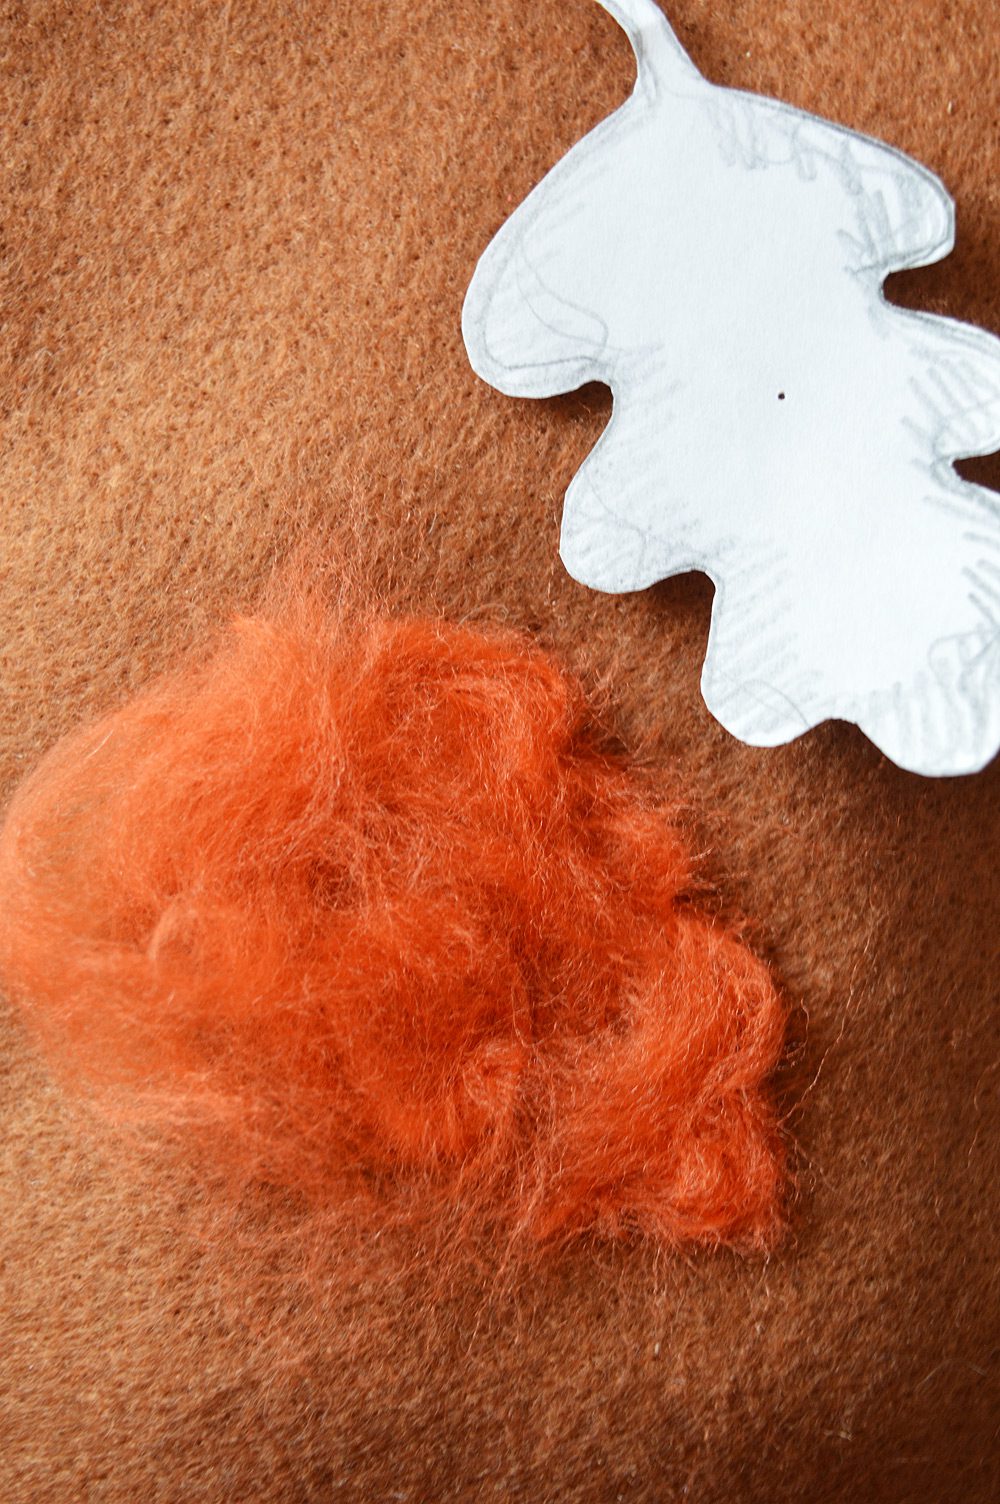
A paper template gives you a rough guide as you’re felting. I like to hold the template over the work and felt along the outline to define the shape. Then I fill in the outline and finish up the edge as I work. If you want more tips, check out my guide to a pretty needle felt finish.
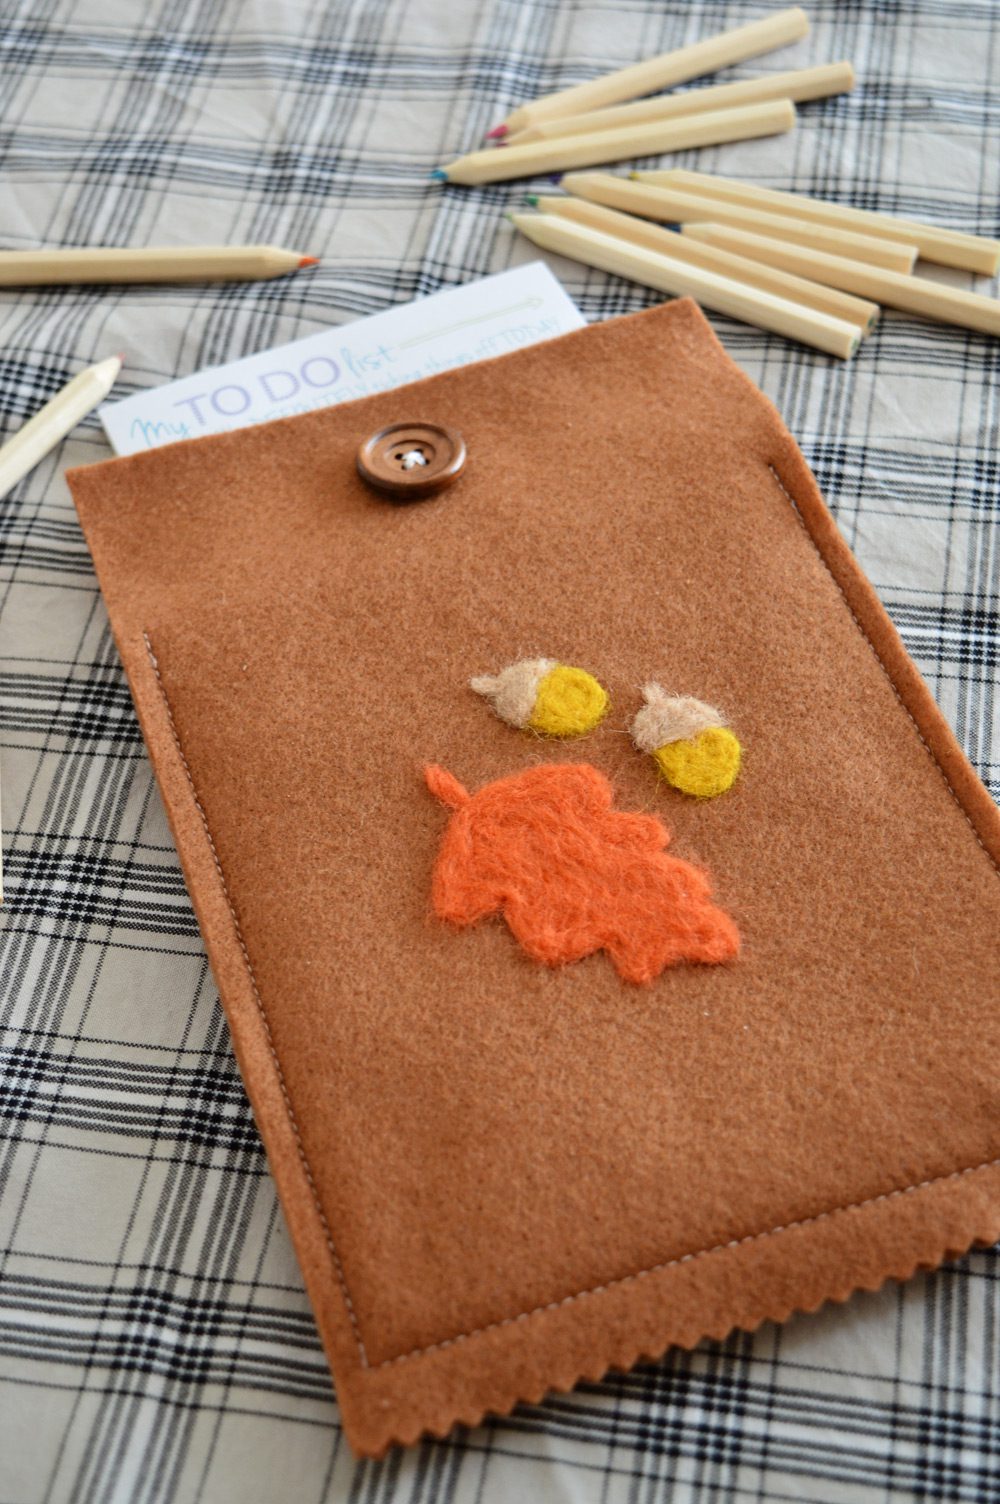
Finally, I added a couple of freehand acorns. First I felted two rough circles with the mustard roving. The last step was adding the coffee-coloured caps. Remove the felt from the pocket and the notepad cover is ready to use!
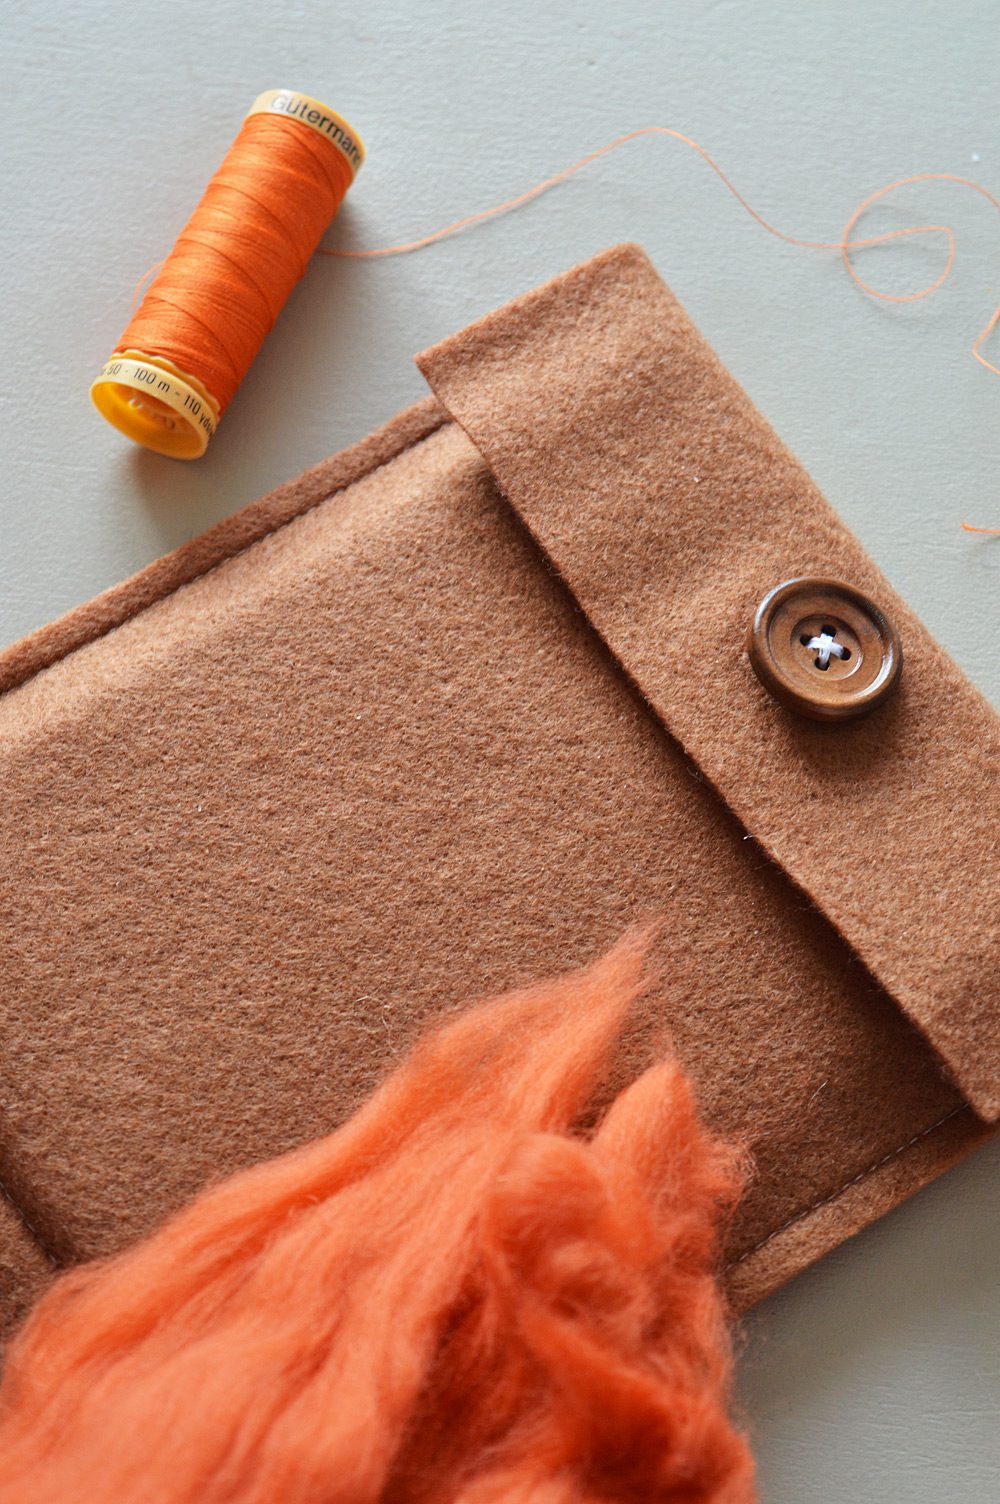
After finishing the project I realised I had a lovely orange thread that would have suited the cinnamon roving colour perfectly. Whoops! There’s always next time.
I love the quick, tactile feel of using a notepad to jot down ideas. This notepad cover means I can use my notepad on the go without worrying about damaging the front. AND it’s autumnal to boot.
Sewing a felt sleeve is the same no matter the size. I think there’s a few gadgets around this house that need a prettier cover…
What have you been making lately?
Lots of crafty love,
![]()
P.S. If you like to design your own DIYs, save time by testing all the elements of the project on some scrap material. I practised my sewing machine settings and lining up the pinking cuts on scrap felt.
Disclosure: Fiskars sent me their A2 cutting board and pinking scissors to use on the blog. Opinions are, as always, my own.


Lovely Anna, I’ve been needle felting acorns today too!
Thanks Abi! Autumn themes and felt go hand in hand. Hope your project is going well x
[…] love anything made of felt, and that’s why one of my favorites this month was this DIY Woodland Notepad Cover from Crafting […]